Error Code Olive in Destiny 2: How To Get Rid of It Easily
If you're struggling with the 'Olive error code' in Destiny 2, our guide is the solution you need 🫒 🔥
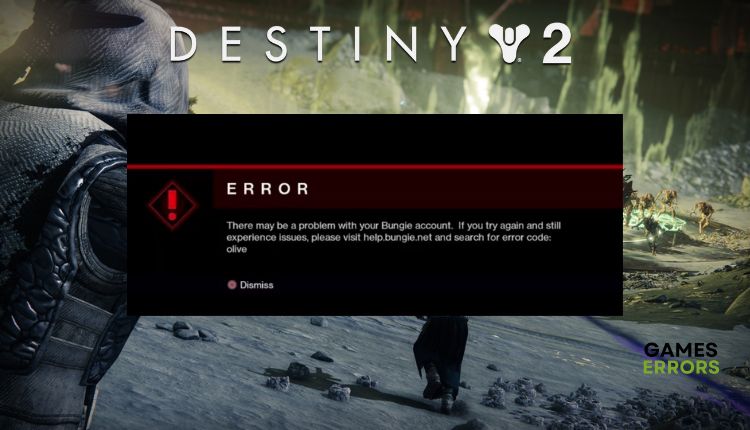
Destiny 2 can mostly be played as a single-player game, but the most fun missions and best moments will be with other players, often outside of the main campaign. An additional incentive for teaming up is a better loot drop system, as now all players mostly get valuable items.
Unfortunately, you may experience random game crashes in Destiny 2 with the Olive error code. You can usually get this error code after getting kicked out of an online game. This guide will provide you with the best solutions to what to do if you get the Olive error code in Destiny 2.
🫒 Why do I keep getting error code Olive in Destiny 2?
If you’re encountering the Olive error while playing Destiny 2, it’s likely caused by various reasons such as:
- Server maintenance
- Testing by developers
- Outdated drivers
- Connectivity issues with your Bungie account
- Leftover data in the Battle.net launcher
- Corrupted game files
- Problems caused by long periods of inactivity
💁 But, according to most players, the main reasons behind the Olive error in Destiny 2 are:
- Destiny 2 server issue
- Bungie account not connected
- Battle.net leftover data
- Glitch caused by a long idle period
This issue can be frustrating as it renders the game unplayable. The Bungie support page doesn’t provide much assistance, simply suggesting exiting the game and attempting to restart it. But we have some good solutions that are easy to follow and apply.
How do I get rid of the error code Olive in Destiny 2?
To fix the error code Olive in Destiny 2, first, do these more uncomplicated steps:
- Check the Bungie server status first. If the servers are down, have a technical problem, or are scheduled for maintenance, you must wait until the servers are up and running.
- Connect with a Bungie account (Restart Destiny 2 and follow the prompts to create a Bungie account. Once the account is created, validate it and join an online game.)
- Don’t idle for over half an hour in the game’s lobby.
- Relaunch the game or restart your PC.
👉 Now, if the problem persists, do the following:
- Update system drivers
- Verify the integrity of the game files
- Change the DNS server
- Reinstall Destiny 2
1. Update system drivers
Time needed: 5 minutes
We recommend updating your system drivers to resolve the error code Olive in Destiny 2. Outdated drivers can lead to the game crashing, freezing, lagging, or failing to launch. Do the following for updating the GPU driver, for example;
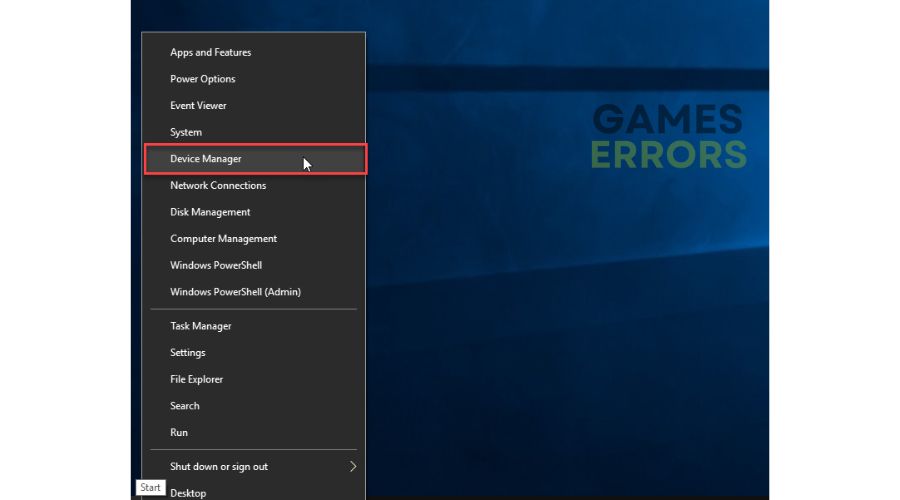
- Open device Manager
Right-click on the Windows Start Menu and choose Device Manager.
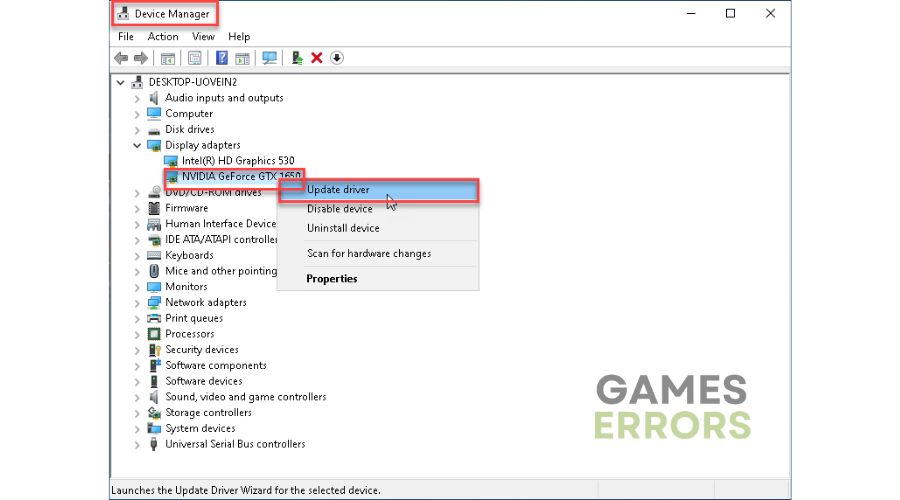
- Select Update driver
Double-click to expand Display adapters. Right-click on your GPU and click Update driver
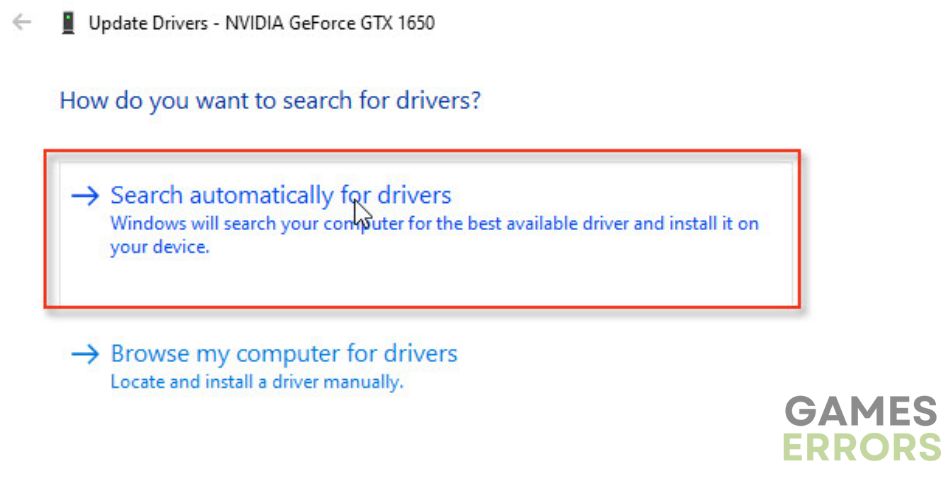
- Search automatically for drivers
Windows will check for an available update; if there is a new version, it will download and install it.
If you’re seeking a simpler way to update your system drivers, we suggest trying PC HelpSoft. This highly efficient tool can effortlessly locate and install all the genuine drivers for your hardware, saving you precious time that would have been wasted on manual updates.
2. Verify the integrity of the game files
One or more game files may be corrupt or missing, affecting the stable operation and possibly leading to the error code Olive. We recommend that you check the integrity of the game files as follows:
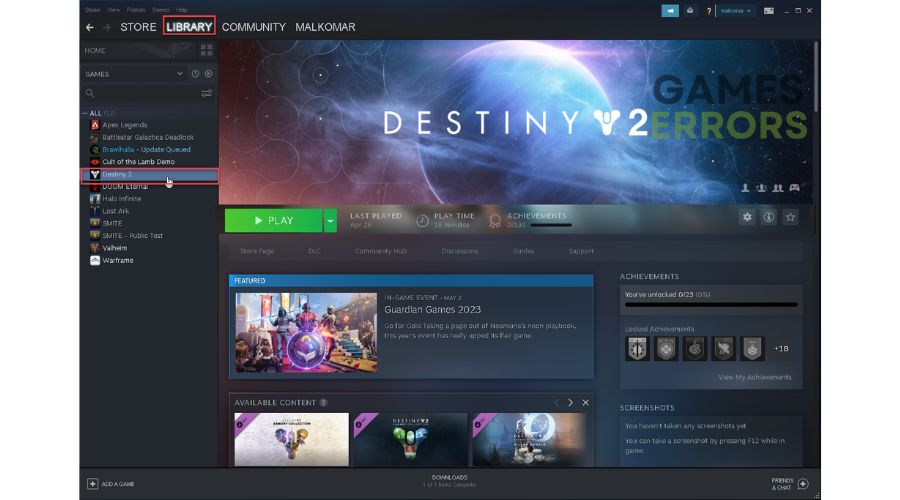
1. Launch Steam and go to your games library.
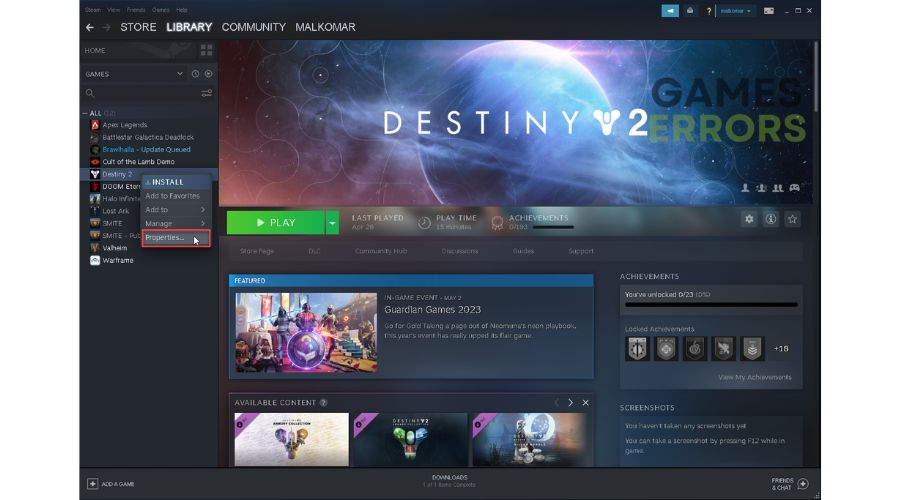
2. Right-click on the Destiny 2 game and select Properties.
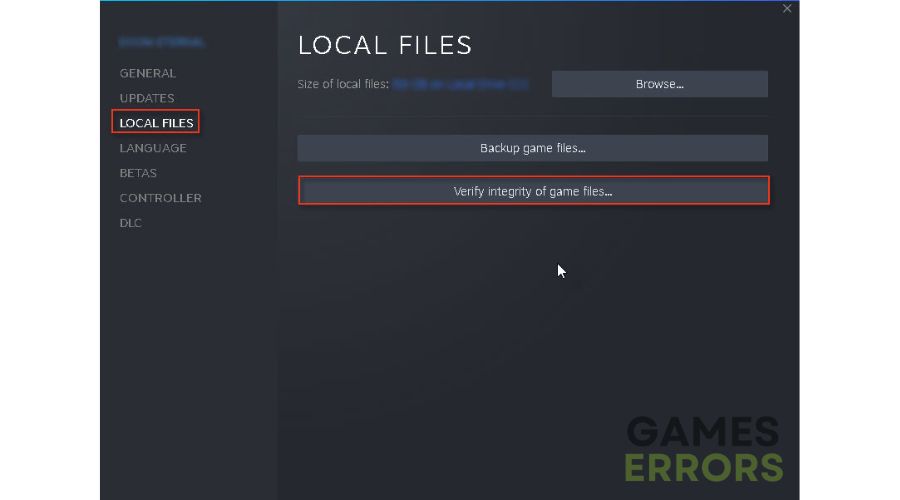
3. Go to the LOCAL FILES tab and click on Verify the Integrity of Game Files.
4. After finishing, restart your PC for the changes to take effect.
3. Change the DNS server
Sometimes, your DNS servers are not working correctly, so there is a possibility that you will get an error code “Olive.” We advise you to use one of the free and secure DNS servers, such as Google DNS. Do the following:
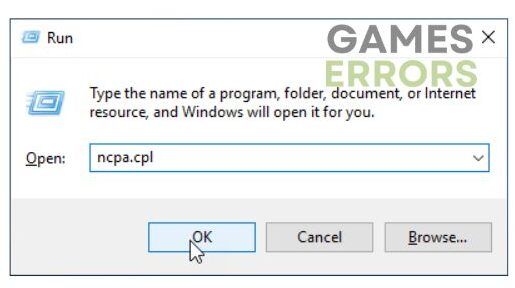
1. Press Win+R on the keyboard to show the Run dialog.
2. Type: “ncpa.cpl” in the box and press Enter to open Network Connections.
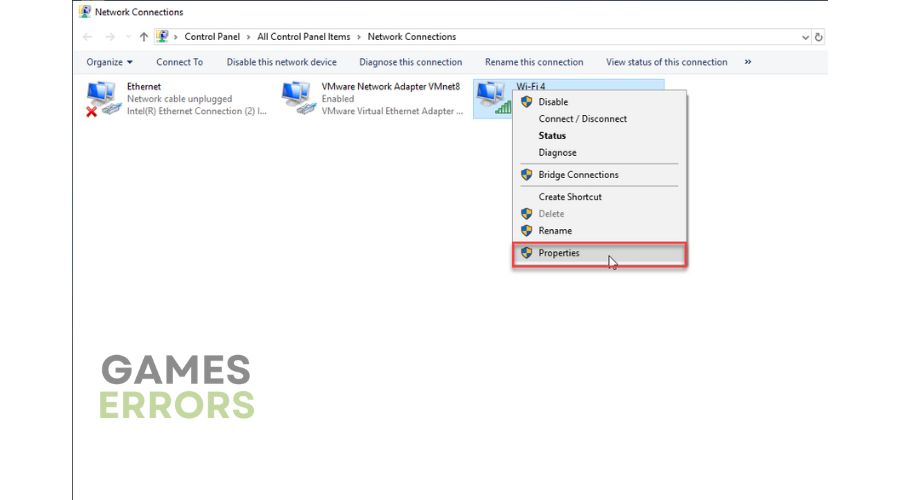
3. Select the network adapter you are connecting to your local network, right-click, and select Properties.
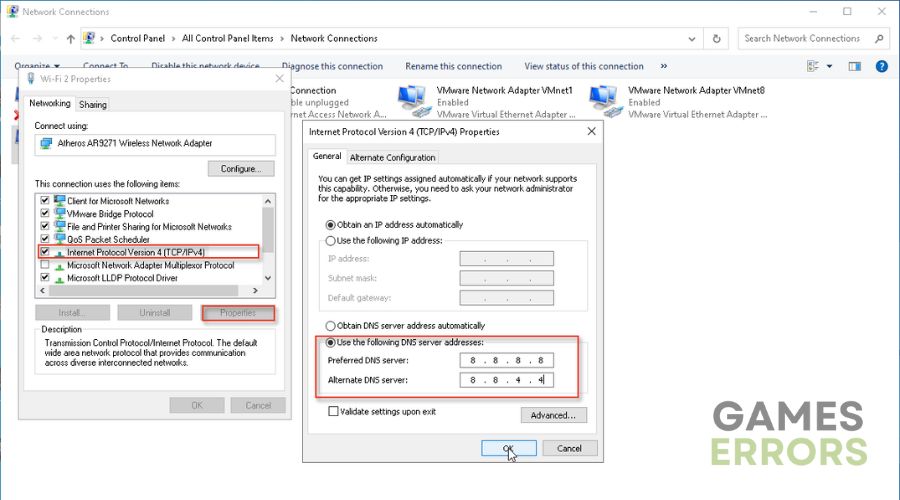
4. Click on the Internet Protocol Version 4 and click on the Properties button.
5. Under the General tab, confirm the radio button: Use the following DNS server addresses:
6. Input Preferred DNS server: 8.8.8.8 and Alternate DNS server: 8.8.4.4.
7. Confirm changes, and try to launch Destiny 2 to check if the error code “Olive” is gone.
4. Reinstall Destiny 2
Bungie’s moving of Destiny 2 from Battle.Net to Steam has caused several issues, including the error code “Olive.” To address this problem, we recommend uninstalling the Battle.Net version of Destiny 2 and clearing the cache data before downloading and installing the game from Steam. Here are the steps to follow:
1. Press the Win+R keys to open the Run dialog box.
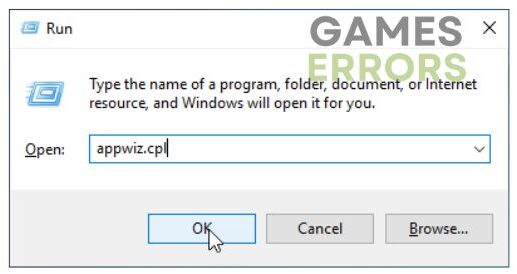
2. Type; “appwiz.cpl” and press Enter to open the Programs and Features menu.
3. Locate and uninstall Destiny 2 and Battle.net launcher.
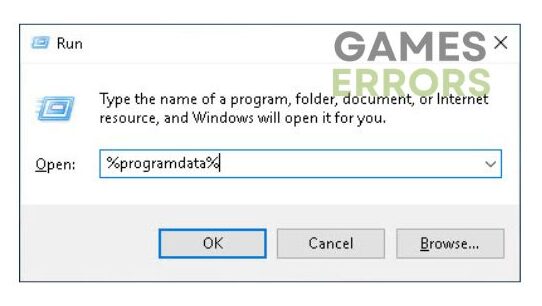
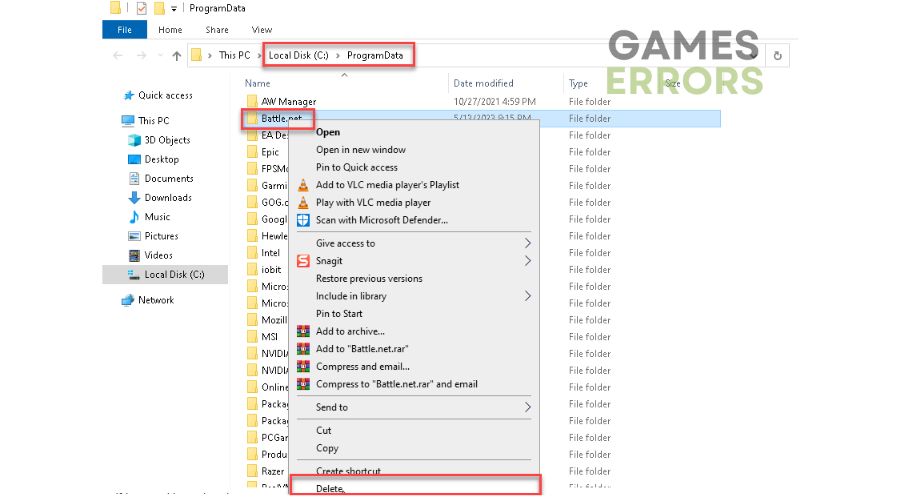
4. Open the Run dialog box again and type; “%programdata%” to open the Program Data folder.
5. Delete the Battle.net folder.
6. Also delete next folders: %APPDATA%\Battle.net, %LOCALAPPDATA%\Battle.net and %APPDATA%\Bungie\DestinyPC
Conclusion
We have provided you with everything you need to know to resolve the “Olive” error code in Destiny 2. However, if you have another solution, share it with us by commenting below.



User forum
0 messages