Valorant Mic Not Working: How To Fix It Easily
Are you trying to communicate with other players but your mic isn't working? Here's everything you need to know about Valorant mic not working and how to fix it 🚀
Valorant has gained a huge following of dedicated fans since its release, but it’s not immune to technical problems. Among the various issues that players may encounter is the issue of Valorant’s microphone not working.
In Valorant, voice communication plays a vital role, enabling seamless coordination and strategic gameplay among players. However, it can be incredibly frustrating when the microphone unexpectedly stops working during intense battles.
To tackle this issue head-on, there are several ways to fix Valorant mic not working. Read on to find out why this even happens in the first place and how to fix it.
Why Is Valorant Mic Not Working?
After looking at extensive user posts, we realized that this issue is related to incorrect input and output devices. Other reasons why you may be experiencing this issue include:
- Outdated audio driver
- Improper Valorant in-game audio settings
- Insufficient permissions
- Conflicting software
How to Fix Valorant Mic Not Working?
Before looking at the solutions, complete the following preliminary checks.
- Try a different microphone or headset to see if this solves the problem.
- Try using the mic in other games and see if they can detect your voice.
- Try performing a clean boot.
- Run the game as administrator.
If you are still experiencing this problem, try the solutions below:
- Allow your game to access your microphone
- Ensure the Correct Microphone Is Selected in Valorant
- Update your Audio Driver
- Change Valorant Audio Settings
- Check Incoming Volume and Mic Volume
1. Allow your game to access your microphone
- Press the Windows logo key on your keyboard to open the Start menu. Then, click on the gear icon to open Settings.
- In the Settings window, click on Privacy.
- From the left pane, select the tab Microphone. Under the “Allow desktop apps to access your microphone” section, click to toggle it On.
- Once you’ve completed these steps, try running Valorant as an administrator.
2. Ensure the Correct Microphone Is Selected in Valorant
- Launch Valorant.
- Press the Escape key to open Settings.
- At the top, click the Audio tab and then the Voice Chat tab.
- In the Voice Chat tab, select the primary microphone you’re using right now in the Input Device field.
- Make sure that the Mic Volume isn’t too low as well. If it is, move the slider to the extreme right.
🔊 Ensure the proper audio output device is selected and its incoming volume isn’t too low If you can’t hear other gamers’ voice chat.
3. Update your Audio Driver
Time needed: 4 minutes
Updating your Audio driver usually corrects system issues on a faulty Windows PC, such as Valorant Mic not working. To ensure you have the latest driver version, you need to check for updates. To do this:
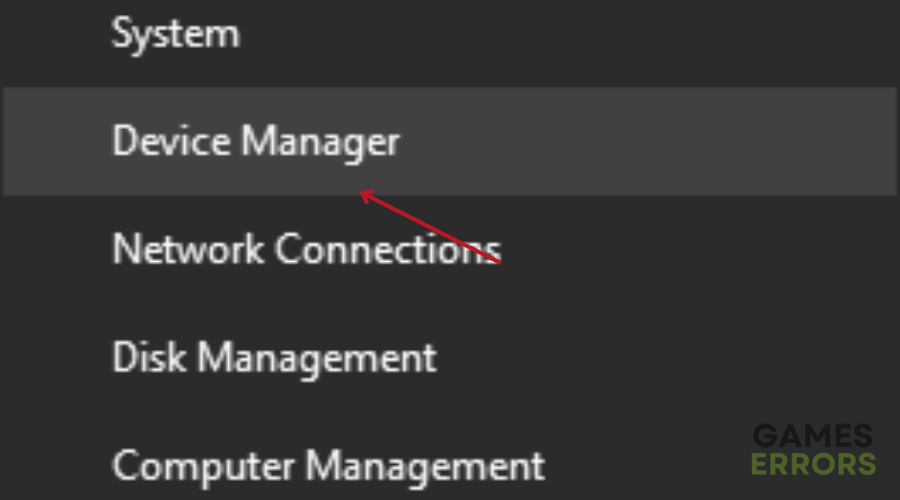
- Press Win + X on your keyboard and select Device Manager from the menu that appears.
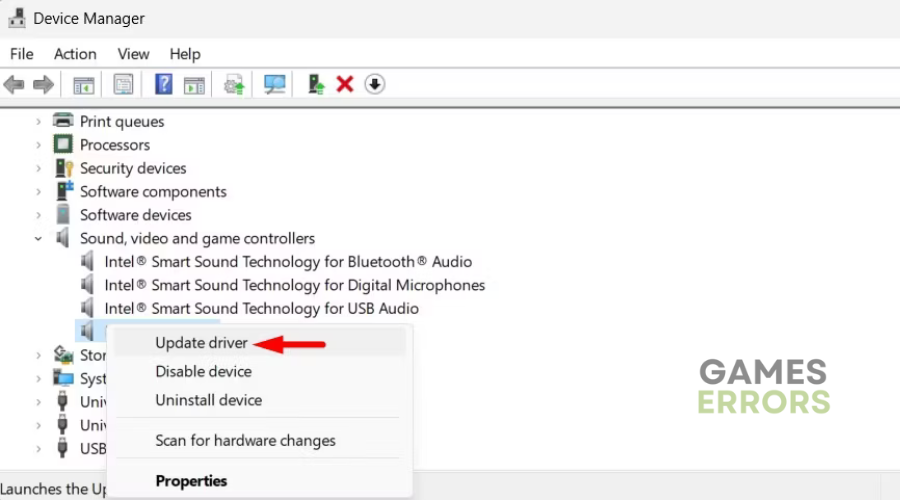
- Locate and expand Sound, video, and game controllers.
- Right-click on the audio driver and select Update driver.
- Choose the “Browse my computer for driver” option.
- Select “Let me pick from a list of available drivers on my computer.”
- Click Next on the following page.
- If prompted, reboot your computer.
Although updating your audio drivers through the Device Manager will ensure you have the latest version, it’s often cumbersome and a hassle. That is why we recommend using PC HelpSoft. This third-party tool scans, finds, and installs the best driver for your PC automatically.
4. Change Valorant Audio Settings
- Press the Windows key to open the Start Menu, type Valorant, and choose “Run as administrator” from the right pane.
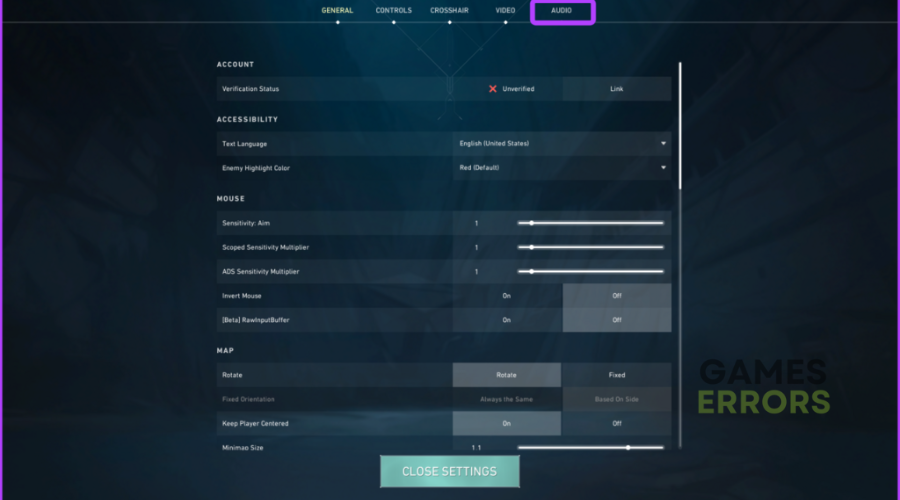
- Click the Gear icon at the top-right corner, then choose Settings from the menu that appears.
- Switch to the Audio tab.
- Click on Voice Chat, then select your default input device from the Input Device drop-down menu.
- Enable the ‘Party Voice Chat,’ ‘Party Voice During Custom Game,’ and ‘Team Voice Chat’ options.
- After that, restart the game to check for the issue.
5. Check Incoming Volume and Mic Volume
- Launch Valorant and access the game settings.
- Navigate to the “Audio” tab.
- Modify the “Incoming Voice Chat Volume” and “Outgoing Voice Chat Volume” sliders to your preferred levels.
- Test the voice chat to check if the changes have resolved the issue.
6. Check Valorant’s Microphone Permissions
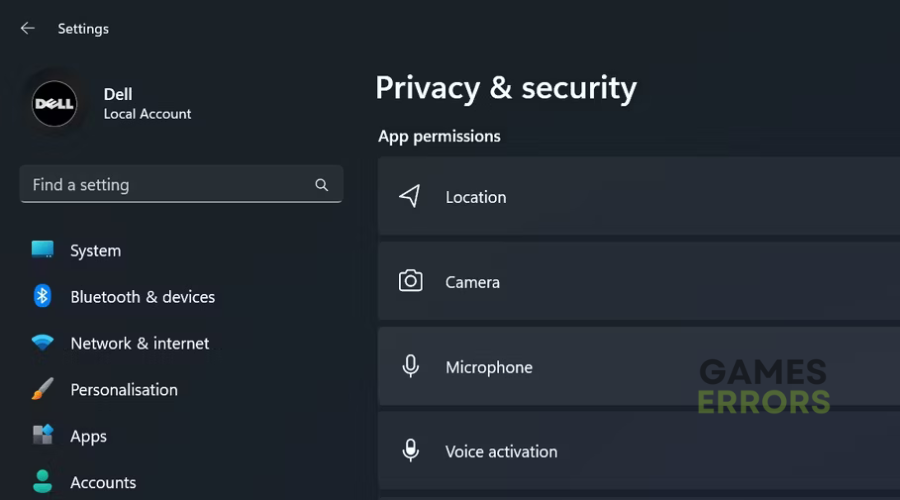
- Open the Settings app.
- Go to the Privacy and security tab in the left sidebar.
- Navigate to the App permissions settings and click on Microphone.
- Ensure the toggle next to Microphone access is turned on.
- Find Valorant in the list of apps and turn on the toggle next to it.
Conclusion
If you are faced with the frustrating problem of Valorant‘s microphone not working, don’t worry! By following the steps outlined in this guide, you can solve this problem and you’ll be ready to dive back into the world of Valorant, armed with clear and reliable voice communication. Happy gaming!





User forum
0 messages