
Destiny 2 Error Code Cabbage: How To Fix
If you don't like cabbage, you definitely don't need it in Destiny 2. Check out our guide to fix this problem. 🥬
Destiny 2 is a mix of Halo and World of Warcraft for those who have never played. Bungie, the development team behind Destiny and the Halo mentioned above, has taken traditional gameplay mechanics from the Halo franchise and implemented them into entirely different online PvE and PvP systems. Occasionally, peculiar error codes may appear, and among the frequently encountered ones is the Error Code Cabbage. Therefore, we make this guide to assist you in resolving Error Code Cabbage in Destiny 2.
🥬 What is Error Code Cabbage in Destiny 2?
The Destiny error code Cabbage can be challenging to resolve as it is caused by a settings problem with the user’s router, which blocks communication to and from Destiny servers. While this error may occur with any router, Technicolor/Thomson routers are more prone to this issue, according to Bungie’s help page. Therefore, users with such routers should check their router settings among exploring other potential causes like server issues or internet connection on the client side.
How do I fix Error Code Cabbage in Destiny 2?
To resolve the Cabbage error code, start by following these simple steps:
- Check the Bungie server status first. If the servers are down, have a technical problem, or are scheduled for maintenance, you must wait until the servers are up and running.
- Relaunch the game or restart your PC.
- Power cycle your network devices( router or modem).
- Switch from wireless to ethernet for a faster, more stable Internet connection.
If the issue continues to occur, take the following steps:
1. Change the DNS server
Sometimes, your DNS servers are not working correctly, so there is a possibility that you will get an error code Cabbage. As a first and easy step, we advise you to use one of the free and secure DNS servers, such as Google DNS. Do the following:
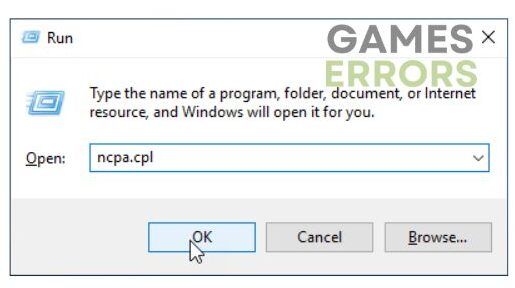
1. Press Win+R on the keyboard to show the Run dialog.
2. Type: “ncpa.cpl” in the box and press Enter to open Network Connections.
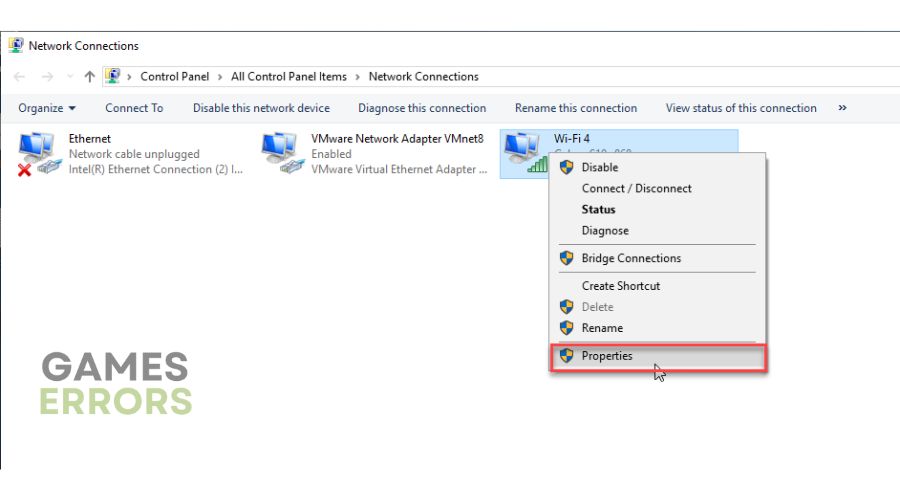
3. Select the network adapter you are connecting to your local network, right-click, and select Properties.
4. Click on the Internet Protocol Version 4 (TCP/IPv4) and click on the Properties button.
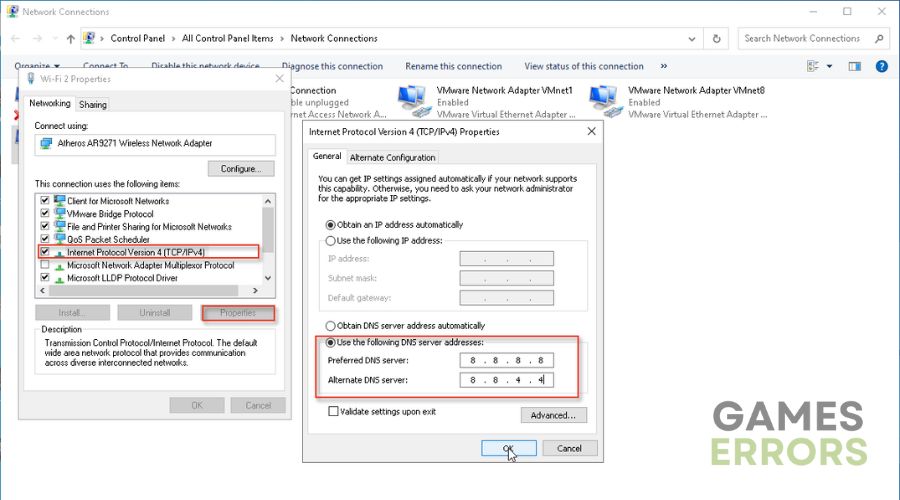
5. Under the General tab, confirm the radio button: Use the following DNS server addresses:
6. For Preferred DNS server input 8.8.8.8 and for Alternate DNS server input 8.8.4.4.
7. Confirm changes on OK, and try to launch Destiny 2 to check if the error code Cabbage is gone.
2. Change NAT Type to Open
Time needed: 3 minutes
One common reason for the Cabbage error code in Destiny 2 can be that your NAT is too restrictive. Ensure it is set to Moderate or Strict, then change it to Type 1/Open. Connecting with an Open NAT type allows for seamless communication with other NAT types.
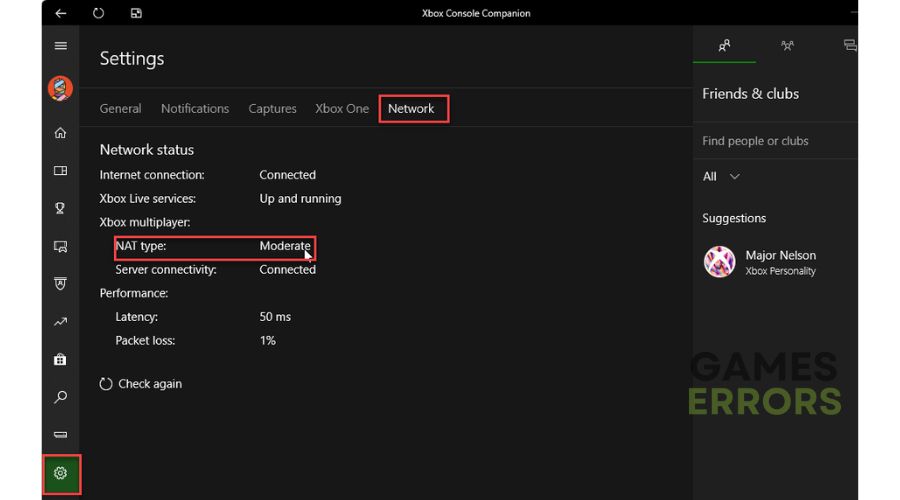
- Check your NAT Type
Open Xbox Console Companion and select Settings (Cog icon). Then navigate to the Network tab and check your NAT Type.

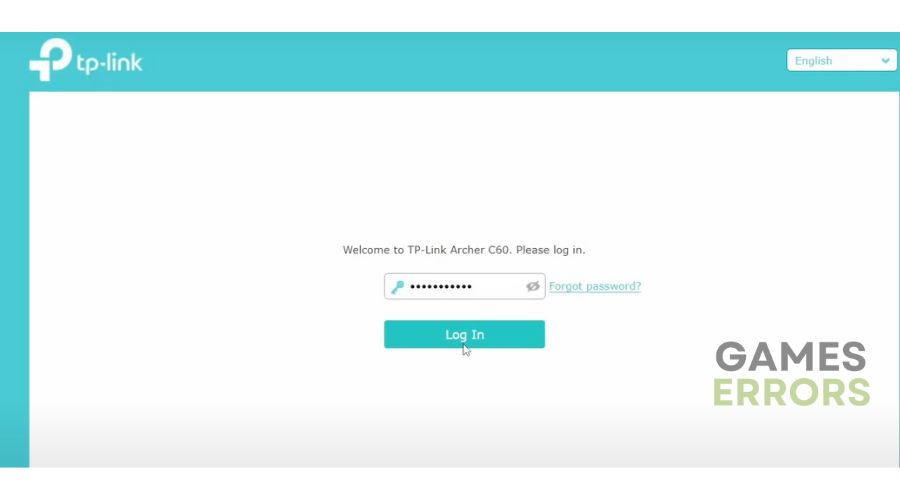
- Log in to your router
If your NAT type is Moderate or Strict, you must change it to Open by accessing the settings in your router. Open your browser and log into your router via the admin account. Check your router manual for different naming conventions on the settings pages.
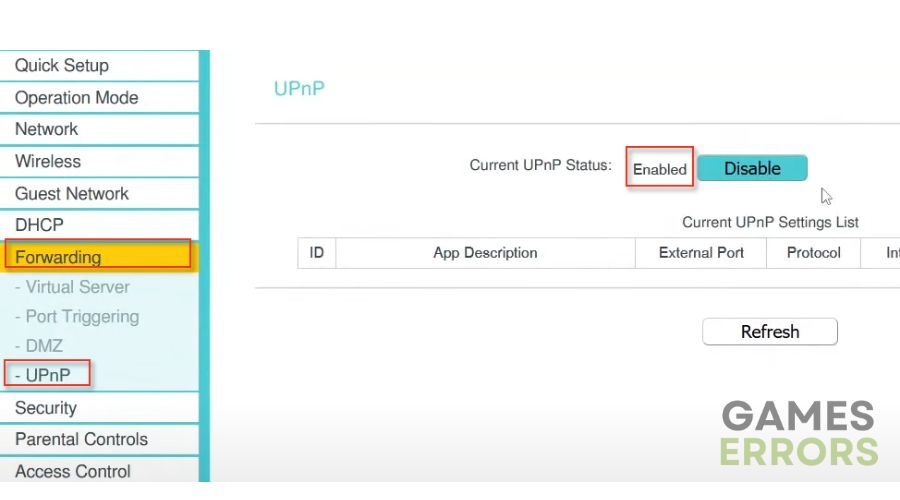
- Enable UPnP
Depending on the model of your router, you need to find the UPnP option in the menu and enable it. Confirm changes and reboot your router.
- Launch Destiny 2
Check if the Cabbage error code in Destiny 2 is gone. Open NAT lacks a firewall which leaves you susceptible to malware, online hacks, and other potential dangers. For security reasons, you may consider port forwarding on your router.
3. Use Ports Forwarding
According to Bungie, enabling UPnP is a simple solution to overcome NAT limitations. However, this method automates port forwarding, making your connection susceptible to online threats. For a more secure option, we suggest using a port forwarding method. Here’s how to set it up:
1. Go to your router menu and disable UPnP (if enabled.)
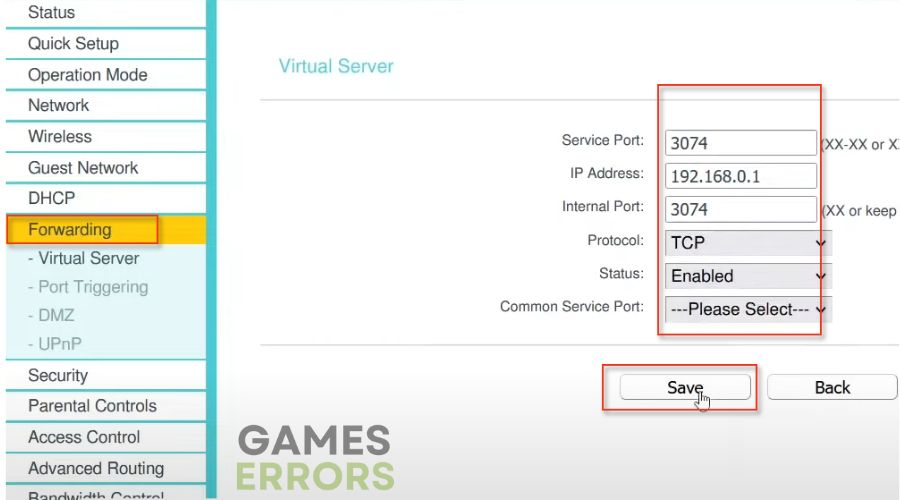
2. Choose the Port forwarding option. Depending on your gaming platform, it also depends on which ports must be forwarded in router settings.
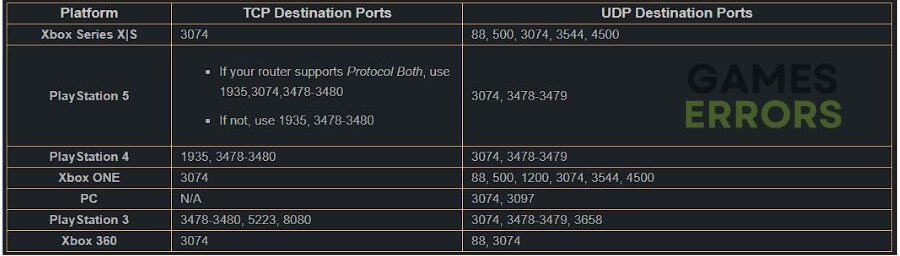
3. Enter the recommended UDP and TCP ports in the respective boxes in Forward settings and click Save.
4. Repeat the process until you have entered all the ports for your gaming platform via the Add New option. Please note that this process depends on the specific model of your router.
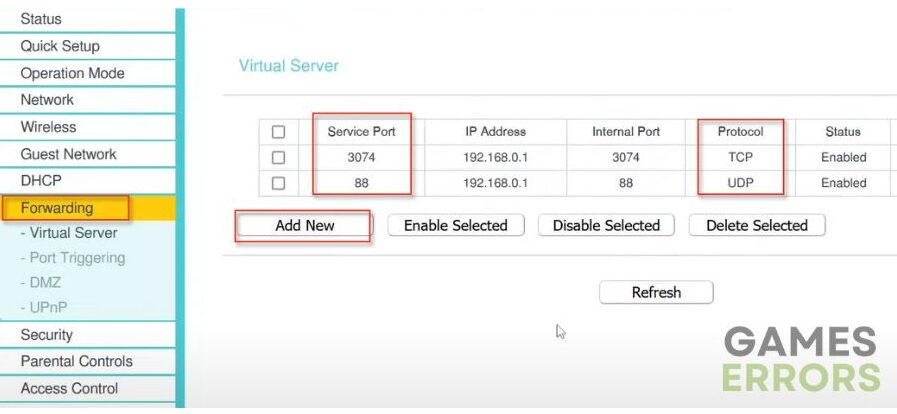
4. After you finish, reboot your router and launch Destiny 2 to check if the Cabbage error code is gone.
Conclusion
Based on our tips, we hope you can successfully fix Destiny 2 error code Cabbage. However, if you have a different solution to the problem, don’t hesitate to drop a comment below.

Improve this guide
User forum
0 messages