Games Crashing With XMP Enabled: Here's the Fix
Is XMP crashing games? Change DRAM voltage and tweak a few things if games start crashing after enabling XMP 🔥
You may have turned on the Extreme Memory Profile to enhance performance on your PC. But things may go wrong. Problems like games crashing with XMP enabled may appear. This article will explain why XMP is crashing games and how to solve it.
The main purpose of XMP is to make the RAM modules run at high frequency. In other words, it is a memory overclocking feature. It helps to gain some extra performance on your PC. Many gamers enable it to have a better gaming experience. Sometimes, the opposite may happen.
Can XMP cause crashes?
Even though you expect a better gaming performance, enabling the XMP may cause game-crashing problems for some gamers.
Low RAM frequency can slow down the performance of a game. So, many users use the XMP feature. If there is something wrong with your RAM sticks or the motherboard, enabling this overclocking feature will cause problems in everyday computing, as well.
RAM, CPU, and motherboard, all three must be compatible and support the Extreme Memory Profile feature. Otherwise, enabling it will cause various gaming errors, including a blue screen of death.
How to fix crashing after enabling XMP in my game?
Before getting started, you must ensure a few things to avoid unwanted hassles. These are:
- Make sure your motherboard, processor, and RAM sticks are all compatible with XMP.
- Ensure that your PC meets the system requirements of the game which is crashing.
- Confirm that the DirectX Runtime and Microsoft Visual C++ Redistributables are installed on your PC.
Now, you can proceed to the methods mentioned below to fix the game crashing with XMP enabled:
- Manually change the voltage
- Clear the cache
- Update graphics card driver
- Repair the game files
- Run Windows memory diagnostic tool
- Update BIOS
- Disable XMP Profile
- Place RAM in different slots
- Change the RAM stick
1. Manually change the voltage
- Turn off your PC.
- Turn the power switch on.
- Depending on the motherboard brand and model, keep pressing the F12/Del/F2 button on the keyboard.
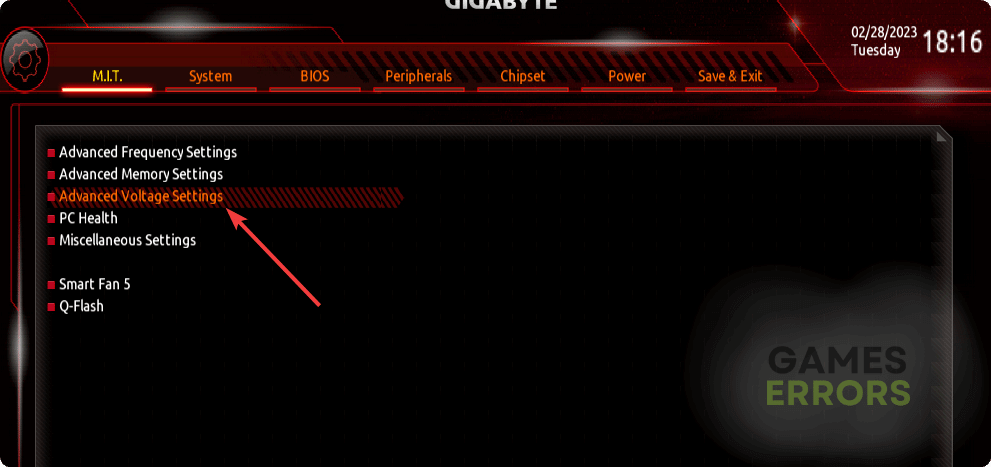
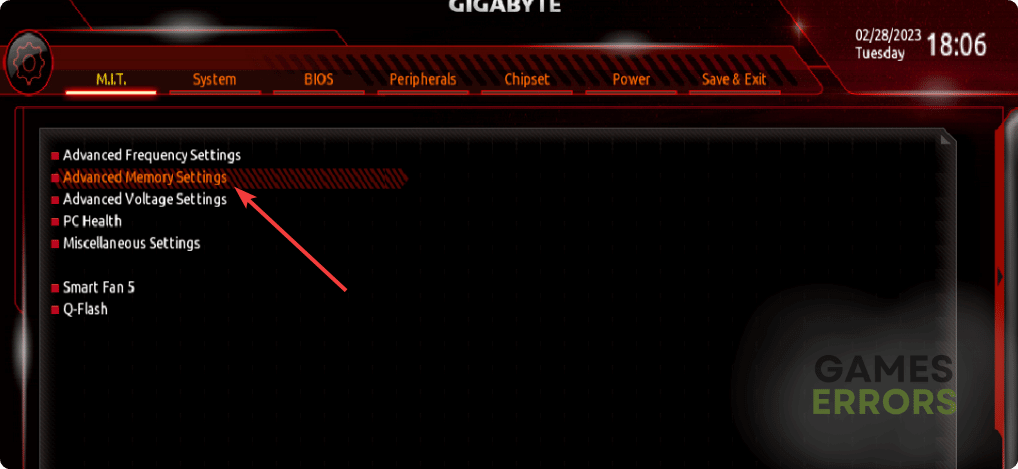
- When you are in the BIOS/UEFI dashboard, find an option like Advanced voltage settings and go there.
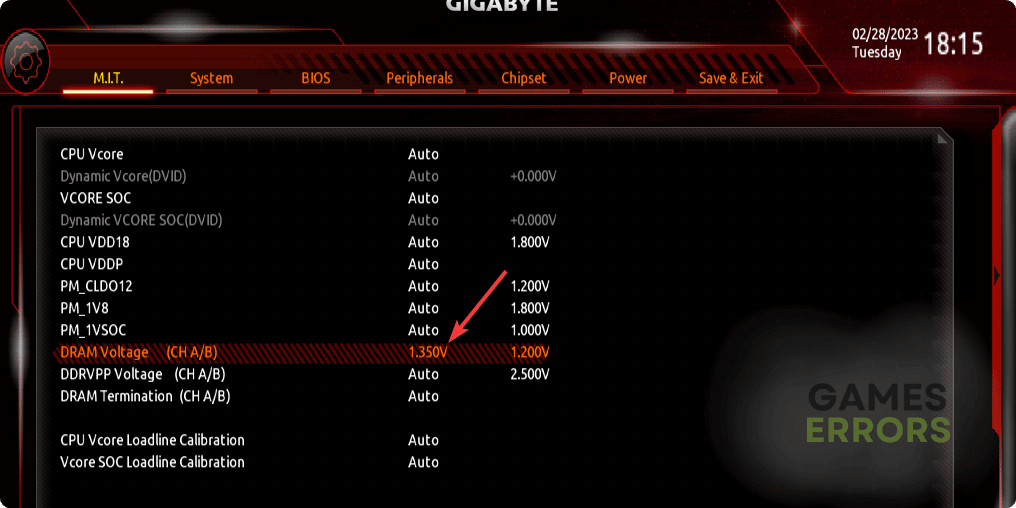
- Manually change the voltage to a higher one, for example, 1.35V.
- Save the Settings and restart your PC.
We suggest you keep increasing the voltage little by little. Then, start observing which one is ideal for this XMP profile. But don’t increase it too much. Keeping it under 1.5V is a good idea if XMP is causing games to crash.
2. Clear cache
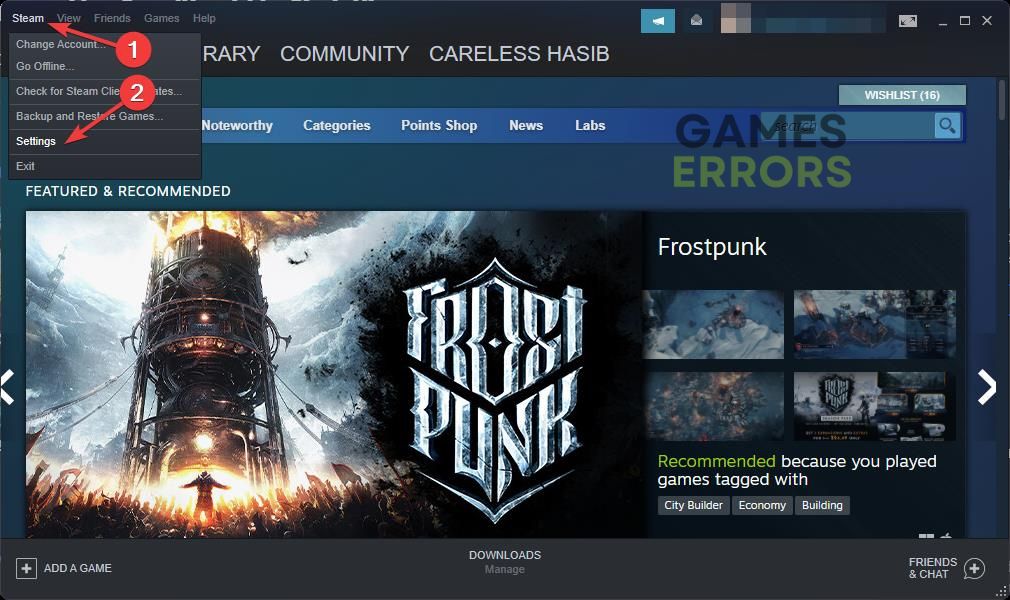
- Open Steam or any other game launcher you have been using.
- Go to its Settings, as shown in the screenshot.
- Go to the Downloads tab and click on Clear Download Cache.
- Relaunch Steam and try playing the game again.
3. Update graphics card driver
- Press Win + X and go to Device Manager.
- Find and click on the > button next to the Display adapters to expand it.
- Right-click on the display driver, and choose Update driver.
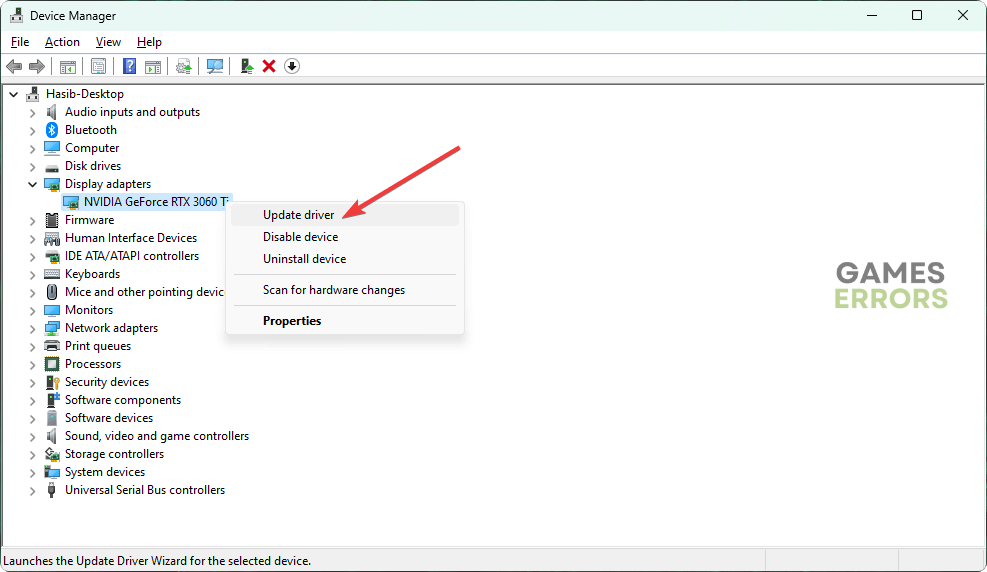
- Choose Search automatically for drivers and finish the update.
Updating your GPU driver may prevent the game’s crash with XMP enabled.
4. Repair the game files
- Go to the Steam game library.
- Right-click on the game and go to its Properties.
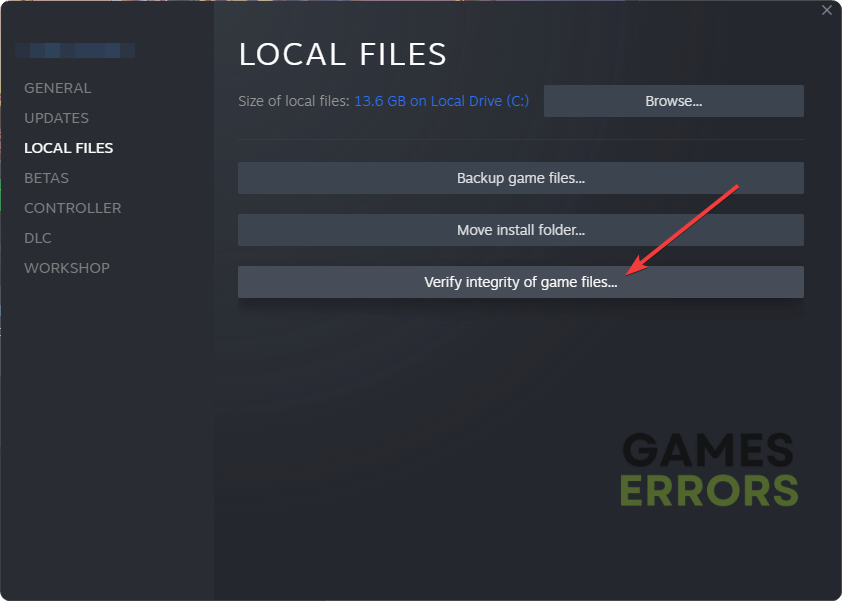
- Go to the Local Files tab.
- Click on Verify integrity of the game files.
- Wait for a while until it repairs the game.
In some cases, the problem may be related to the game itself, not the XMP profile. Doing the above steps will solve it.
5. Run Windows memory diagnostic tool
- Press Win + R on the keyboard to open Run.
- Type mdsched and press Enter.
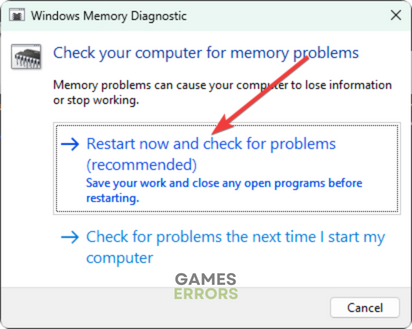
- Choose Restart now and check for problems.
It’s also possible that the RAM modules have some temporary problems, which are preventing them from performing normally under XMP mode enabled. In this case, running the memory diagnostic tool may solve the game crashing problem.
6. Update BIOS/UEFI firmware
- Go to the BIOS as described in method 1.
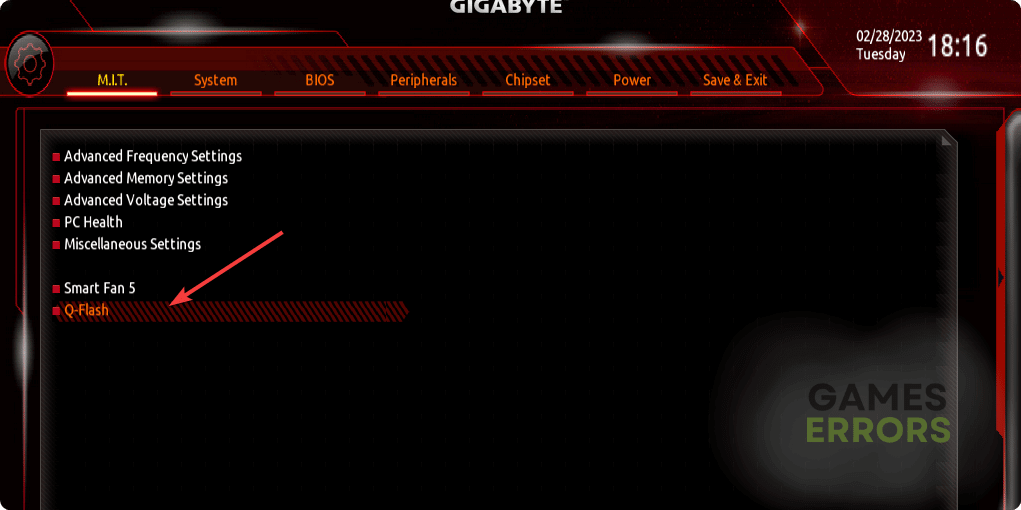
- Find updating utility, for example, Q-Flash, and go there.
- Choose your option to update and follow on-screen instructions.
Most modern motherboard supports an online update feature. If not, before trying out this method, you should download the firmware from the motherboard manufacturer’s website and store it in a Pendrive. Then, connect it to your PC and follow the above steps.
7. Disable XMP Profile
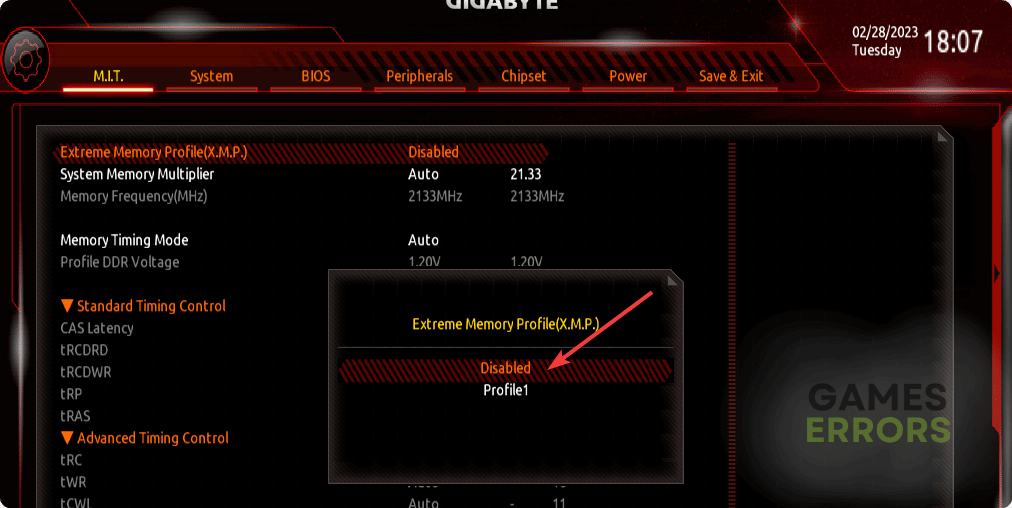
If the previous 6 methods fail, you may consider disabling the XMP from the BIOS. To do it, follow these steps:
- Boot into your BIOS dashboard like before.
- Find and go to the option similar to the Advanced Memory Settings.
- Now, find the Extreme Memory Profile (XMP) and disable it.
This will solve the game crashing problem which was appearing after enabling the XMP. However, if you don’t wish to disable this feature, try the next methods.
8. Place RAMs in different slots
According to some users, placing RAM in different slots has worked for them. So, it is also possible that doing the same thing will also save you from facing game crashing issues. You can gently remove the RAM sticks and place them in different slots.
However, if you have four slots and all of them already have RAM placed, we suggest you swap the placing and see if it helps.
9. Change RAM sticks
The root of the problem can be faulty or incompatible RAM sticks. So, you also can consider upgrading to a better XMP-compatible RAM and see if it works.
Besides the above methods, you also can consider tweaking the memory frequency in the BIOS settings to see if it helps.
If you are interested, read how to stop games from crashing.
This article has explained the best methods to fix games crashing with XMP enabled or similar problems. In the comment box, you can let us know if you have any suggestions or opinions.




User forum
0 messages