
Gears of War 4 Stuck on Loading Screen: How to Fix
Are you also facing gears of war 4 stuck on loading screen? Read on to learn how to fix it⚡
Gears of War 4 has been a top favorite for many fans of the franchise. This can be attributed to the game’s fantastic graphics and great level design.
Although Gears of War 4 capitalizes on these strengths, many players have reported problems when trying to play the game, such as Gears of War 4 stuck on the loading screen.
We have done our research and figured out why this happens. Read on to find out how to fix it.
Why is Gears of War 4 Stuck on Loading Screen?
The Gears of War 4 stuck on loading screen problem occurs when you try to start the game, but instead, the game freezes on the start screen and won’t go past it plus, it does not show any error message.
Some of the reasons why this happens include:
- A server issue where the server runs through downtime or is under maintenance.
- Outdated or corrupted drivers
- Running outdated Windows version
- Enabled VPN
- Outdated version of the game
- Antivirus program or Windows Firewall
How to Fix Gears of War 4 stuck on loading screen?
Before following the steps below, try restarting your computer. Sometimes a simple restart can resolve the Gears of War 4 stuck on loading screen issue. Also, check the game’s official Twitter page @GearsofWar for any updates on website maintenance.
- Update graphics card
- Update Your Game
- Reset Microsoft Store
- Disable Windows Defender
- Disable or Uninstall VPN
- Reinstall Gears of War 4 (PC/Xbox)
1. Update graphics card
Time needed: 4 minutes
It is important to update your PC drivers to ensure maximum performance and avoid problems like Gears of War 4 stuck on loading screen. To do this:
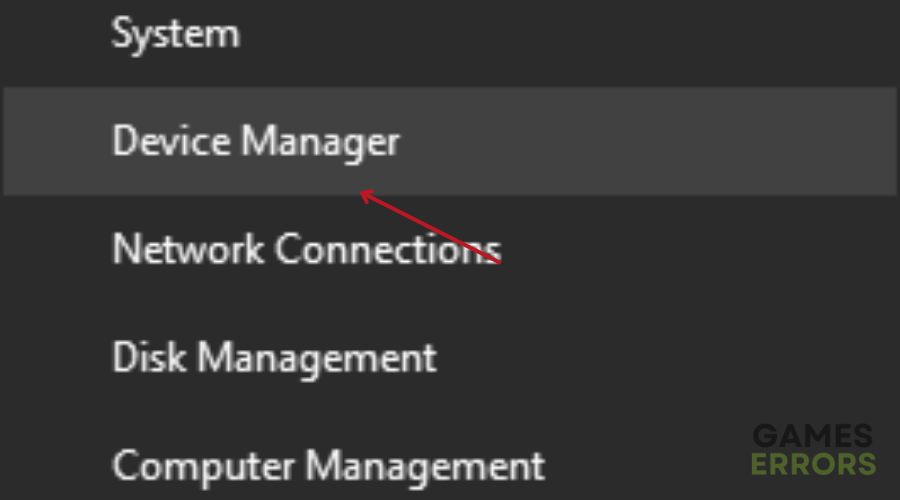
- Right-click the Windows icon and select Device Manager.

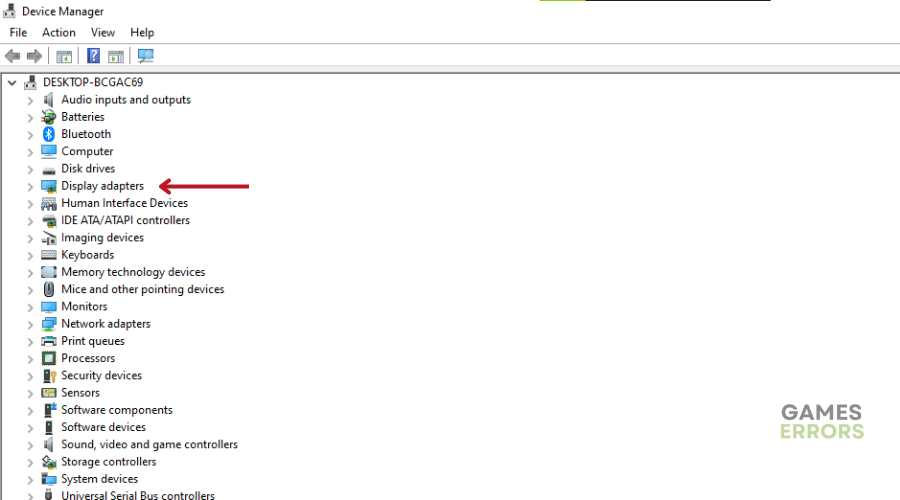
- In the pop-up window, right-click Display adapters to expand it.
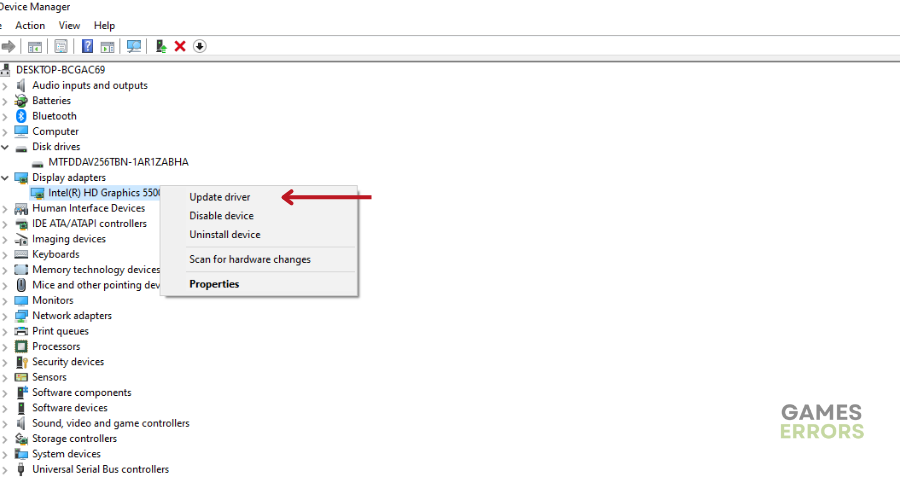
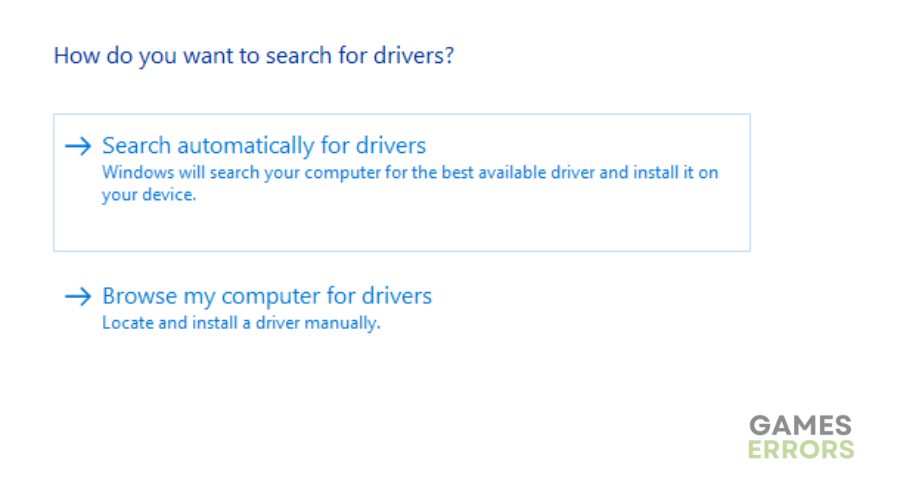
- Right-click your device and select Update driver.
- In the pop-up window, click Search automatically for updated driver software.
- Follow the on-screen wizard to update the driver.
If you are tired of manually looking for the latest driver for your PC, try using PC HelpSoft. Drivefix scans the web and automatically installs the best and latest driver for your PC.
2. Update Your Game
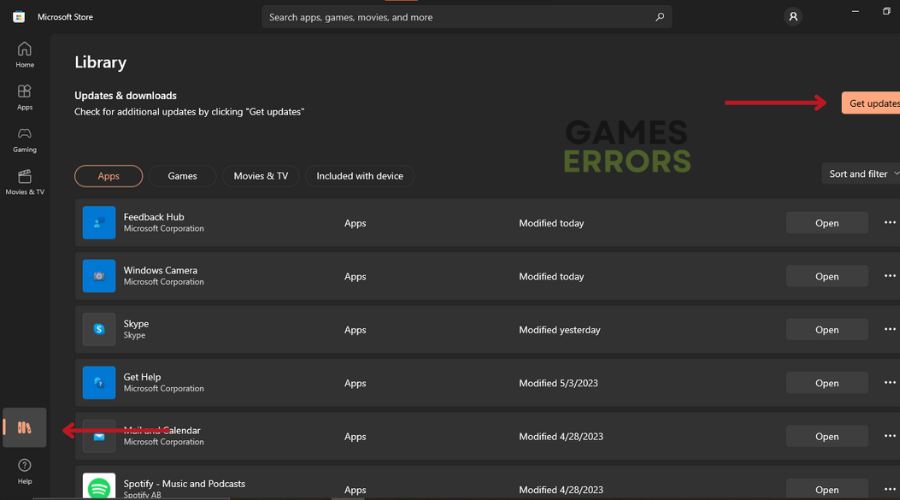
- Go to Windows Start, type Microsoft Store in the search box, and double-click on it in the results.
- Once the Microsoft Store is open, click the three dots in the top right corner of the window next to your profile picture.
- From the drop-down menu that appears, select Downloads and Updates.
- Tap the Get Updates button to download all available updates for the Microsoft Store, including any GoW 4 game updates.
- Wait for the updates to download and automatically install on your PC.
- Once the updates are installed, restart your system and start the game to see if the issue is resolved.
3. Reset Microsoft Store
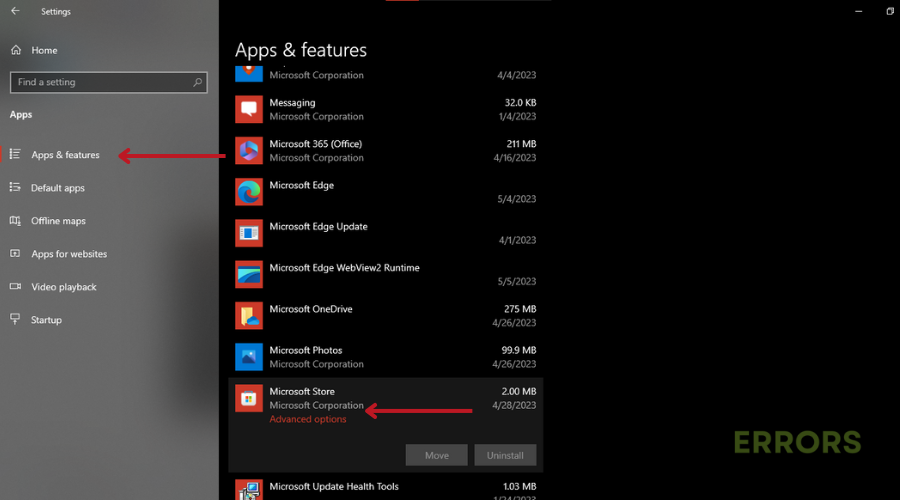
- Go to Settings and select Apps.
- Go to Apps & Features then go to the Microsoft Store and click on Advanced options.
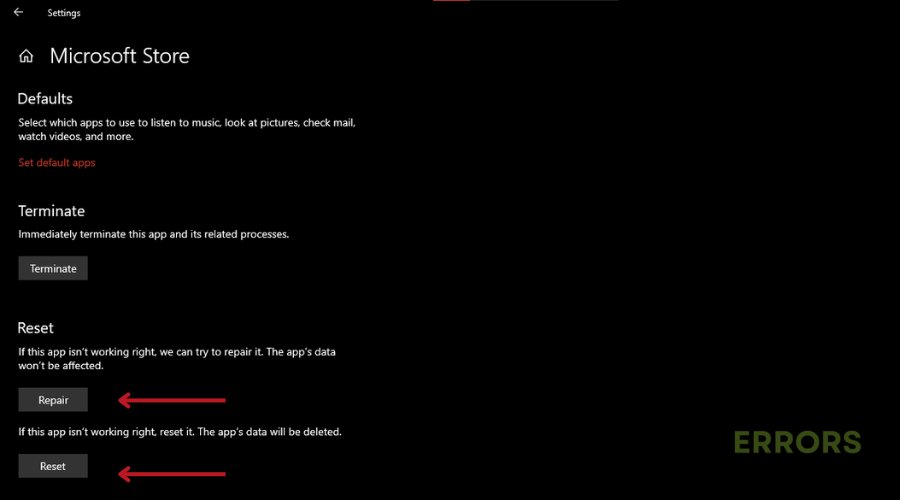
- In the pop-up window, click on Repair and wait until the process completes. If the repair process does not work, click the Reset button to reset the Microsoft Store app.
- To enable the Offline permissions feature, click on Settings in the Windows Store window.
- Find the Offline permissions feature and enable it.
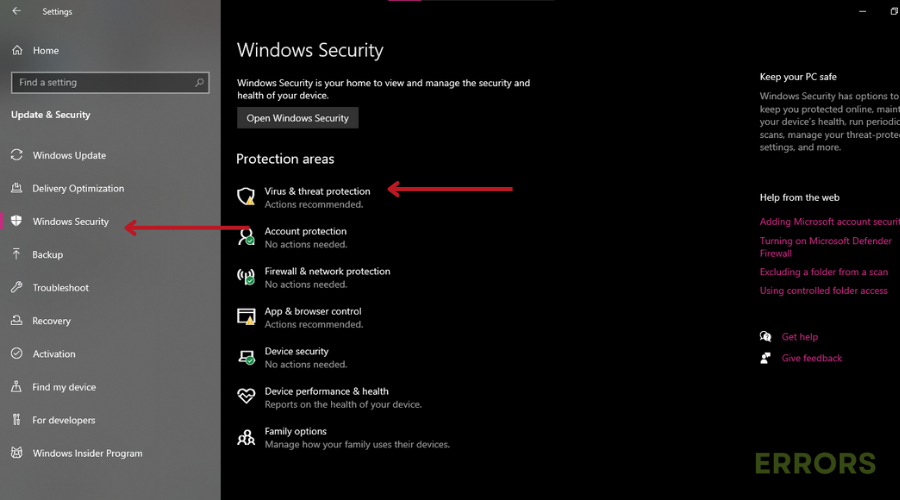
4. Disable Windows Defender
- Select the Win key + the I key to launch the Settings app on Windows.
- Go to the Privacy & Security category and click on it.
- Click on the Windows Security option and select Virus and Threat Protection.
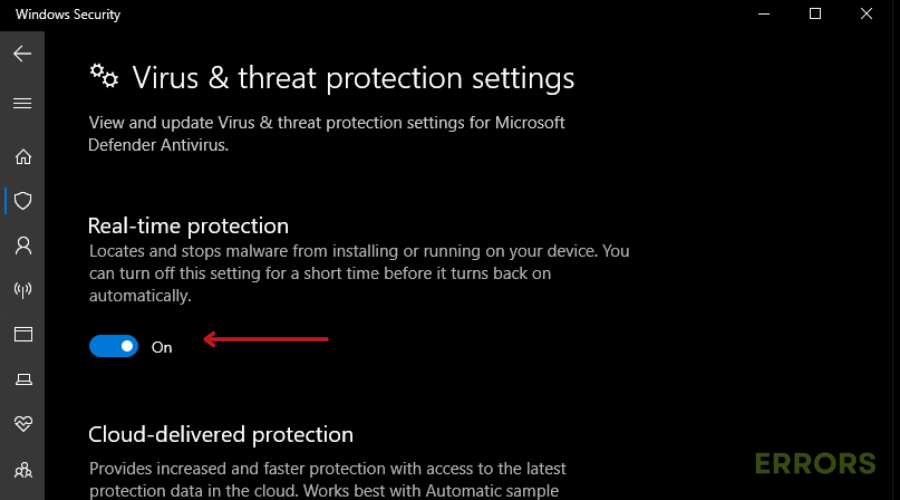
- Under the Virus and threat settings, select the Manage Settings option.
- Toggle off the Real-time protection and restart your system.
5. Disable or Uninstall VPN
🎮 To disable the VPN:
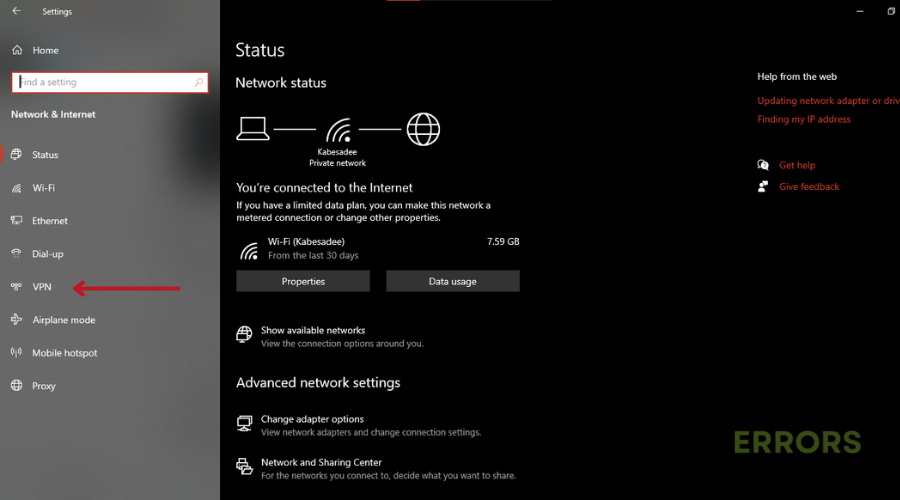
- Hold the Win key and press the I key to launch the Settings menu.
- Then, select the option Network & internet.
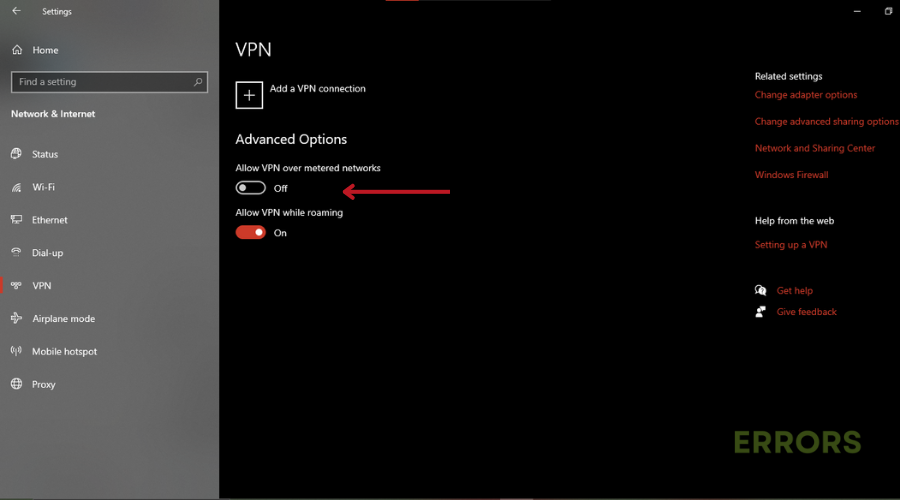
- Click on the VPN option.
- Toggle off the button for Allow VPN to disable it.
🎮 To uninstall a VPN app:
- Go to the Settings panel by holding the Win key and pressing the I key.
- Then, go to Apps and select Apps & features.
- Scroll through the applications list and navigate to the installed VPN app.
- Click on the three dots beside the VPN app and select Uninstall option.
6. Reinstall Gears of War 4 (PC/Xbox)
🕹 On Windows:
- Go to Settings by holding the Win key and pressing the I key.
- Then, go for the Apps and select Apps & Features.
- Here, locate the Gears of War 4 game app on the list that appeared and right-click on it.
- Tap the Uninstall option.
- Once uninstalled, visit the GoW 4 installation folder and delete the leftover game files from the driver where the game is installed.
🕹 On Xbox:
- Click on the My games & apps section on your Xbox One Home screen.
- Click on the Games category and scroll through the games list to search for Gears of war 4.
- Once found, click the Gear of War 4 game and press the Menu button on the controller.
- Next, select the Manage game option.
- Lastly, click the Uninstall All option and press the Uninstall All button again for final confirmation to delete all game and add-on files associated with the game.


Conclusion
There you have it! We hope one of the following steps has helped you fix Gear of War 4 stuck on loading screen. Let us know what worked for you in the comment section below.

Improve this guide
User forum
0 messages