How to Fix Steam No Internet Connection Error [2023]
Having a connection error when starting Steam? Try our solutions. 🛠
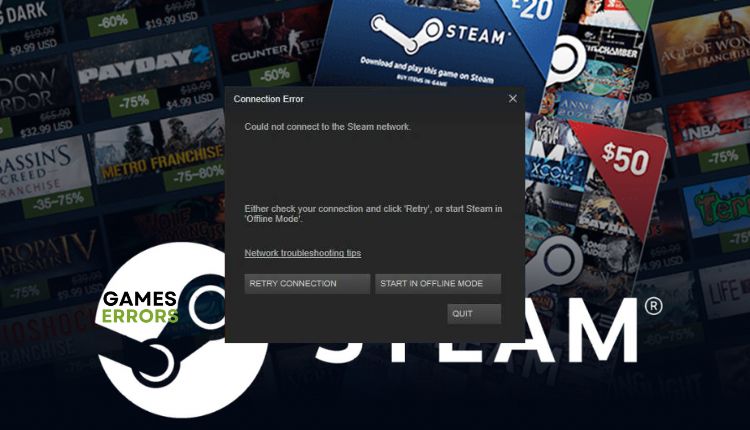
Steam is an excellent gaming platform for playing today’s best games. However, even this popular platform sometimes has problems and prevents you from playing your favorite games online. You sit at your computer and type in your Steam account, but the error “Could not connect to the Steam network” appears. What to do when this no internet error occurs is the subject of our guide to help you quickly fix the problem and continue playing.
Why my Steam can’t go online?
The most common reasons why you get a no internet connection error on Steam can be the following:
- Steam server issue
- Unstable internet connection
- Outdated network drivers
- The firewall and antivirus are not set up properly
- Heavy apps running in the background
How do I fix Steam no internet connection?
Do these simple steps first before doing anything more complicated:
- Check the Steam server status.
- Close all background apps, like antivirus, P2P, etc.
- Run Steam as admin.
- Update Windows to the latest version.
After going through all the steps above and finding that you still have a connection error, please do the following:
- Check your internet connection
- Update your network driver
- Flush DNS cache
- Change Steam’s Internet protocol
- Turn Off Windows Firewall
- Use a VPN
1. Check your internet connection
Your unstable internet connection is one of the main reasons you might get a Steam no internet connection error.
Check with popular internet test speed programs if you have problems with the download, upload, and latency (ping). To improve the quality of your internet connection, we recommend the following:
- Do not move your computer too far physically from your router and modem.
- Disconnect all unnecessary WiFi devices from the network.
- Restart your modem and router (unplug the power cords and plug them back in for one minute).
- If the signal is still weak, get a wireless network extender.
- Use ethernet for a faster and more stable connection than wireless.
2. Update your network driver
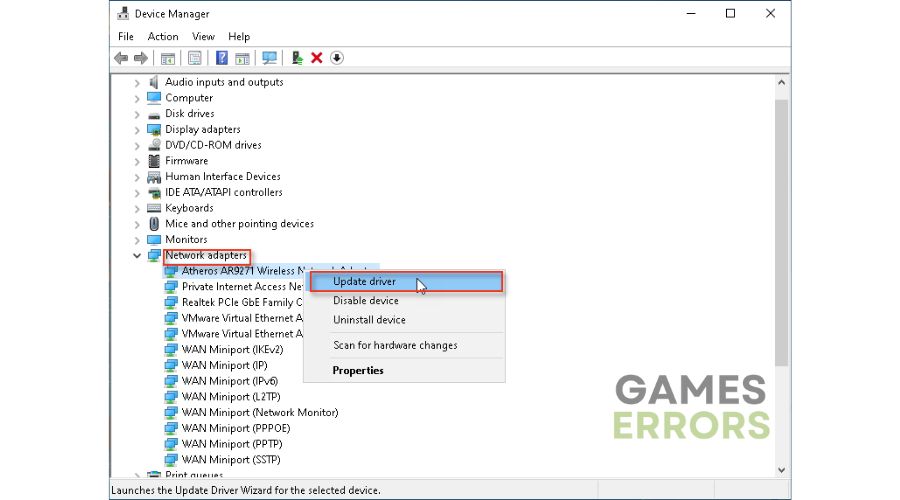
Sometimes internet connection errors on the Steam launcher may indicate that you are using an outdated network driver. Update your network driver as follows:
1. Right-click Windows Start and select Device Manager from the Quick Menu.
2. Double-click the Network adapters and right-click on your network card to select Update drive.
3. Click on the Search automatically for drivers and wait to finish the update process.
4. Restart your computer, launch Steam, and see if the connection error is gone.
If you don’t want to think about whether your system drivers are up to date, we recommend installing PC HelpSoft. This powerful tool will scan all your drivers and install the latest ones.
3. Flush DNS cache
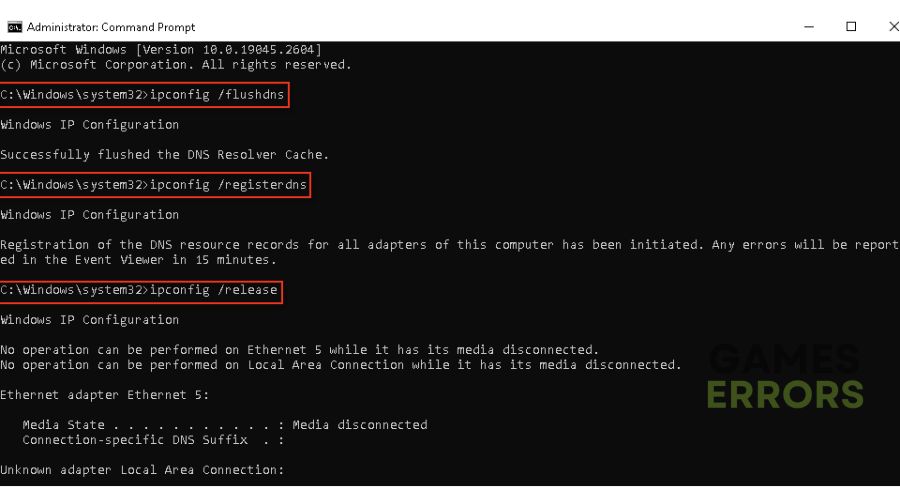
Flushing DNS will delete IP addresses or other DNS records from the cache. This can help resolve security and internet issues that can cause Steam server connection errors. Do the following:
1. Press the Win+Q keys on the keyboard and type cmd in the search bar.
2. Right-click on the Command Prompt and select Run as administrator.
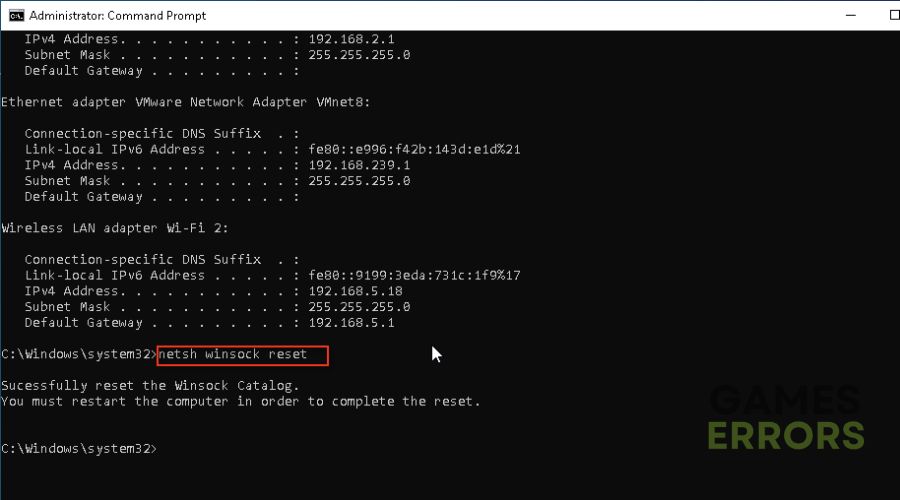
3. Type “ipconfig /flushdns” and press Enter; then type “ipconfig /registerdns” and press Enter; then type “ipconfig /release” and press Enter.
4. Type “ipconfig /renew” and press Enter; then type “netsh winsock reset” and press Enter.
5. Reboot the PC and see if the internet connection error is gone.
4. Change Steam’s Internet protocol
Time needed: 1 minute
Many Steam users use the UDP internet protocol, which can sometimes be unstable. If you encounter the error “could not connect to the Steam network,” we recommend changing UDP to TCP, which is more reliable and faster.
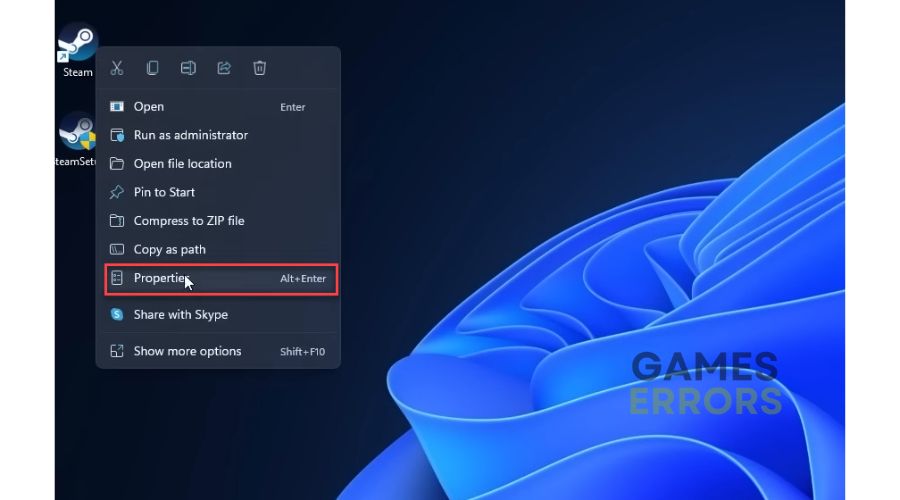
- Locate the Steam shortcut on the desktop
Right-click on the Steam shortcut on the desktop and select Properties.
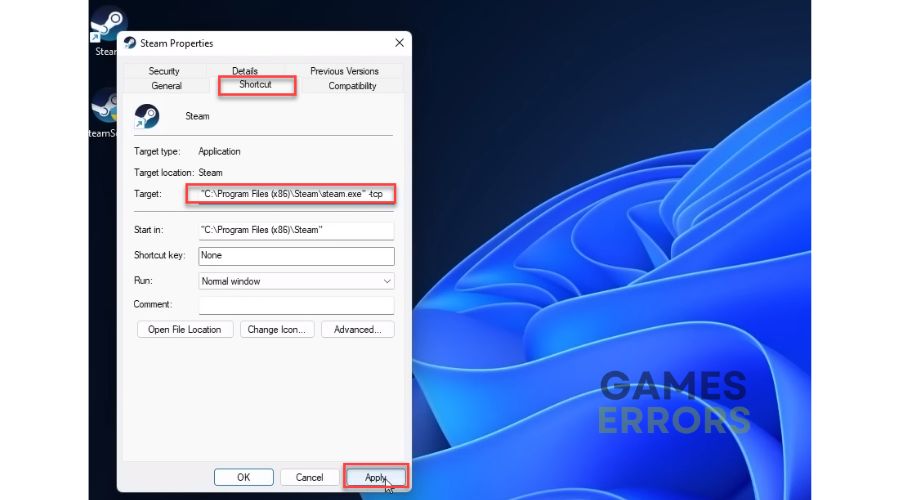
- In the Properties window, choose the Shortcut tab
In the Target dialogue box, add –tcp to the end. For example: C:\Program Files (x86)\Steam\Steam.exe -tcp
- Launch Steam client
Check if the Steam connection error is fixed.
5. Turn Off Windows Firewall
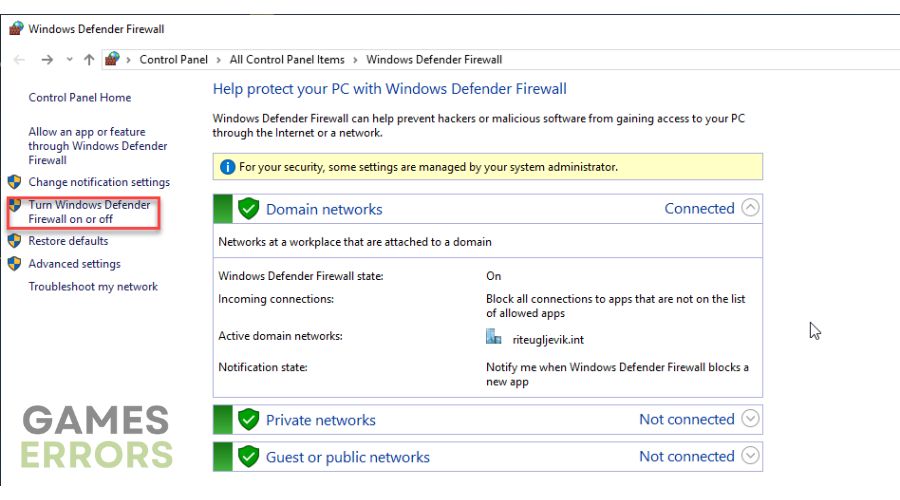
1. Press the Win + R keys on your keyboard to launch the Run dialog.
2. Type the firewall.cpl and press Enter. Click on Turn Windows Defender Firewall on or off.
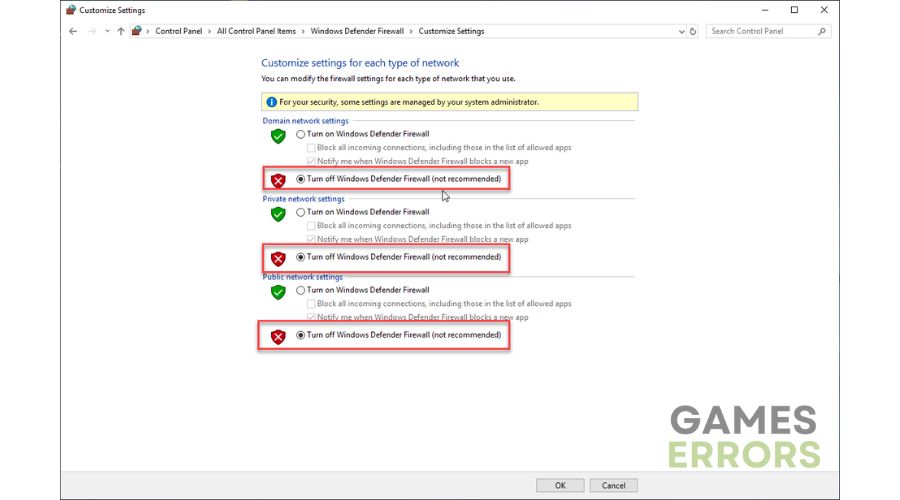
3. Click on the Turn Off Windows Defender Firewall radio buttons.
4. Launch Steam to see if the internet connection error is gone.
6. Use a VPN
If you are connected to the internet and have a stable connection but still cannot connect to Steam, there is a possibility of a problem with the server you are connecting to. We recommend using a VPN to connect to a server in another region or closer to you. Connecting through a reliable VPN service like ExpresVPN is fast and secure, and setup is effortless. It offers you an easy connection in a few seconds, maintaining a fast and stable connection, lower ping for gaming, selection of fast servers in different countries for online matches with friends (over 90 countries).
Related articles:
Conclusion
We’ve tried to show you how to fix Steam’s no internet connection error. For all your suggestions and remarks, please comment below.



User forum
0 messages