
VRChat Keeps Crashing on Oculus Quest 2: How to Fix It
Many players using Oculus Quest 2 are disappointed by the performance in VRChat. Follow our tips and learn how to enjoy VR once again! 🤩

VRChat keeps crashing on Oculus Quest 2 is a problem that ruins the virtual reality experience for many players. If you are experiencing such issues, follow our guide and learn how to make the game enjoyable without crashing.
Using a standalone setup for gaming with Oculus Quest 2 is limiting in several aspects, and it is always recommended to have a gaming PC. However, some players cannot afford it or simply want to enjoy VR games independently from their PC setup.
Why does VRChat keep crashing on Oculus Quest 2?
VRChat crashing on Oculus Quest 2 occurs mainly when too many players are in the same lobby or too much visual effects are processed. Luckily, the game has settings you can customize, making the VR experience more reliable.
How do I fix VRChat crashing on Oculus 2?
As mentioned, if you have a gaming PC setup, use it to run the game while using Oculus as a VR screen and controller. If this is not an option, proceed with the solutions we listed below for Oculus Quest 2 standalone setup.
Some players complain that their VR headset is not loading anything. If you have similar issues, check out our guide on troubleshooting Oculus Quest 2 not loading anything problem.
1. Customize safety settings
Time needed: 3 minutes
Safety settings in VRChat are introduced to create privacy layers between unknown players, friends, visitors, and other categories. However, customizing these settings is also a great way to prevent crashes.
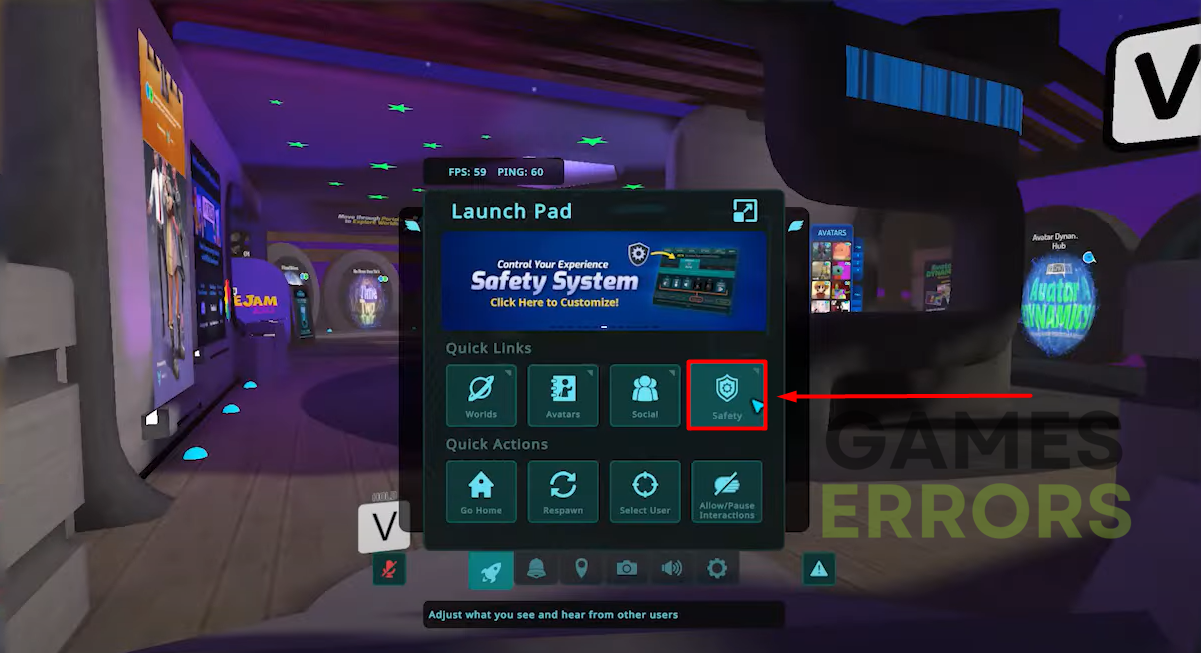
- Open the menu and click on the Safety tab.

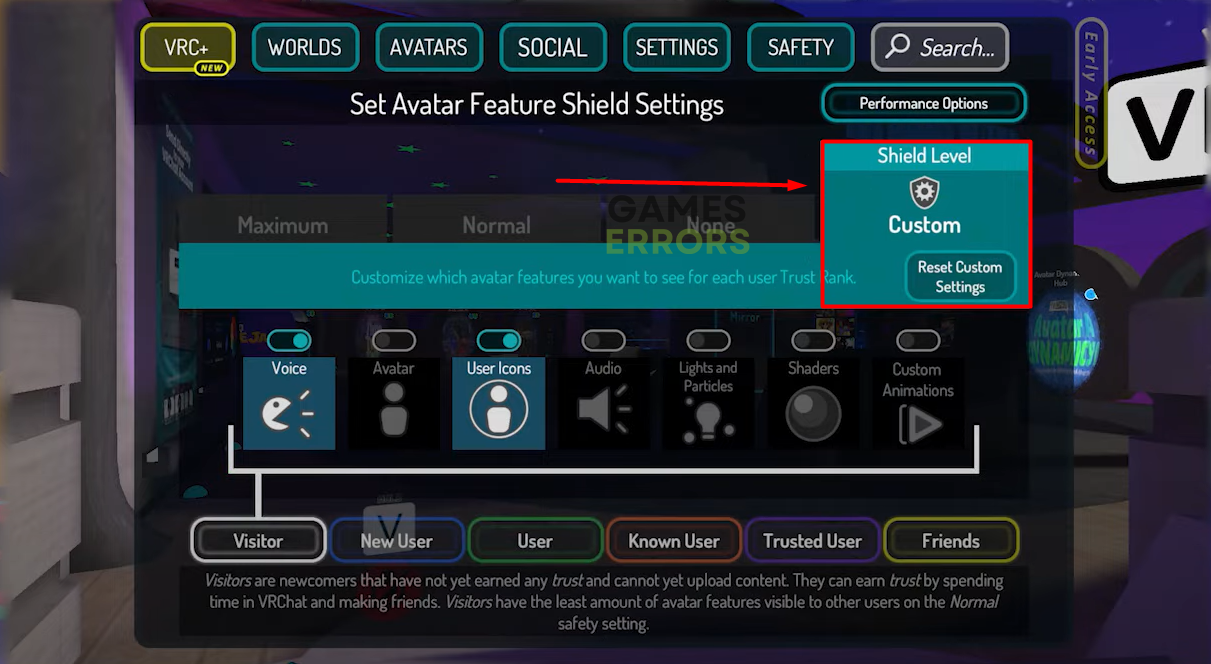
- Select Custom under Shield level.
This will allow you to customize safety settings for different groups of players.

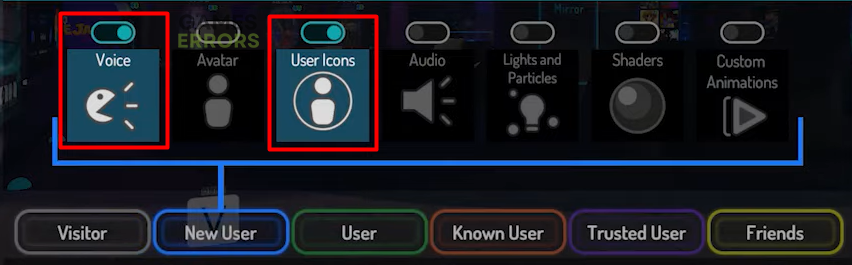
- Navigate to the first group of players (Visitors) by clicking on the corresponding label.
- Enable only Voice and User Icons For Visitors, New Users, and Users.
Disable the other options.

- Enable only Voice, Avatar, and User Icons for Known and Trusted Users.
Disable the other options.
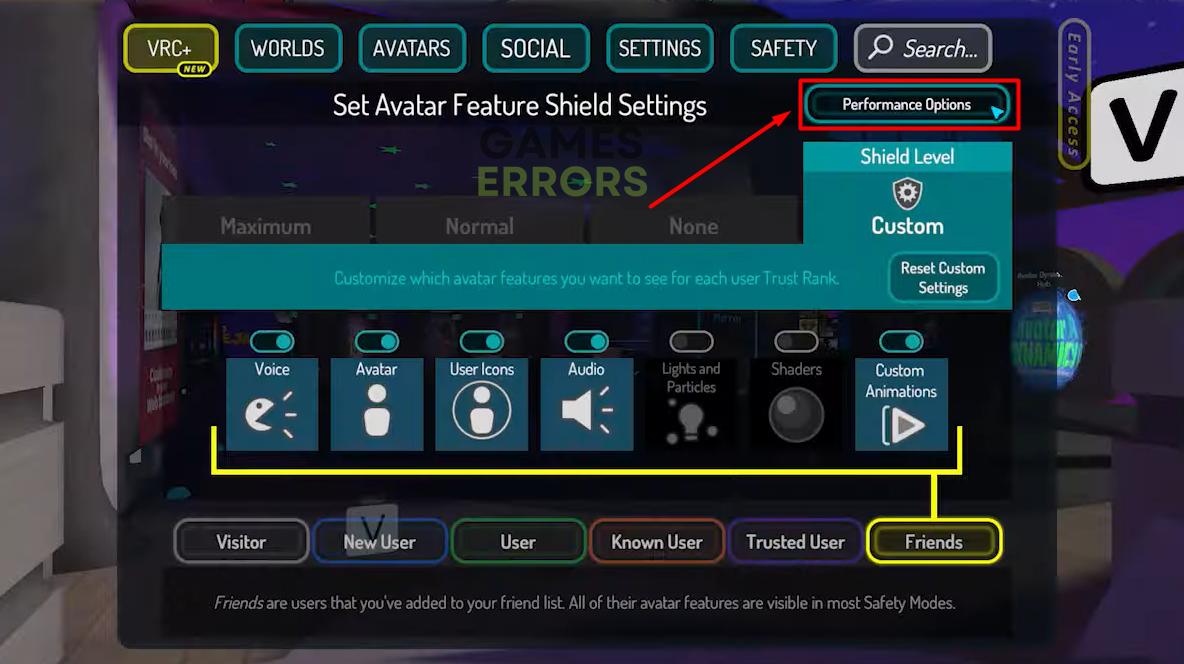
- Enable all options except Lights and Patterns and Shaders for Friends.
You can override safety settings individually by clicking on the Player, and in User Actions, you can select the Show Avatar setting (eye icon). Click the Shield button to revert to safety settings.
2. Tweak performance options
There is a menu for tweaking performance options in which you can customize a fair number of graphical settings that directly influence performance and the game’s stability.
- Open the menu and click on the Safety tab.
- Click on the Performance Options button.

- Under the Avatar Performance section, set Minimum Displayed Performance Rank to Medium and lower Maximum Avatar Download Size if you have problems with the internet connection.

- Click on the Adv. Graphics button to navigate to the next section to customize.
- Lower the Graphics Quality to your liking. We recommend you start with Lower quality.
- Disable Multisample Antialiasing for better performance and less smooth geometry.
The general advance here is experimenting with different Avatar Performance and Advanced Graphics settings to find the balance where the game runs smoothly, without crashes, with enjoyable graphics.
3. Clear game cache files
Like any game nowadays, VRChat stores cache files to load quicker and perform better under a poor internet connection. However, this comes with a price – cache files often pile up, take up memory space, and can cause the game to crash.
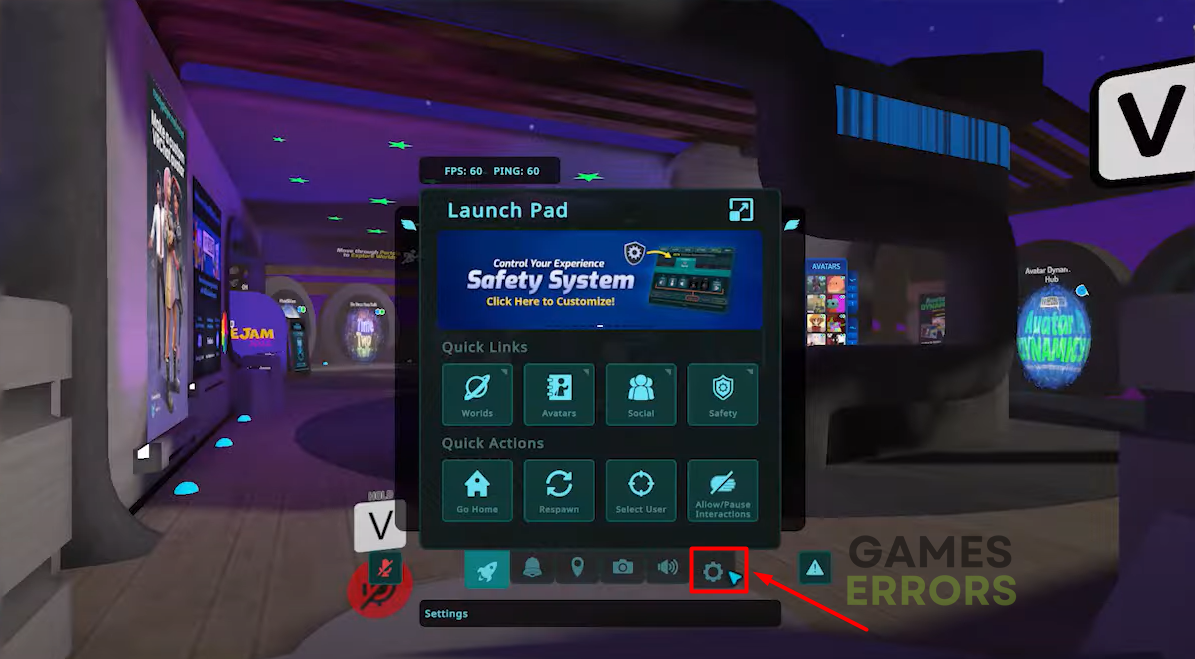
- Open the menu and select the gear button.

- On the top right corner, click on the square with an arrow inside to expand the settings menu.
- Click on the Advance Settings button.
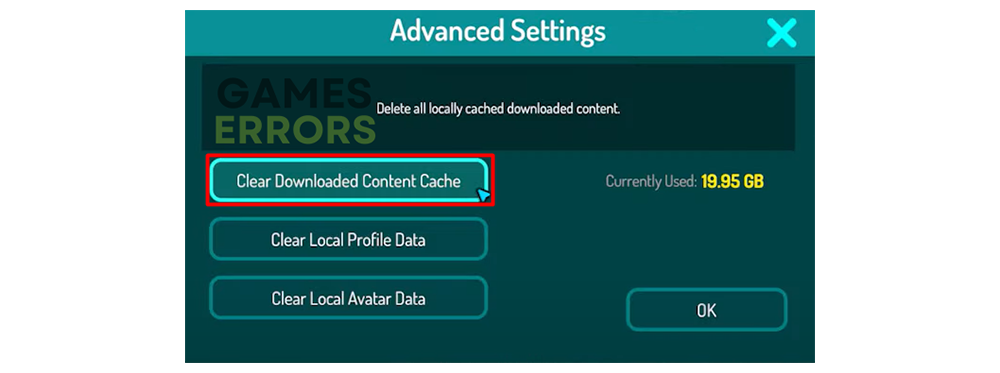
- Select Clear Download Content Cache.

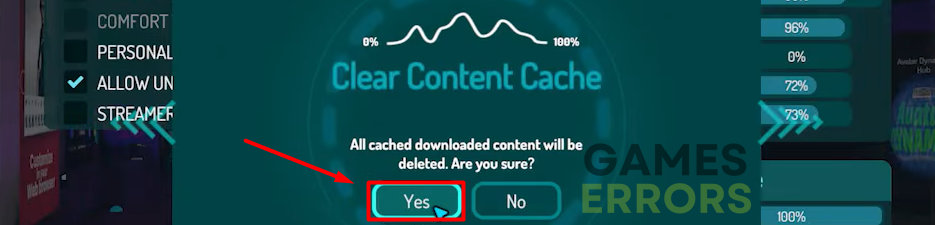
- Confirm in the pop-up by selecting Yes.

- Select Clear Local Avatadar Data and confirm by selecting Yes.
- Click OK and restart your VRChat.
Next time you launch VRChat, it will start without cache files, eventually building up. You can repeat this process now and then to ensure that cache files are not taking an unnecessary memory and ruining your experience.
Conclusion
We hope this guide was helpful and you don’t experience more VRChat crashing on Oculus Quest 2. Share with us any additional solutions that worked out for you, and remember that VR technology is still in development, and no VR hardware can guarantee the perfect experience.

Improve this guide
User forum
1 messages