
Metro Exodus Stuck on Loading Screen: Quick Fixes
Did you launch your favorite first-person shooter, and all you could do was observe the loading screen? No worries, we can help you handle this! 👾
Is Metro Exodus stuck on loading screen, and it seems you can’t do anything about it? Well, what if we told you there are plenty of solutions for this and that you can play the game in no time? Join our journey to discover the causes and fixes for this tricky situation.
If you have a problem starting all the games on your PC, read what to do when games don’t launch.
Why is Metro Exodus stuck on loading screen?
You can’t get past the Metro Exodus loading screen because your PC doesn’t meet the hardware requirements for the game, the game is outdated, there are problems with DirectX 12, Steam cache files pilled up, outdated GPU driver, game files are corrupted, there are problems with Windows or overlays created by other apps.
How to fix Metro Exodus stuck on loading screen?
To get past the loading screen in Metro Exodus, apply these quick fixes and checks:
- Check the system requirements: Find your PC’s specifications by right-clicking on This PC and comparing them to Metro Exodus System Requirements. If some components don’t have enough computing power to handle the game, consider upgrading them.
- Update the game: Game developers had to fix this issue for many gamers, as the problem was related to the game itself. The patch was delivered through an update, which you might skip. Right-click on Metro Exodus in the Steam library, select Properties, where you can choose the Update tab.
- Use DirectX 11: If the game doesn’t get stuck every time, navigate to the settings when it loads and change the DirectX version from 12 to 11. Additionally, you can delete Steam cache files. Check solution three to learn how.
If the loading screen is still the most you can see from the Metro Exodus, follow these step-by-step solutions.
1. Clear Steam cache files
Steam stores cache files locally on your PC to start quicker and make games run faster. However, these files can get messed up and create trouble when launching the game, so we recommend you clear them when you face issues.
- Open File Explorer using the Windows key + E shortcut.
- Paste this path in C:\Program Files (x86)\Steam and hit Enter.
If you installed Steam in another directory, paste the path to that directory.
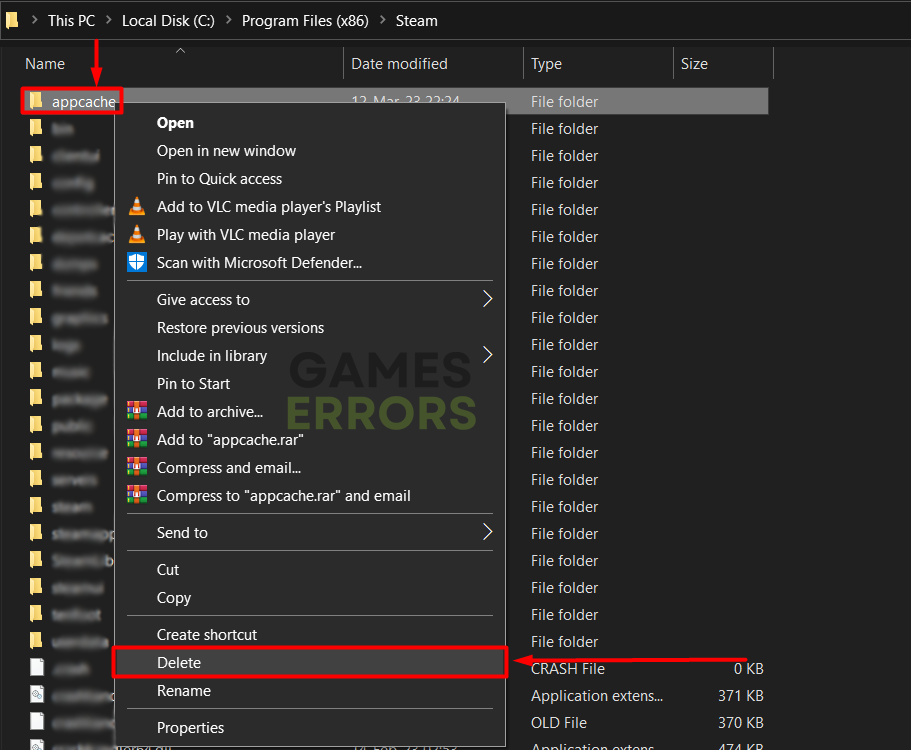
- Right-click on the appcache folder and select Copy.
- Navigate to Desktop using the Windows key + D shortcut.
- Create a backup of the appcache folder using the CTRL + V shortcut.
You can return this backup to the Steam folder if something goes wrong. - Return to the Steam directory, right-click on the appcache folder, and select Delete.

- Restart your PC.

2. Update the GPU driver
Time needed: 5 minutes
An outdated GPU driver will cause a variety of problems on your PC. One potential problem is blocking Metro Exodus from loading, so we advise you always keep it updated.
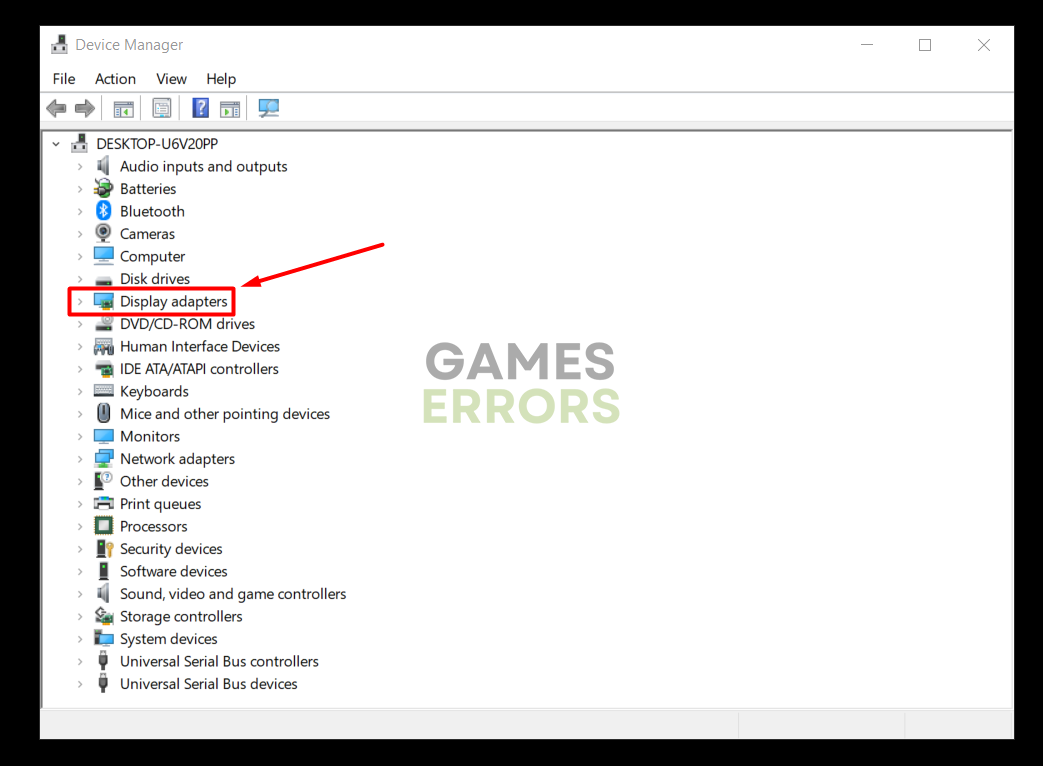
- Click on the Windows icon, type Device Manager, and open it.

- Double-click on Display adapters.

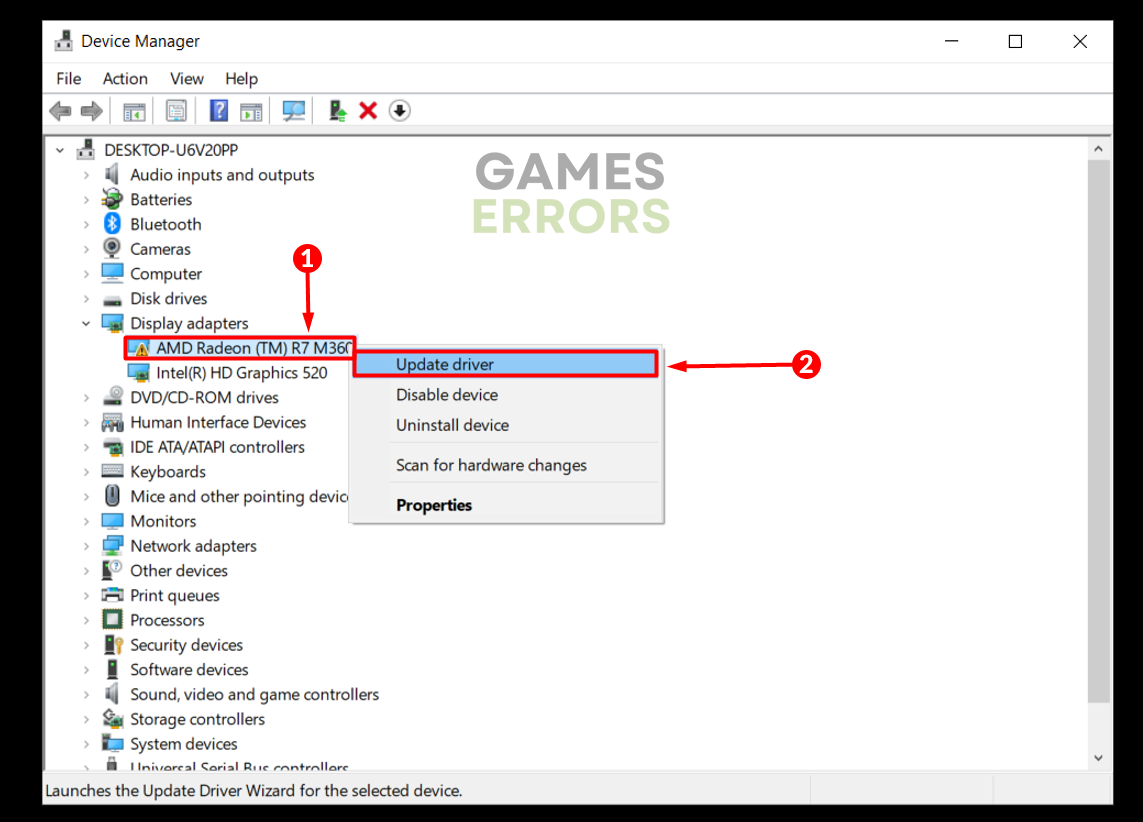
- Right-click on GPU and select Update driver.

- Click on Search automatically for drivers.
- Install the driver update.
- Restart your PC.
PC HelpSoft is an easy-to-use and portable driver updater tool that will scan, monitor and update GPU drivers for you. The tool works flawlessly with other device driver updates as well.
3. Verify game files
Corrupted game files might hold back Metro Exodus from launching. Regardless of whether you use Steam or Epic Games, both platforms have a file verification system that you can use. Take advantage of this feature to check and repair game files.
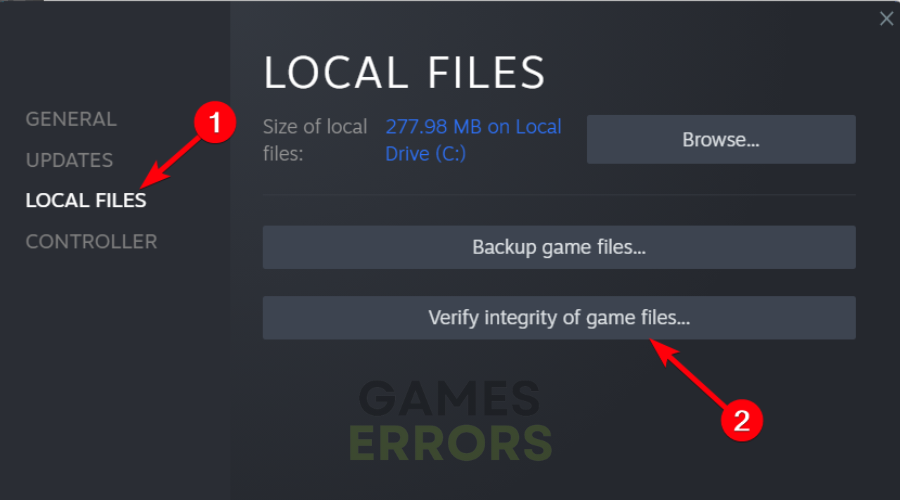
For Steam users:
- Launch Steam and go to the Library.
- Right-click on Metro Exodus and select Properties.
- Select the Local Files tab, and click on Verify integrity of the game files.

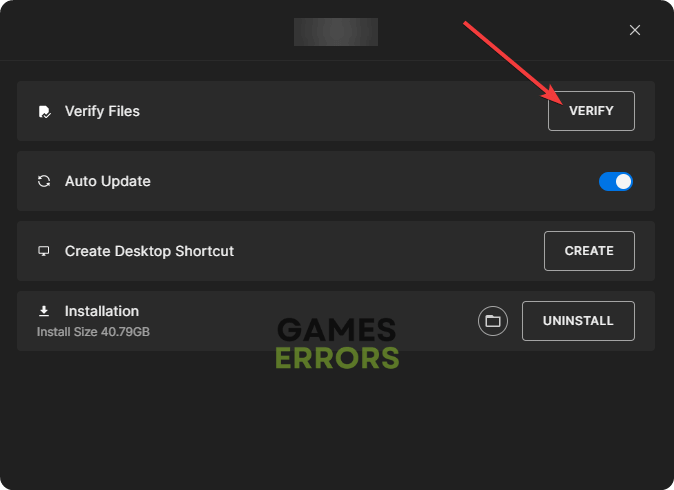
For Epic Games users:
- Open Epic Games Launcher and navigate to the Library.
- Find Metro Exodus, click the three vertical dots, and select Manage.
- Click the Verify button.

Extra steps
Some gamers won’t be able to solve Metro Exodus stuck on loading screen problems, even if they have done everything we described up until now. If you are in a similar situation, try to:
- 🦺 Boot the Windows in Safe Mode: Many gamers claim that booting in Safe Mode is the only solution that helped them get past the loading screen in Metro Exodus. Click on the Windows icon, type msconfig, and hit Enter. Find the Boot Settings in the Boot tab and enable Safe Boot.
- 🎮 Enable Game Mode: This feature comes with Windows that optimizes your PC for gaming. You must press the Windows icon, type Game Mode, and open Game Mode Settings to enable it. Set the slider to On.
- 👨💻 Disable overlays: Geforce Experience, Steam, and Discord are just some apps that most gamers have installed on their PCs. Although these apps are made and optimized for gaming, they can create overlays that cause troubles when loading and playing games. Head to the app setting and disable the overlay. If you don’t use the app, close the app entirely.
- 🧹 Perform a Disk Cleanup: As you use your PC, files pile up and eventually cause troubles with loading games and OS. Click the Windows icon, type Disk Cleanup, and open this tool. Tick Directx shader cache and any other category you want to clean and hit OK.
Conclusion
We hope the Metro Exodus stuck on loading screen problem is part of the past for you. However, if you still experience issues, comment in the section below and share more details on the problem you are experiencing with us. Also, feel free to share any additional solutions that fixed the issue for you.

Improve this guide
User forum
0 messages