
Project Zomboid Crashing on PC: How To Fix It
To fix the crashing issue in Project Zomboid, start by updating GPU drivers and set the game as high priority👌
Project Zomboid, an immersive zombie survival first-person shooter game, offers players a wide range of activities and is currently available for PC users through the Steam platform’s early access program.
However, some players have recently reported encountering Project Zomboid crashing. Given the game’s prolonged presence in the early access phase, it’s not surprising that errors and issues can arise for players.
Fortunately, there are steps you can take to address and fix Project Zomboid crashing. You can fix this issue by following the steps provided and ensuring a smoother and more enjoyable gaming experience.
Why is my Project Zomboid crashing?
Just like with any other game, there can be several reasons why a game could be experiencing various issues, including crashes. Some of the most common reasons include:
- An incompatible PC configuration
- Outdated graphics driver
- Outdated Windows version
- Outdated DirectX version
- Outdated game version
- Missing or corrupted game files
- Overlay apps
⚡How do I stop Project Zomboid from crashing?
Before jumping into the solutions, always do the following pre-checks:
- Ensure your PC meets the minimum system requirements to run Project Zomboid.
- Disable your Antivirus or security software.
- Run the game as an administrator.
- Reinstall Microsoft Visual C++ Runtime.
- Verify Integrity of Game Files.
If none of the above steps work, try the steps below without wasting more time.
Table of content:
- Update Graphics Drivers
- Set High Priority in Task Manager
- Set High Performance in Power Options
- Try Disabling Overlay Apps
1. Update Graphics Drivers
Time needed: 4 minutes
Outdated graphics card drivers are a common cause of issues such as Project Zomboid crashing. Regularly updating graphics drivers on your Windows system is necessary to ensure the smooth performance of your games. To do this:
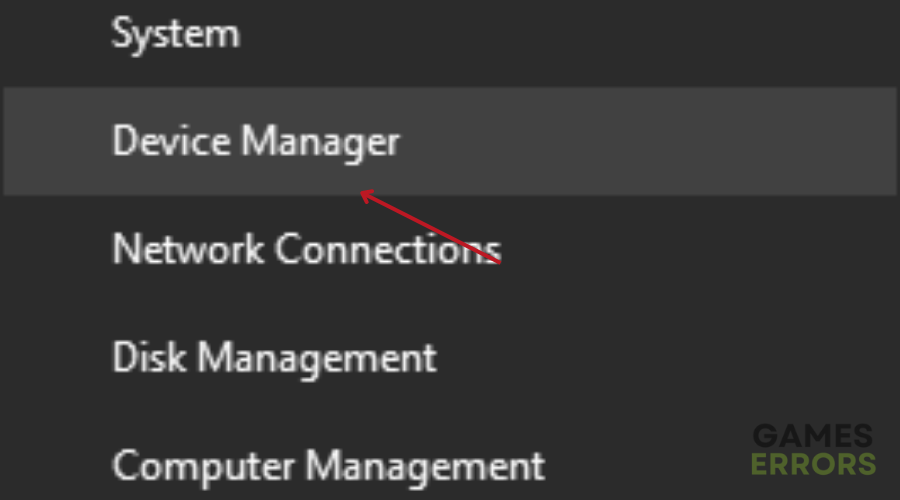
- Right-click on the Start Menu to open the Quick Access Menu.
- Click on Device Manager from the list.

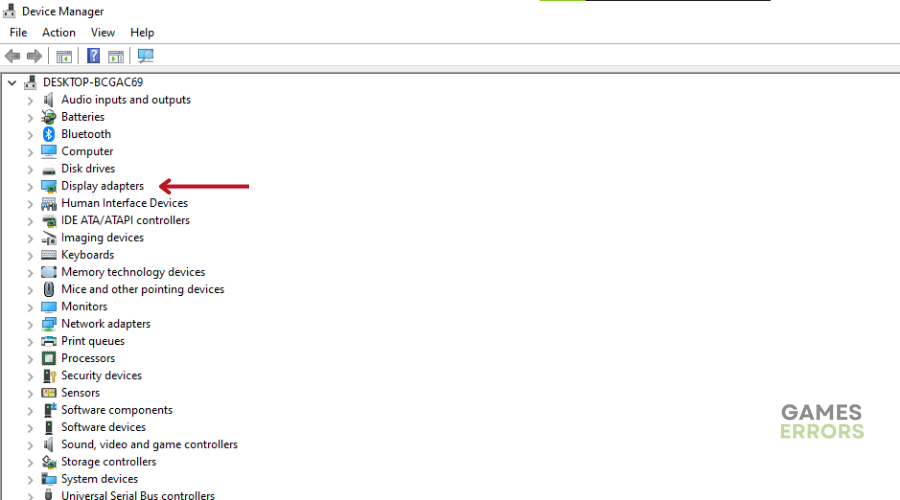
- Double-click on the Display adapters category to expand the list.
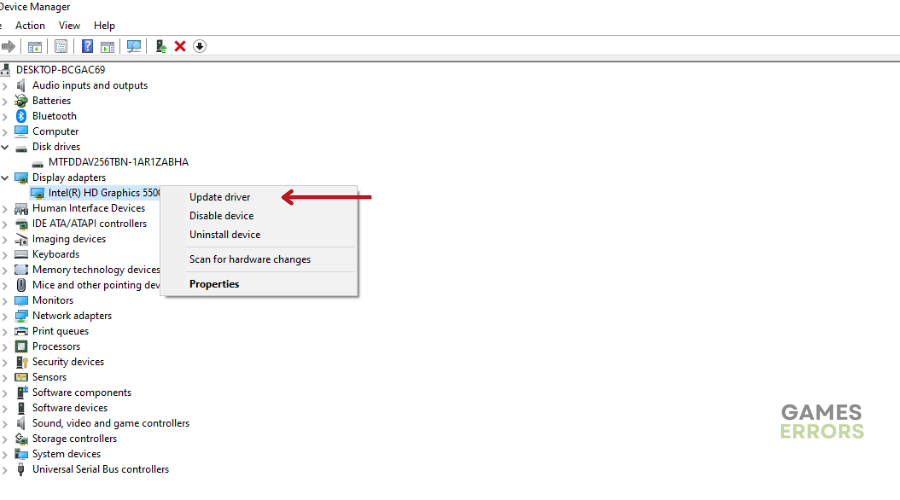
- Right-click on the dedicated graphics card name.
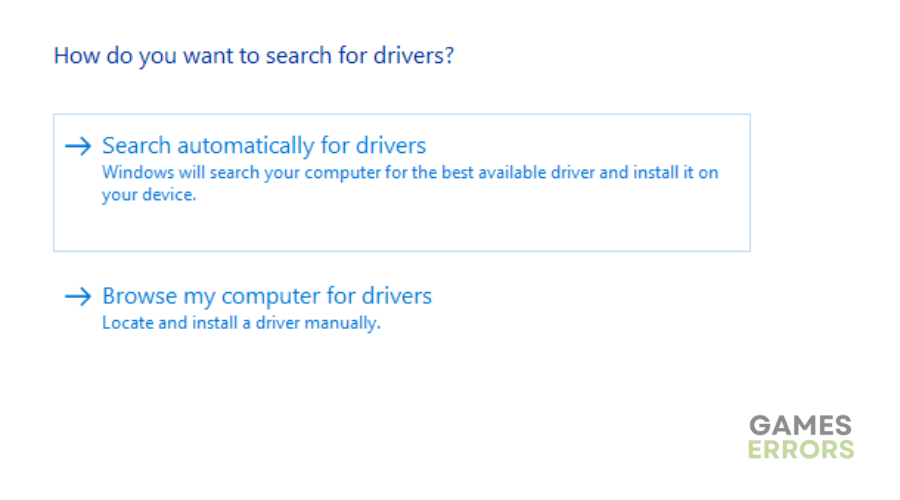
- Select Update driver > Choose Search automatically for drivers.
- If an update is available, it will automatically download and install the latest version.
- Once the installation is complete, make sure to reboot your computer for the changes to take effect.
To ensure a seamless gaming experience, it is important to have the latest drivers installed. That is why we recommend using a third-party tool like PC HelpSoft. This tool scours the internet for the best driver for your PC and installs it in your PC thus saving you time and effort.
2. Set High Priority in Task Manager
Setting high priority in Task Manager for Project Zomboid tells your Windows system to allocate more resources to it, improving its performance. To do this:
- Right-click on the Start Menu and select Task Manager.
- Click on the Processes tab.
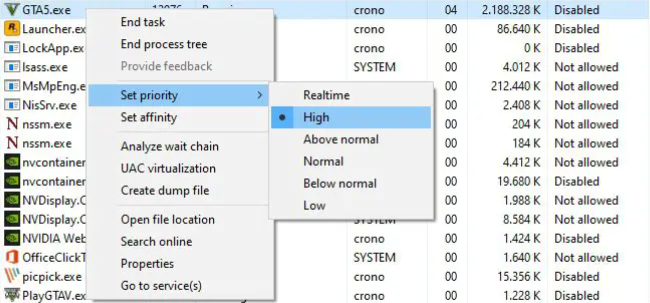
- Right-click on the Project Zomboid game task.
- Select Set Priority and choose High.

- Close Task Manager.
- Finally, run the Project Zomboid game to check if it is crashing on your PC or not.
3. Set High Performance in Power Options
To improve performance, switch your Windows system from Balanced mode to High-Performance mode in Power Options. To do this:
- Click on the Start Menu.
- Type “Control Panel” and click on it from the search results.
- In the Control Panel, navigate to “Hardware and Sound” and select “Power Options.”
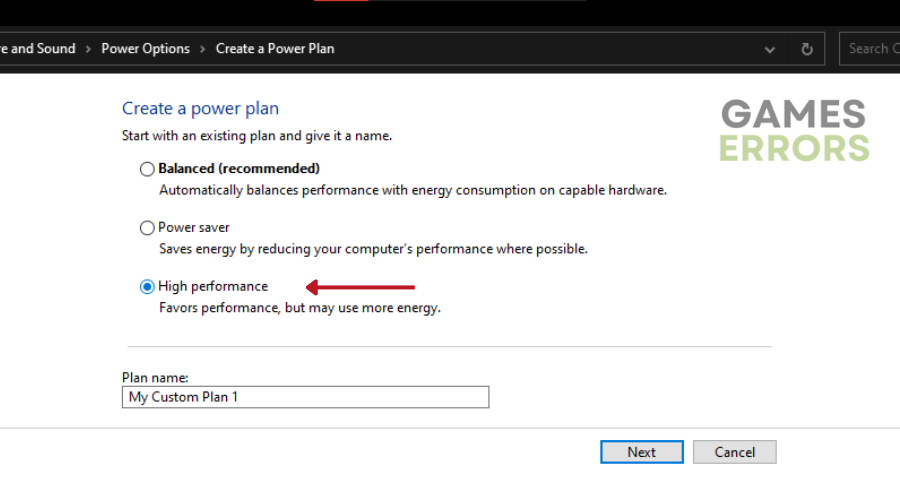
- Click on “High Performance” to choose it as your power plan.
- Close the window.
- Fully shut down your computer by clicking on the Start Menu, selecting “Power,” and then choosing “Shut Down.”
- Once your computer is completely turned off, you can power it on again.

⭐However, keep in mind that this mode may lead to higher power consumption or reduced battery life, especially on devices operating on battery power.
4. Try Disabling Overlay Apps
🎮Disable Discord Overlay:
- Launch the Discord app.
- Click on the gear icon at the bottom.
- Under App Settings, click on “Overlay.”
- Turn on the “Enable in-game overlay” option.
- Click on the “Games” tab and select “Project Zomboid.”
- Finally, turn off the “Enable in-game overlay” toggle.
- Reboot your PC to apply the changes.

🎮Disable Xbox Game Bar:
- Press Windows + I keys to open Windows Settings.
- Click on “Gaming.”
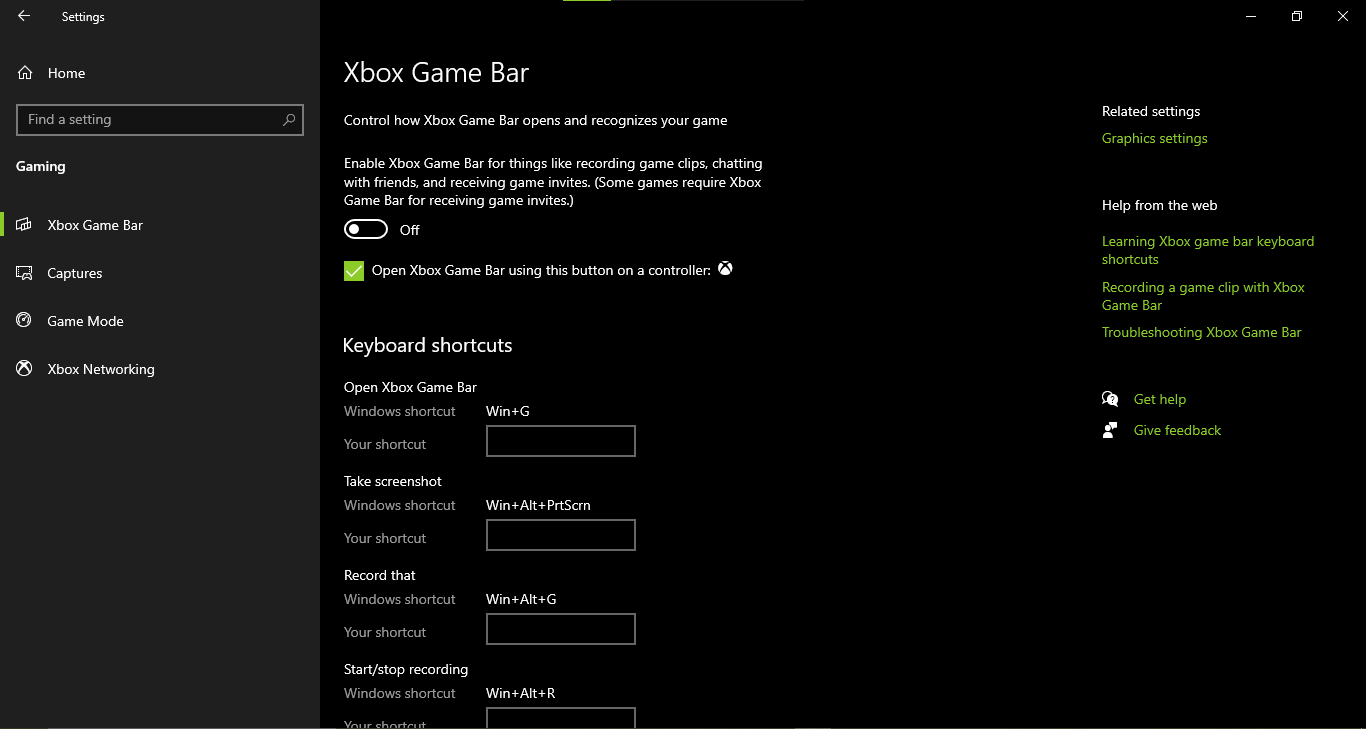
- Go to the “Game Bar” section.
- Turn off the “Record game clips, screenshots, and broadcast using Game bar” option.

- If you’re unable to find the “Game Bar” option, search for it within the Windows Settings menu.
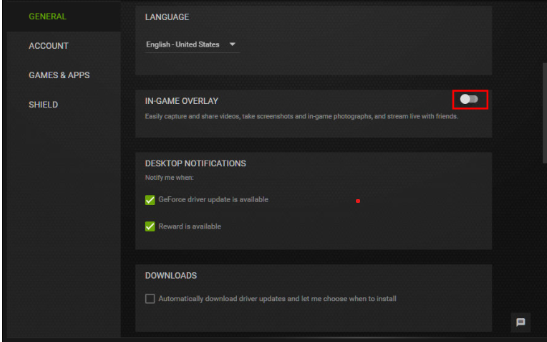
🎮Disable Nvidia GeForce Experience Overlay:
- Launch the Nvidia GeForce Experience app.
- Head over to “Settings.”
- Click on the “General” tab.
- Disable the “In-Game Overlay” option.

- Restart your PC to apply the changes.
- Launch the game again.
Conclusion
We hope one of the solutions has helped you fix Project Zomboid crashing. You can also check out our ultimate guide on how to stop games from crashing for more suggestions. Happy gaming!

Improve this guide
User forum
1 messages