
ROG Ally Cloud Recovery Stuck on the Checking [Quick Fix]
It's good to double-check things, but ROG Ally sometimes does it too long. Let's see what you can do about it! 🚀
Booting your handheld console only to see ROG Ally Cloud Recovery stuck on the checking will cause frustration. Regardless if the problem occurred from nowhere or you tried to upgrade the console’s memory, we have a way to resolve it!
If you can’t even begin Cloud Recovery, learn what to do when server authentication fails for Cloud Recovery on ROG Ally.
Why is ROG Ally Cloud Recovery stuck on the checking?
ROG Ally Cloud Recovery is stuck on the checking due to temporary issues on the console, wrong date/time settings, misplaced memory, outdated BIOS or network driver, or security settings on your home network.
💡 This issue often occurs when you install a new memory on your ROG Ally.
How to fix ROG Ally Cloud Recovery stuck on the checking?
These quick fixes and checks will get you going:
- Reboot your device: Some gamers claim that the problem was fixed after they restarted their device a couple of times.
- Check the date/time settings: Your settings must correspond to your time zone. If you do it from BIOS, look for the pencil icon to find these settings.
- Check memory placement: If you have changed the memory in the device, check if it was correctly placed.
Follow the solutions to move past Cloud Recovery on ROG Ally.
1. Update ROG Ally BIOS
Time needed: 3 minutes
Since its release, ROG Ally received many BIOS updates, some of which are crucial for the functioning of the console. This goes especially for those who upgraded the console’s memory, so proceed with updating the BIOS.
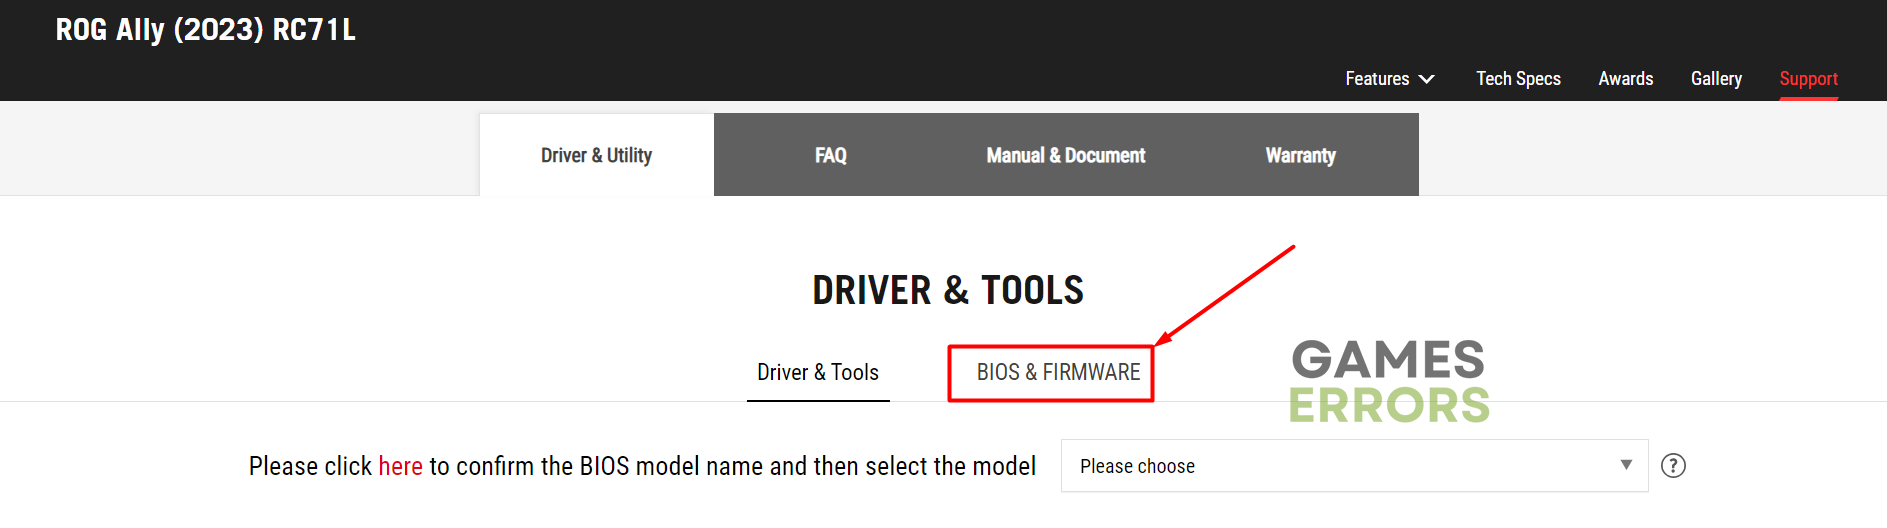
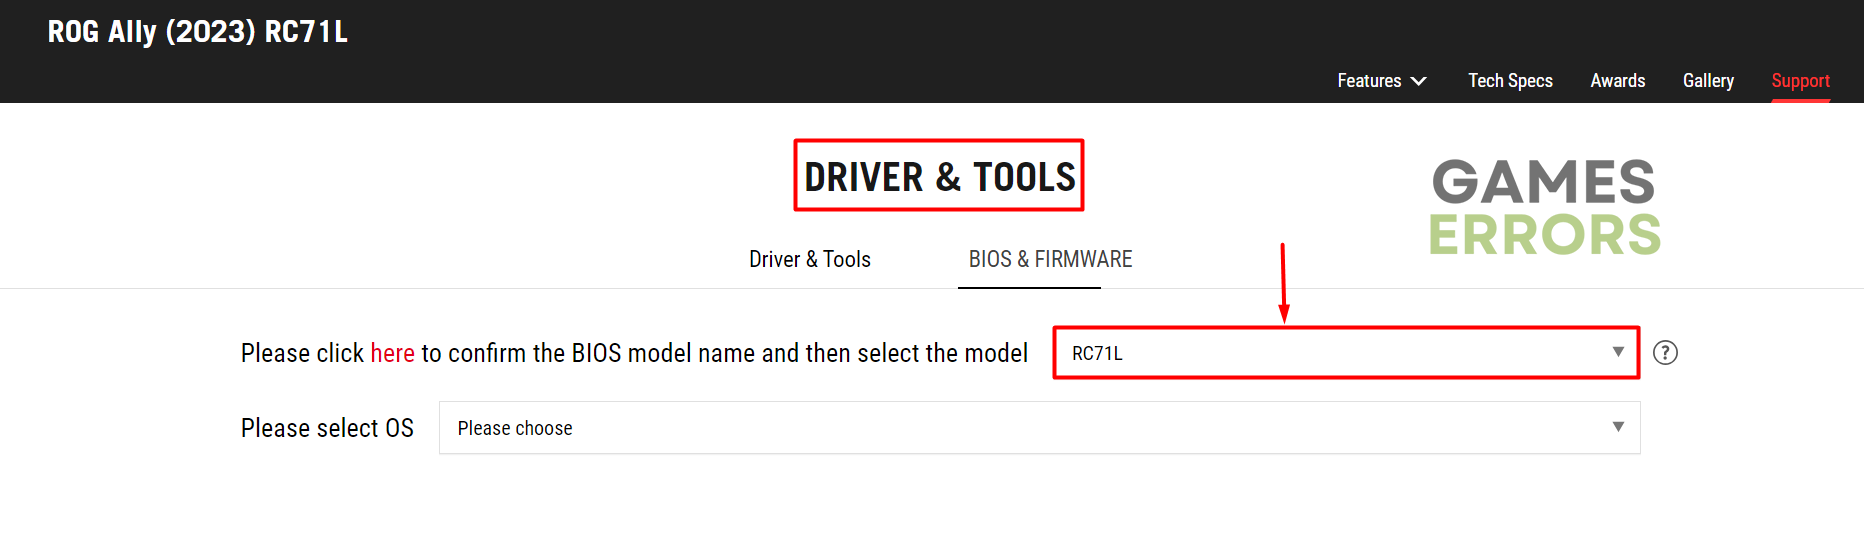
- Head to the Asus Driver & Tools page and select Bios & Firmware.

- Select your ROG Ally model.

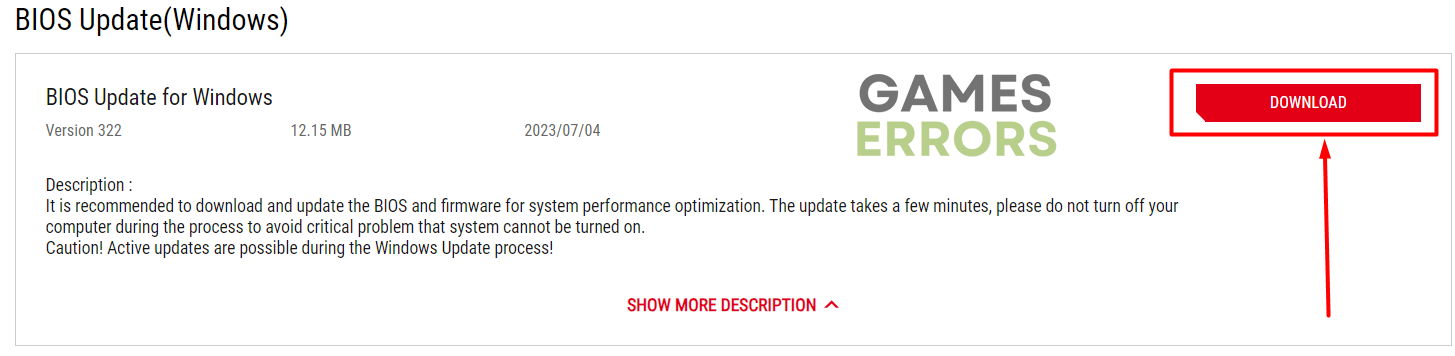
- Click on the Download button for BIOS Update for Windows.

- Run the executable (.exe) file once downloaded.

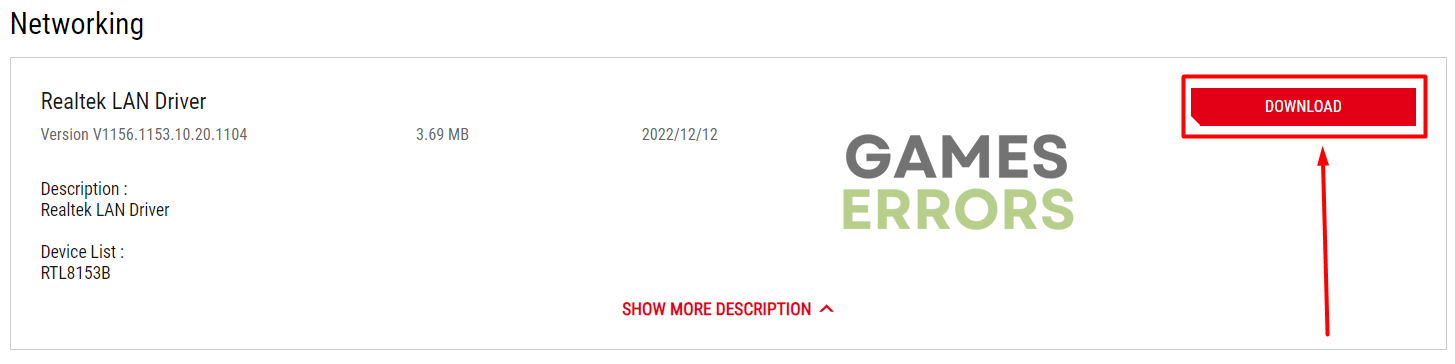
2. Update the network driver
The network driver handles the communication between your console and the Asus Cloud Services during the Cloud Recovery, so it must run on the latest version.
- Head to the Asus Driver & Tools page and select your ROG Ally model.

- Select Windows 11 for your OS.
ROG Ally runs only Windows 11.
- Click the Download button under the Networking section.

- Run the installation on your ROG Ally and follow the steps.

3. Disable network security features
Some routers set strict security settings to keep you safe from various threats. However, these settings can block the console from completing Cloud Recovery, so we advise temporarily disabling them.
- Open your browser and type the IP address of your router.
It should be written on the router (192.168.X.X or 10.0.X.X) - Type the login credentials and hit the Log In button.
Find them next to the IP address on the router.
- Navigate to the Security settings under Advanced and select None for Security Settings.
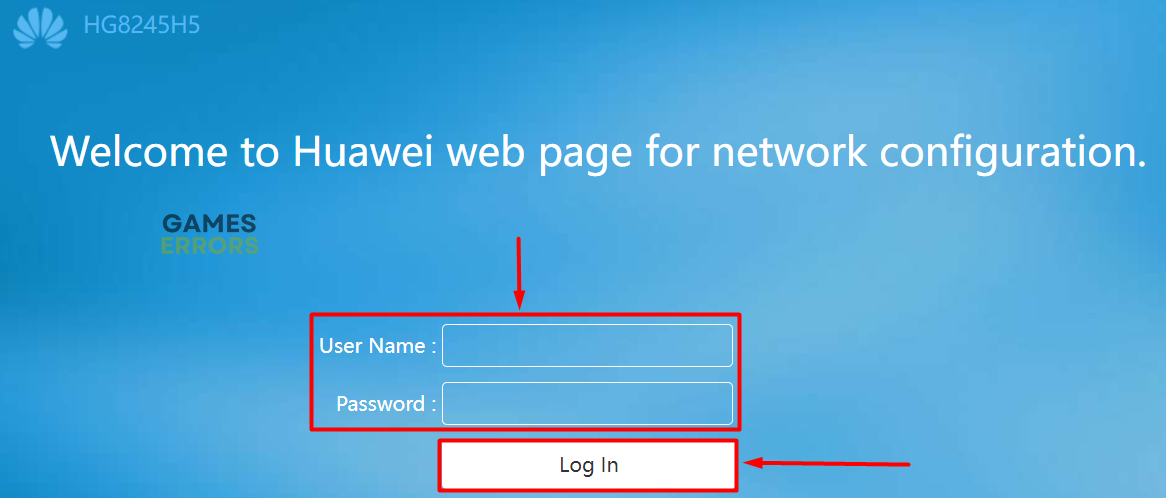
⚠ Don’t forget! If this is a solution for your issue, re-enable protection settings, and communicate with your ISP on how to add only ROG Ally as an exception.
Extra steps
If the ROG Ally Cloud Recovery is still stuck on the checking, try to:
- ⏳ Give it some time: Wait a bit longer and check if the Cloud Recovery moves forward, as some players claim that it sometimes just takes longer than usual.
- 🌐 Change network settings: Switch between 2.4 GHz and 5 GHz wireless networks in the BIOS settings.
- 📶 Use another network: Connect to another wireless network or use a mobile hotspot as an alternative.
Related articles:
- Cloud Recovery Server Authentication Failed ROG Ally [Fixed]
- ROG Ally Left Bumper Not Working: How To Fix It Quickly
- ROG Ally Not Detecting SD Card: How To Make It Work
- Games Crashing On ROG Ally? Here Are The Best Fixes!
Conclusion
These were the most efficient way to troubleshoot the ROG Ally Cloud Recovery stuck on the checking problem. For most of you, changing the date/time settings and updating the BIOS will solve it, but if the problem persists, don’t forget to update the network driver and change the security settings on your network.
Additionally, try to use an alternative network or mobile hotspot to ensure the connection is not a problem and happy gaming!

Improve this guide
User forum
0 messages