
The Finals High CPU Usage: How I Fixed It Efficiently
The high CPU utilization is an annoyance, especially when playing games like The Finals, since it might cause latency. So, check out this comprehensive guide to see how I fixed it.
I thought I was the only one, but I’ve observed that many others have had high CPU usage when playing The Finals. Some even complained that their computer’s CPU was overheating. Fortunately, mine did not overheat. However, the usage rate was constantly at 100%. However, this is not the first time I’ve run across this problem, especially with a new game, and I managed to fix it by using some methods I learned years ago from gaming veterans.
How to fix the high CPU usage issue in The Finals?
Before you try the more intricate solutions, I recommend that you apply some of the following quick fixes. Also, consider verifying if your hardware meets the minimum system requirements of the game.
- Limit FPS in Games: I limit the FPS in The Finals to reduce the load on the CPU, often leading to a decrease in high CPU usage.
- Tweak Graphics Settings: I tweak graphics settings in The Finals, lowering them to reduce the CPU load and alleviate high usage.
- Clean Your PC: Regularly cleaning my PC, both physically and digitally, helps maintain optimal performance and can reduce high CPU usage in The Finals.
- Check for Background Processes: I check and close unnecessary background processes to free up CPU resources for The Finals, helping to lower its high CPU usage.
- Perform a Clean Boot: Performing a clean boot helps me identify if background applications are causing high CPU usage while playing The Finals.
These are the most effective solutions I tend to use when I run into a high CPU problem. Try them out and mix them together for better results. Also, keep track of everything you have tried so far.
- Update Your Graphics Drivers
- Verify the Game Files
- Disable Superfetch
- Check for Memory Leaks
- Adjust Affinity Settings
- Adjust System Configuration
- Change Power Plan
- Adjust Windows Update Settings
- Check for Malware
- Update BIOS
- Disable Windows Search Indexing
1. Update Your Graphics Drivers
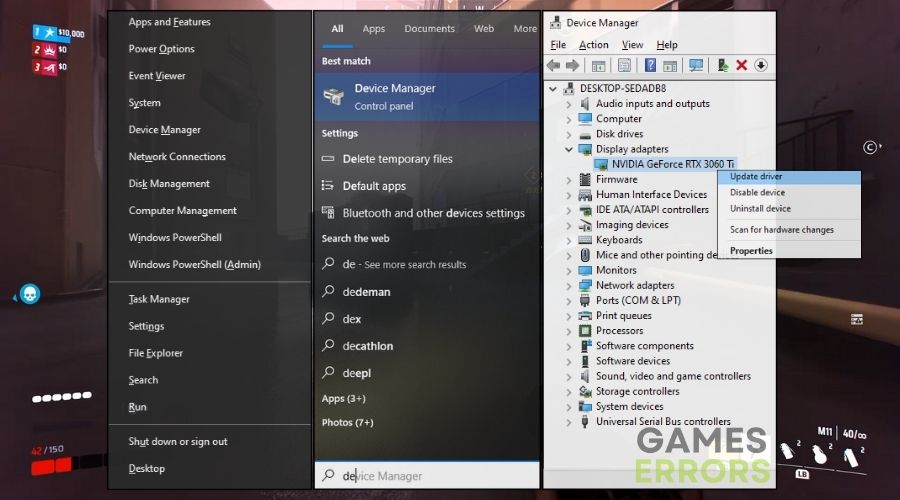
I keep my graphics drivers up to date because outdated drivers might cause unnecessary CPU load and high usage when playing The Finals.
- Open Device Manager: Press the Windows key, type Device Manager, and click it.
- Expand Display Adapters: Click on Display adapters.
- Update Driver: Right-click your graphics card and choose Update driver.
- Automatic Search: Select Search automatically for updated driver software.
- Install and Restart: Follow any prompts to install, then restart your computer.
2. Verify the Game Files
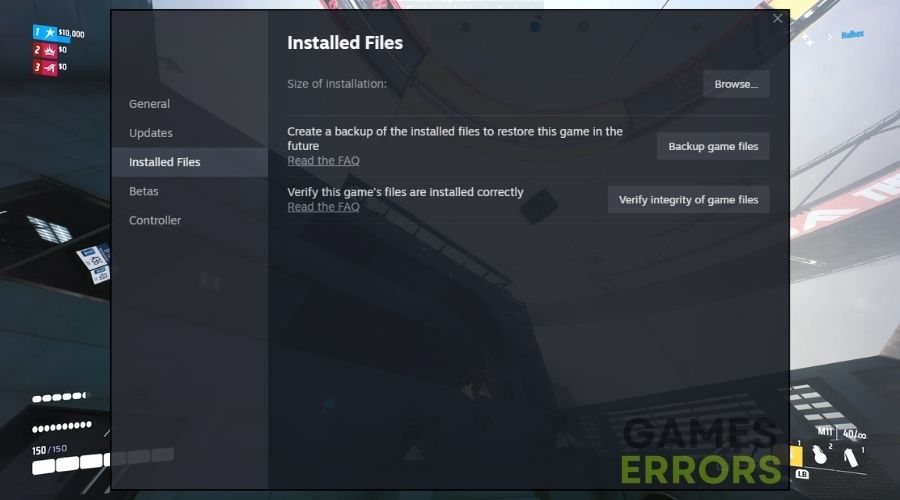
By periodically verifying the game files, I ensure that The Finals isn’t dealing with faulty data, which can occasionally cause significant CPU utilization.
- Open Game Launcher: Open the platform like Steam where The Finals is installed.
- Game Properties: Right-click on The Finals and select Properties.
- Verify Files: Click the Local Files tab, then Verify integrity of game files.
3. Disable Superfetch
I deactivate Superfetch (SysMain) since it might cause high CPU utilization by preloading apps unnecessarily.
- Run Services: Press Win + R, type services.msc, and hit Enter.
- Find Superfetch: Scroll down to find Superfetch or SysMain.
- Disable: Right-click it, select Properties, change Startup type to Disabled, and click OK.
4. Check for Memory Leaks
I keep an eye out for memory leaks in The Finals, as they might cause excessive CPU consumption owing to poor memory allocation.
- Open Task Manager: Press Ctrl + Shift + Esc.
- Monitor Performance: Go to the Performance tab and monitor memory usage over time.
- Identify Leaks: Look for continuously increasing memory usage while running The Finals.
5. Adjust Affinity Settings
I change The Finals’ CPU affinity settings to dedicate particular cores to it, which helps control CPU utilization.
- Open Task Manager: Press Ctrl + Shift + Esc and start The Finals.
- Details Tab: Go to the Details tab.
- Right-Click Game: Right-click on The Finals process.
- Set Affinity: Choose Set affinity and select the CPU cores to use.
- Apply and Close: Click OK to apply changes.

6. Adjust System Configuration
I fine-tune my system settings to ensure it’s gaming-optimized, which can assist prevent high CPU usage while playing The Finals.
- System Configuration Tool: Press Win + R, type msconfig, and press Enter.
- General Tab: Adjust settings under the General tab for optimized performance.
- Apply and Restart: Click Apply, then OK, and restart your computer.
7. Change Power Plan
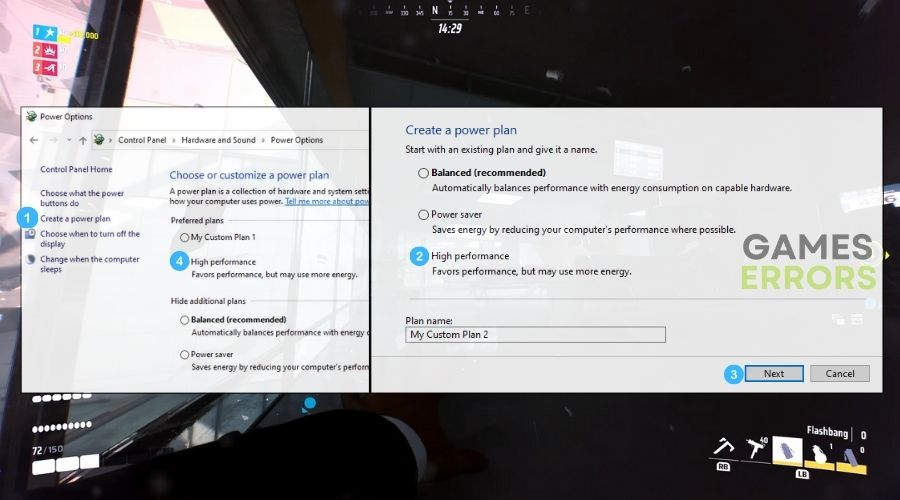
Switching to a high-performance power plan gives The Finals extra resources, which could decrease excessive CPU utilization while playing.
- Control Panel: Click Start, type Control Panel, and open it.
- Power Options: Select Power Options.
- High Performance: Choose High Performance plan.
8. Adjust Windows Update Settings
I adjust Windows Update settings in order to avoid background downloads and installations from generating high CPU usage when gaming.
- Open Settings: Click the Start button, then the gear icon for Settings.
- Update & Security: Go to Update & Security.
- Windows Update: Adjust settings for Windows Update to a schedule that doesn’t interfere with gaming.
9. Check for Malware
I regularly scan for malware, as it can cause high CPU usage by running malicious processes in the background.
- Open Antivirus: Start your antivirus program or the Virus & Threat Protection feature.
- Run Full Scan: Choose to run a full system scan.
10. Update BIOS
I update my BIOS to ensure that my motherboard is operating at peak performance, which might affect CPU performance and consumption in games like The Finals.
- Check BIOS Version: Press Win + R, type msinfo32, and check your current BIOS version.
- Manufacturer’s Website: Go to your motherboard manufacturer’s website and find the latest BIOS update.
- Download and Update: Follow the manufacturer’s instructions to update the BIOS.
- Restart Computer: Restart your PC after the update.
11. Disable Windows Search Indexing
Turning off Windows Search indexing can help lower CPU consumption because it can consume a lot of resources in the background while running.
- Services Menu: Press Win + R, type services.msc, and hit Enter.
- Find Windows Search: Scroll and find Windows Search.
- Disable Service: Right-click, select Properties, set Startup type to Disabled, and click OK.
Why The Finals is experiencing a high CPU problem?
The major cause of The Finals’ high CPU use might be due to improper coding and programming. However, by excluding that scenario, the 100% CPU might be caused by outdated drivers, damaged game files, malfunctioning system services, or background apps.
To summarize, you should try all of the previously listed options to resolve the high CPU consumption issue in The Finals. In the past, I found that disabling Superfetch service and updating the BIOS worked well for me. However, be cautious because updating it may cause more problems. Also, keep an eye out for malware, which can come from a variety of sources. Additionally, if you discover any other methods to fix the issue, feel free to share them in the comments.
Additional Resources:

Improve this guide
User forum
0 messages