
Valheim Won't Connect to Server: Why & How to Fix it
Valheim won't connect to server? Don't worry. Apply these solutions to fix it⚒

Valheim, a Viking-themed survival game, has taken the world by storm, and for a good reason. The Minecraft replica combines the best elements from each survival game available on the market today.
Despite its great reception from its fan base, players have reported experiencing various issues, including Valheim won’t connect to server.
Understandably, this can be frustrating for anyone trying to play the game. That’s why we’ve done our research and found out what’s causing this and how to fix it.
Why can’t I connect to a Valheim server?
While you are not wrong to assume that a problem with the server is probably coming from their end, which may be the case, sometimes the problem can be traced back to your end.
Factors such as overload in the server, maintenance or unexpected downtime, antivirus software or Windows Defender blocking the connection, corrupted game files, and an outdated version of the game are common causes of this problem.
How do I connect to my Valheim server?
Before jumping into the solutions, try:
- Checking the official Valheim website or the game’s official Twitter channel for updates on server status.
- Restart Your PC.
- Restart your router.
Table of contents:
- Delete Dedicated Server files
- Verify the Integrity of Game Files
- Run your game as an administrator
- Update your network adapter driver
- Disable IPv6
- Release and Renew IP Address
1. Delete Dedicated Server files
- Open File Explorer and navigate to the following location: C:\Users<username>\AppData\LocalLow\IronGate\Valheim\Worlds
- Note: Make sure to replace <username> with your actual username.
- Delete the Dedicated.db file.
- Look for Dedicated.db.backup and remove “.backup” from its name.
- Restart your computer.
- Retry setting up the Dedicated Server, and it should work.
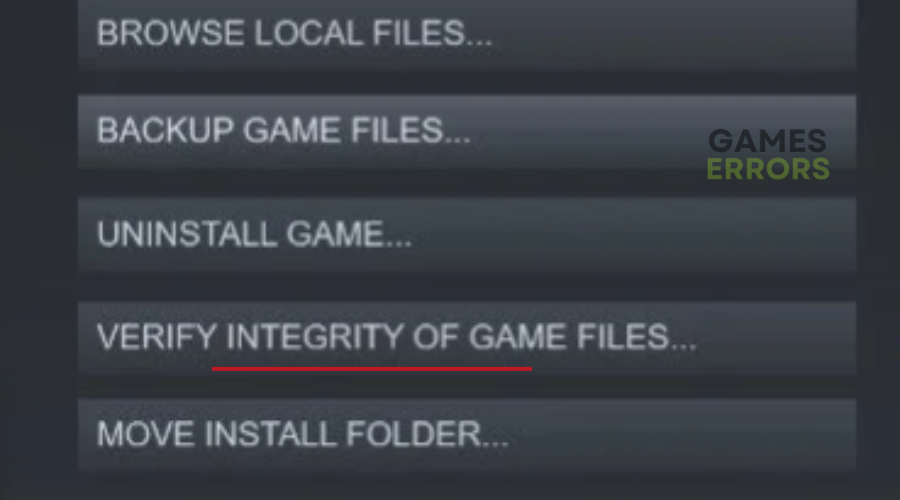
2. Verify the Integrity of Game Files
- Open your Steam Client.
- Under the Library tab, find your game title and right-click on it.
- Select Properties.
- Click on the Local files tab.
- Click on the Verify integrity of game files… tab.

- Wait for the process to re-download and replace any missing or corrupted game files. This may take a while.
- Once the process is complete, you should be able to play the game without any issues.
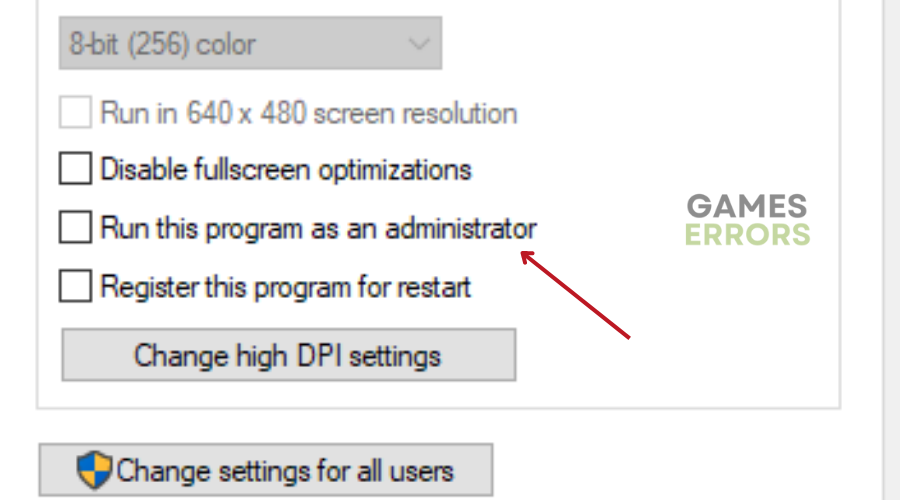
3. Run your game as an administrator
- Press the Windows logo key + R at the same time to open File Explorer.
- Find the valheim.exe file on your system, which is typically located in C:Program Files.
- Right-click on valheim.exe and select Properties.
- Select the Compatibility tab.
- Check the box next to Run this program as an administrator.
- Click Apply and then OK.
- Launch Valheim and attempt to join your server to see if you can connect.
4. Update your network adapter driver
Time needed: 4 minutes
Outdated network drivers can cause a variety of issues when connecting to servers, including slow connections and frequent disconnections. To update your network driver:
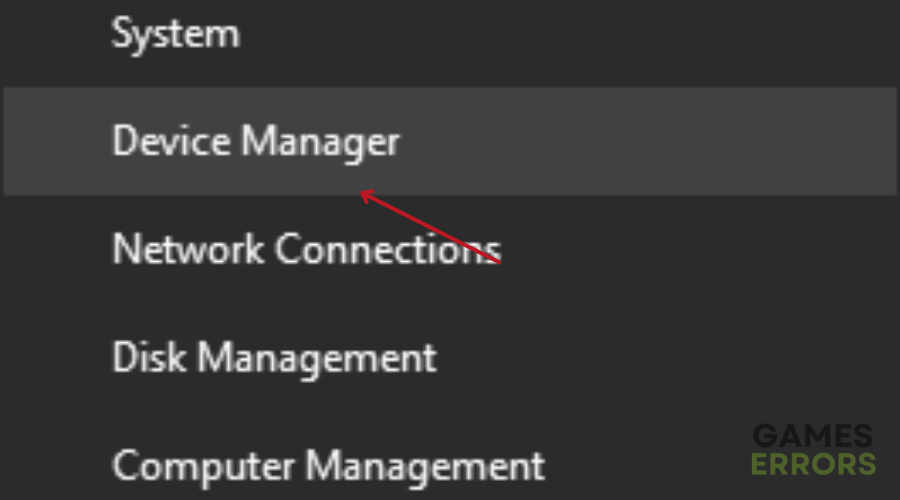
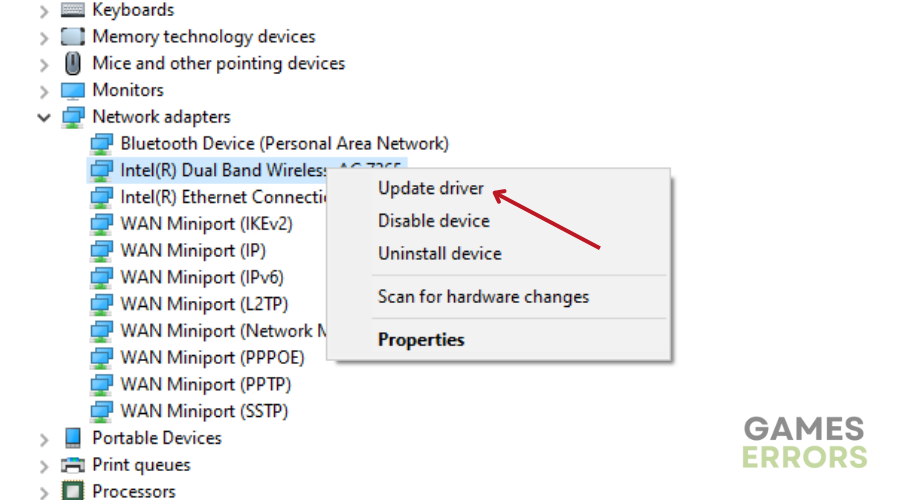
- Right-click on the Windows Start menu and select Device Manager from the Quick Menu.
- Open Device Manager. and double-click on Network adapters.

- Right-click on your network driver and select Update driver.
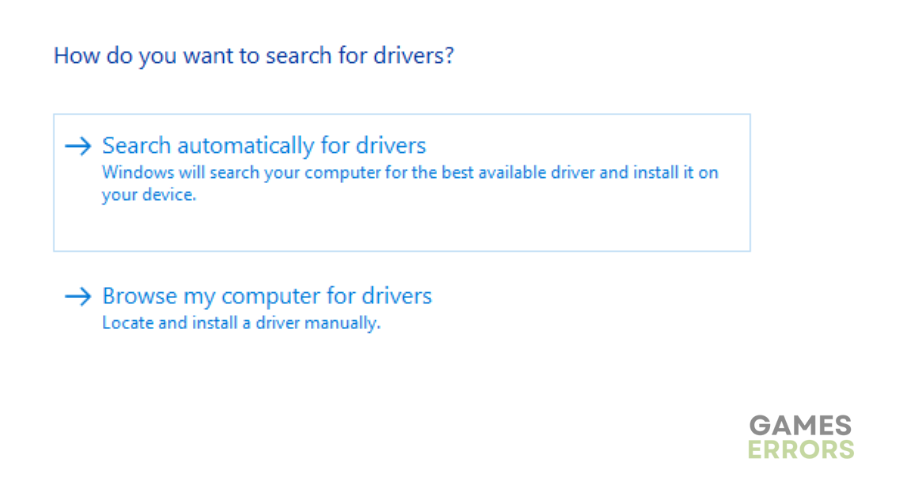
- Click on Search automatically for drivers and wait for the Windows update to finish the process.
- Once the update is complete, restart your computer.
- Launch Valheim to see if the issue of “won’t connect to server” has been resolved.
If you’d rather not manually update your PC drivers, you can always automate this process. We recommend using a third-party tool like DriveFix. Drivefix will find, download, and install the best and latest drivers for your PC hassle-free.
5. Disable IPv6
- Press the Windows logo key and R simultaneously to open the Run dialog box.
- Type “control” and press Enter to open the Control Panel.
- Make sure that the Control Panel is being viewed by Category, and then click on Network and Internet.
- Click on Network and Sharing Center.
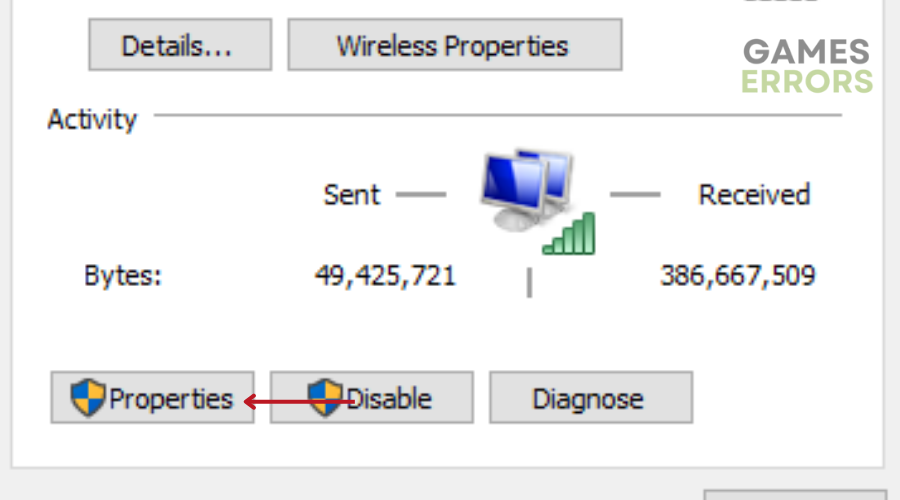
- Locate your network connection, whether it’s Ethernet, Wi-Fi, or another type, and click on it.
- Click on Properties.
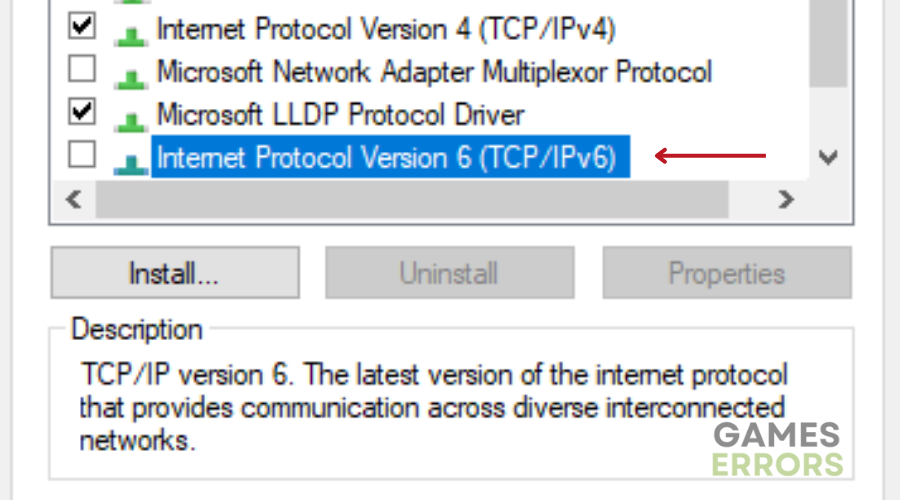
- Find Internet Protocol Version 6 (TCP/IPv6) and uncheck the box next to it.
- Click OK to save the changes.
- Attempt to join your dedicated server and you should now be able to connect without any issues.
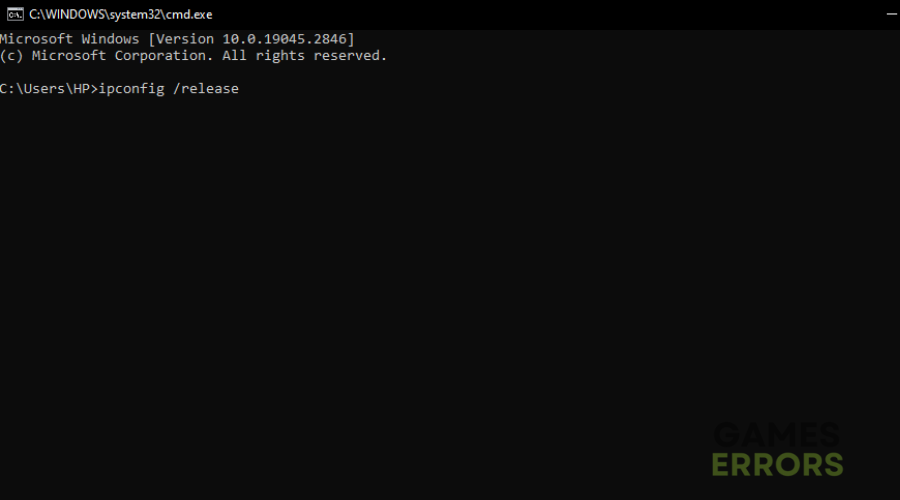
6. Release and Renew IP Address
- Open the Start menu by pressing the Windows logo key.
- Type “cmd” in the search bar.
- Right-click on Command Prompt in the search results and select Run as administrator.
- Click Yes when prompted by the User Account Control.
- In the Command Prompt window, type “ipconfig /release”
- and press Enter to release the IP configuration from the active adapter.
- Next, type “ipconfig /flushdns” and press Enter to flush the DNS cache.
- Wait for the task to complete successfully.
- Finally, type “ipconfig /renew” and press Enter to renew the IP configuration for the active adapters.
- Close the Command Prompt window.

Extra steps:
- Whitelist Valheim in your antivirus, or allow it through the Windows Firewall.
- Try using a VPN to connect to the best servers. We recommend using Express VPN, a reliable and secure VPN service that effectively secures your network. You can also enjoy superior speeds from anywhere, making it easier to access Valheim servers.
- Update your Valheim server using SteamCMD.
Related articles:
Conclusion
We hope one of the solutions listed below has helped you fix Valheim won’t connect to server. Leave us a question, comment, or concern in the comment section below.

Improve this guide
User forum
0 messages