
Fortnite Login Failed: How To Fix It Using Simple Steps
What do you do if Fortnite login keeps failing? Update your network driver, clear your DNS cache and more. Read on to find out 👀
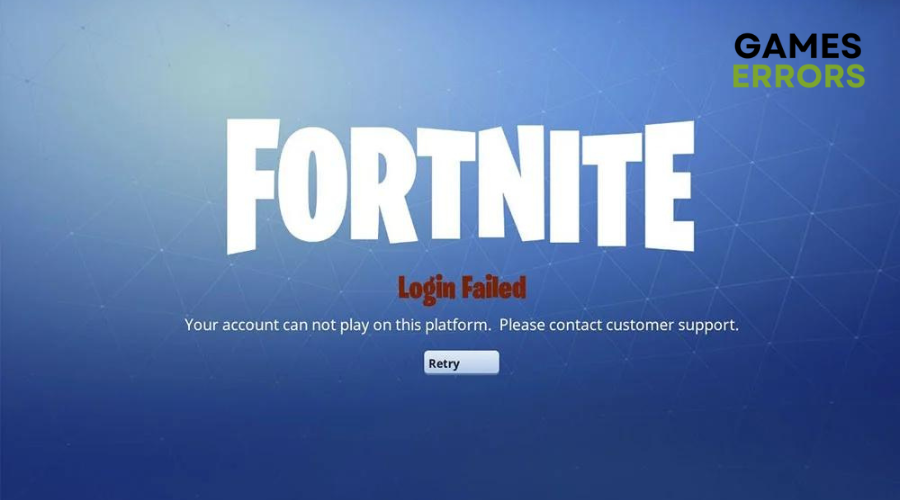
Running into login issues when trying to access Fortnite can be an incredibly frustrating experience for players on various platforms, including PC, PlayStation and Xbox. This error, which reads “Login Failed. Unable to log in to Fortnite servers. Please try again later” can be caused by a number of factors.
Whether you get an ‘Unknown Login Error’ or are unable to connect to the servers at all, it can be disappointing to miss out on your favorite game.
The good news is that this annoying error can be fixed easily. By following these simple instructions, you can overcome the Fortnite Login Failed issue and get back to playing the game.
Why has Fortnite Login Failed?
The main reason for this issue isn’t specific, but Fortnite login failed can be triggered by a number of factors, including outdated game patches, network settings, or connected accounts.
How to Fix Fortnite Login Failed?
Before getting into the solutions listed below, try the following preliminary checks and see if it fixes the problem:
- Check if your PC meets the minimum system requirements to run Fortnite. (Fortnite requires at least 4 CPU cores)
- Perform a system and network restart.
- Test your Internet connection speed
- Check if the Fortnite servers are up and if they are not, try signing in a bit later.
Table of contents:
- Update Fortnite Patch
- Update your network driver
- Disable the Proxy Server
- Reset Winsock Data
- Clear DNS cache and Renew IP
- Account Conflicts
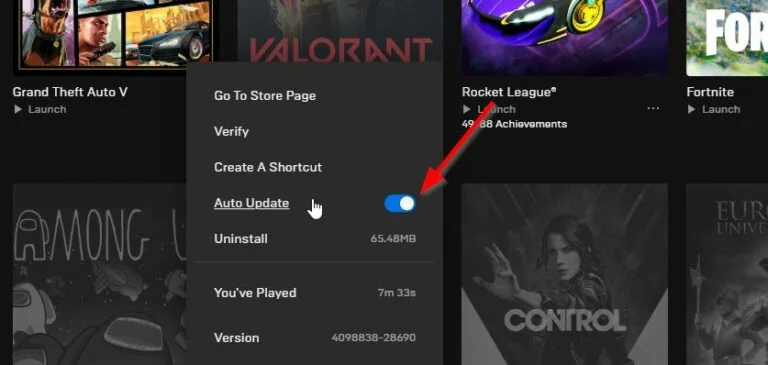
1. Update Fortnite Patch
- Open Epic Games Launcher.
- Click on the gear icon to access settings.
- Find “Manage Games” and enable the “Allow Auto-Updates” option.

- Scroll down to locate “Fortnite” and enable the “Auto-Update Fortnite” option.
- Close the Epic Games Launcher.
- Reopen the Epic Games Launcher to ensure the changes have taken effect.
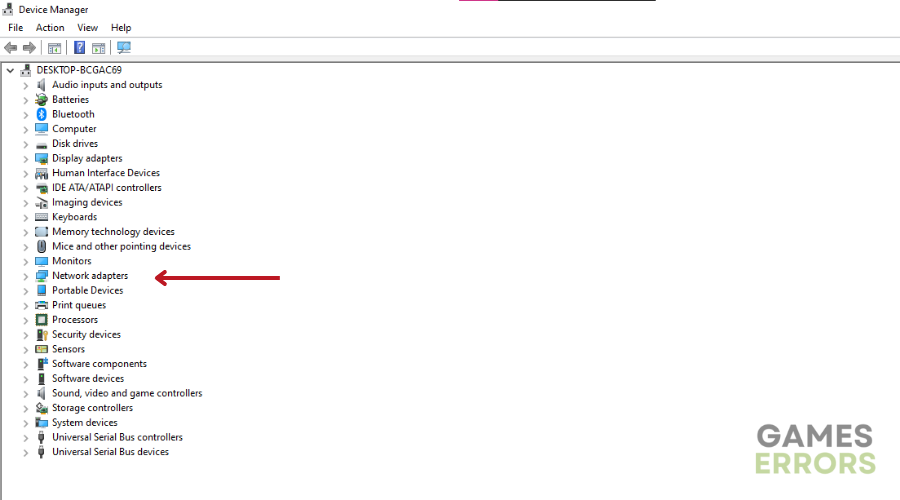
2. Update your network driver
Time needed: 4 minutes
- Click the Start button and Select “Device Manager” from the search results.
- In the Device Manager window, locate the “Network adapters” drop-down menu.

- Choose the appropriate Network Adapter from the list.
- Right-click on the selected adapter From the drop-down menu, choose “Update Driver Software.”
- Click on “Search Automatically for Updated Driver Software.”
- Follow the instructions provided on the following screens to complete the updating process.
- Finally, restart your computer to apply the changes.
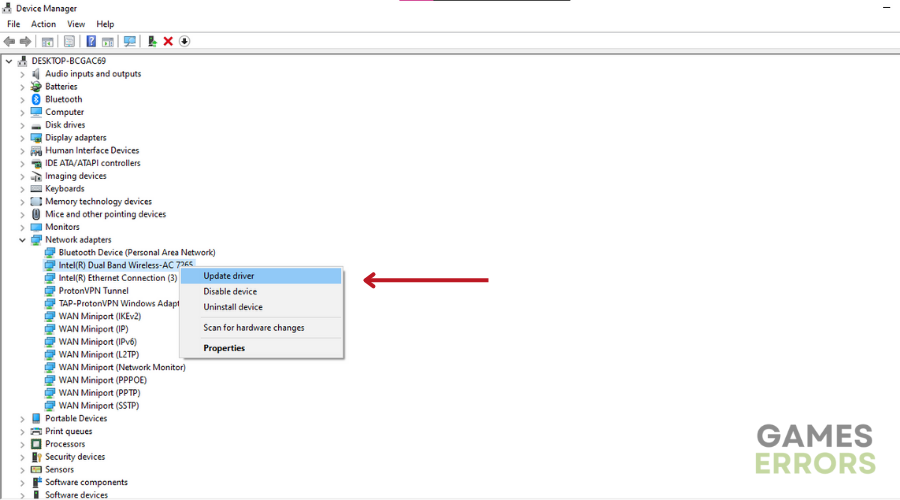
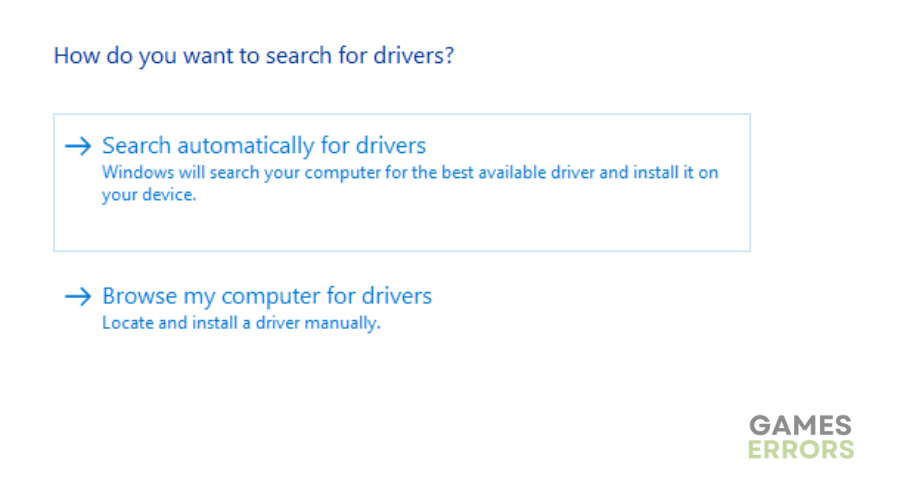
We recommend installing the PC HelpSoft which automates the process of updating PC drivers. This tool scans your computer for outdated, corrupted, or missing drivers and lets you easily update them to the latest and most stable versions.
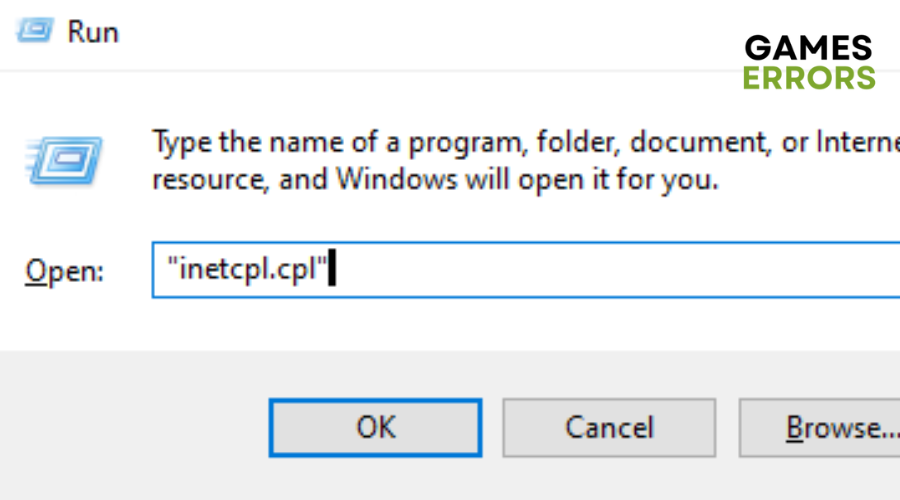
3. Disable the Proxy Server
- Press the Windows logo key and R simultaneously to open the Run dialog.
- Type “inetcpl.cpl” into the Run dialog and hit Enter.
- Internet Properties window will open.
- Navigate to the Connections tab.
- If you see “Never dial a connection” below “Choose Settings,” select it.
- Click on LAN settings.
- Uncheck the box next to “Use a proxy server for your LAN.” If it’s already unchecked, check the box next to “Automatically detect settings.”
- Click OK to apply the changes.
- If you’re using a VPN or a third-party proxy server, disable it.
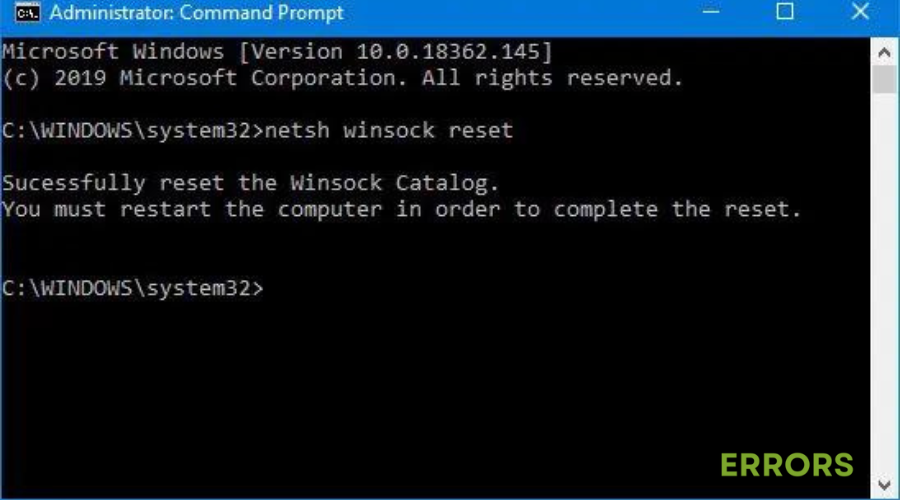
4. Reset Winsock Data
- Open the command prompt from Windows.
- Right-click on the command prompt icon and choose “Run as administrator.”
- In the command prompt window, type: “netsh winsock reset” and press Enter.
- Wait for the process to complete.
- Restart your system.
- After the restart, check again to see if the issue is resolved.
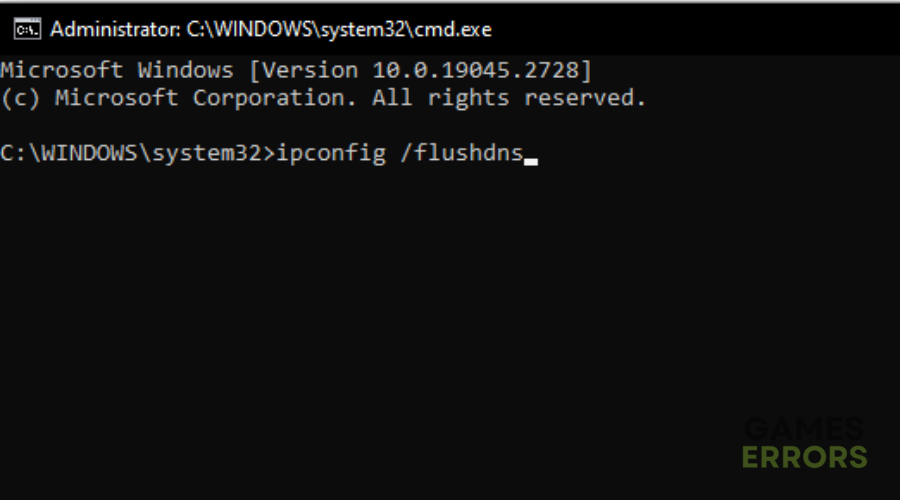
5. Clear DNS cache and Renew IP
- Open the command prompt from Windows.
- Right-click on the command prompt icon and choose “Run as administrator.”
- In the command prompt window, enter the following commands one by one:
- “ipconfig /flushdns”
- “ipconfig /release”
- “ipconfig /renew”
- Wait for each command to execute before entering the next one.
- After executing all three commands, restart your system.
- Once your system has restarted, check again to see if the issue is resolved.
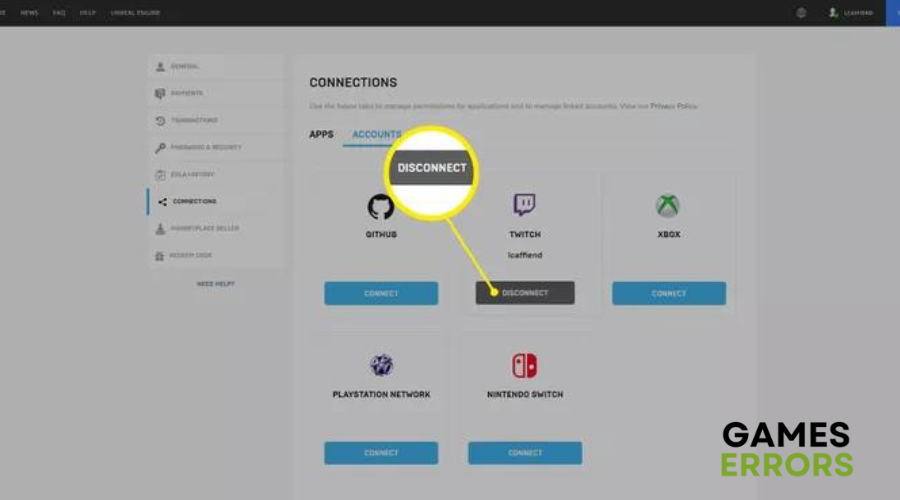
6. Account Conflicts
The cross-buy feature from Epic Games can cause conflicts that trigger the ‘login failed’ error on Fortnite. To fix this:
- Close the launcher.
- Visit the Epic Games official website.
- Log into your account and click on “Account.”
- From the menu sidebar, choose “Connected Accounts.”
- Select “Disconnect” for all consoles that are connected.
- Log in again to your account.
- After logging in, check again to ensure the changes or issues are resolved.
Related Articles:
- Fortnite Successfully Logged Out: Fix It in 3 Minutes
- Fortnite Voice Chat Not Working: Here Is What to Do
- Why is My Ping so High in Fortnite? Here’s Why & How to Fix
- Fortnite Keeps Crashing: Best Methods to Fix This Problem
Conclusion
In conclusion, encountering the ‘Fortnite Login Failed’ problem can be frustrating for players on different platforms. However, by following the solutions provided and performing preliminary checks, you can overcome this issue and get back to enjoying your favourite game.
Make sure to update your Fortnite patch and network drivers, and disable the proxy server to resolve any potential conflicts. Additionally, resetting your Winsock data, clearing your DNS cache, and renewing your IP can all help to resolve any network-related issues. Happy gaming!

Improve this guide
User forum
0 messages