
Minecraft Launcher Not Working: How To Make It Work
When the Minecraft launcher just won’t launch on your system, don’t despair. Try out one or more of these fixes and make it work painlessly.

We all are excited about new game features. News of a new launcher for a beloved game like Minecraft always gets everyone excited. But when the new Minecraft Launcher is not working for everyone, that excitement soon turns into resentment and frustration. But don’t let the new launcher keep you from enjoying your favorite game. Here you’ll find all the fixes you need to get back into the game.
Why Minecraft Launcher Not Working?
For one reason or another, Minecraft launcher doesn’t seem to work on every system or device. Even those devices it was designed for like Windows 10, Windows 11, Xbox 1, PS4, and all mobile devices. The new launcher is buggy and you can still have trouble launching it for any of these reasons.
- Your launcher profile file is corrupted.
- Mods are interfering with the game and the launcher
- The launcher cache is damaged
- Windows Store needs to be reset.
- You downloaded your launcher from Minecraft.net
- Your firewall is blocking the new launcher
How to Fix Minecraft Launcher Not Working?
- Delete launcher profile file
- Download Minecraft launcher from Microsoft Store
- Uninstall Mods
- Reset the launcher
- Reset Windows Store
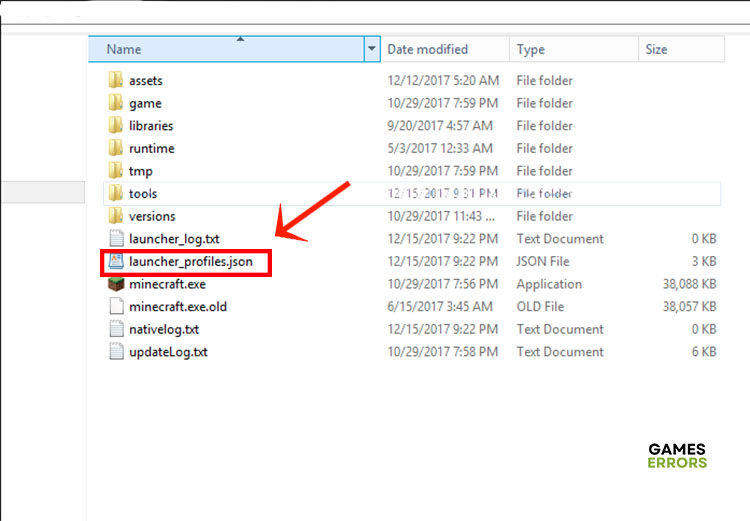
1. Delete Launcher Profile File
Like other installation files in the game, the launcher has a profile file of its own. And that file can get corrupted after installing the new launcher. It seems that the new Minecraft launcher doesn’t clean after itself by deleting the old files properly. Either way, it’s easy to fix the issue with these simple steps.
- Press Win + R to open the Run dialog.
- Type the following command and press OK: %Appdata%.
- This opens the hidden AppData folder. Navigate to Minecraft > Install folder.
- Scroll down to the launcher-profiles.json file. Right-click it and select Delete.

- Close the AppData folder and launch Minecraft. Check that the launcher is working.
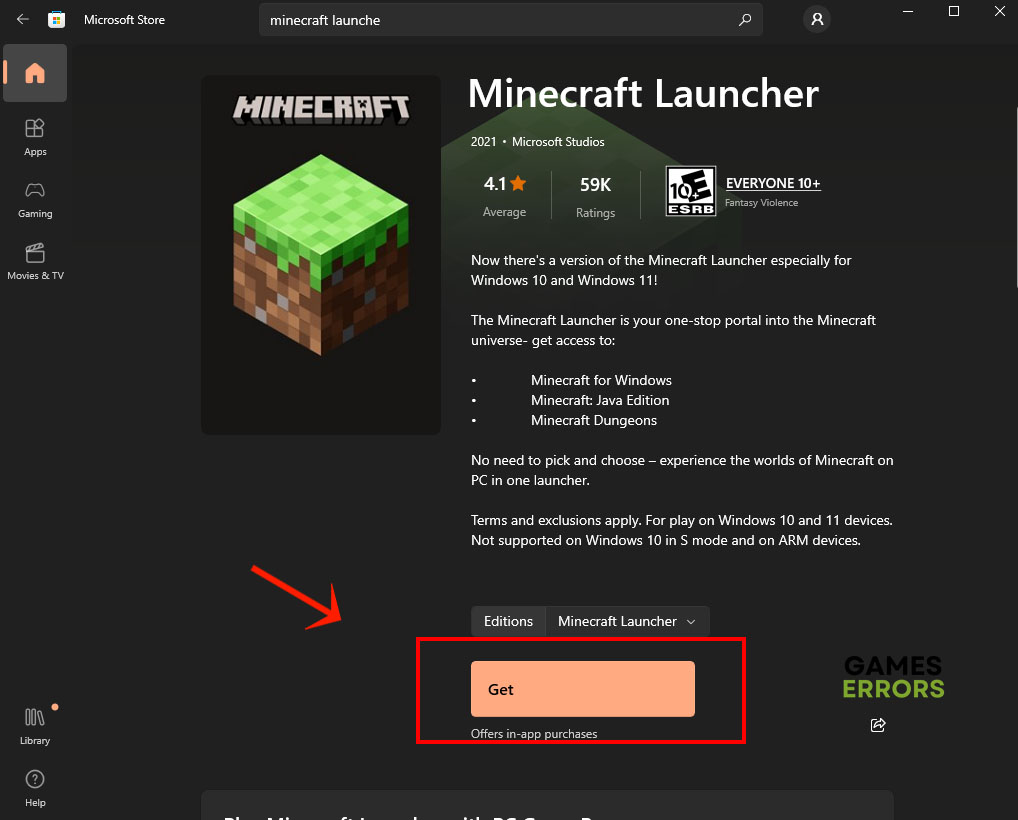
2. Download Minecraft Launcher from Microsoft Store
Time needed: 2 minutes
This might sound counterintuitive, but some gamers noticed that the issue with the Minecraft launcher not working is only with launchers downloaded from the official Minecraft website. For some reason, the launchers downloaded from Microsoft Store are bug-free and work perfectly well. Before installing the good launcher on Microsoft Store, you’ll need to uninstall the buggy one first. Here’s how to do it.
- Right-click the Start button and select Apps and Features.
- Scroll down to Minecraft launcher and select Advanced Options, then select Uninstall on the next screen.

- Open Windows Store and type Minecraft Launcher in the search bar then click Enter.
- Click the Get button to download and install the launcher.

- Launch the game and make sure that it runs without problems.
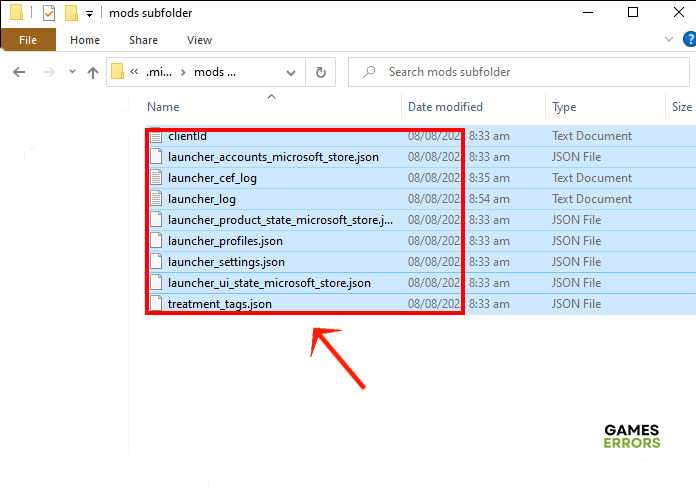
3. Uninstall Mods
Although mods add a lot of benefits to the game, they have many problems. Unless you downloaded the mods on Minecraft.net, chances are these pieces of code will hog up resources and impact the performance of the game. Other times, they’d just create conflicts with the system libraries and might leave your device vulnerable to malware attacks. If you have mods installed on your system and your Minecraft launcher refuses to run, then you’ll need to uninstall these mods first.
- Press Win + R to open the Run dialog.
- Type %Appdata% and press OK to open the AppData folder.
- Navigate to Minecraft > Mods subfolder and open it.
- Select all files and right-click then select Delete.

- Restart the Minecraft Launcher and check that the problem is solved.
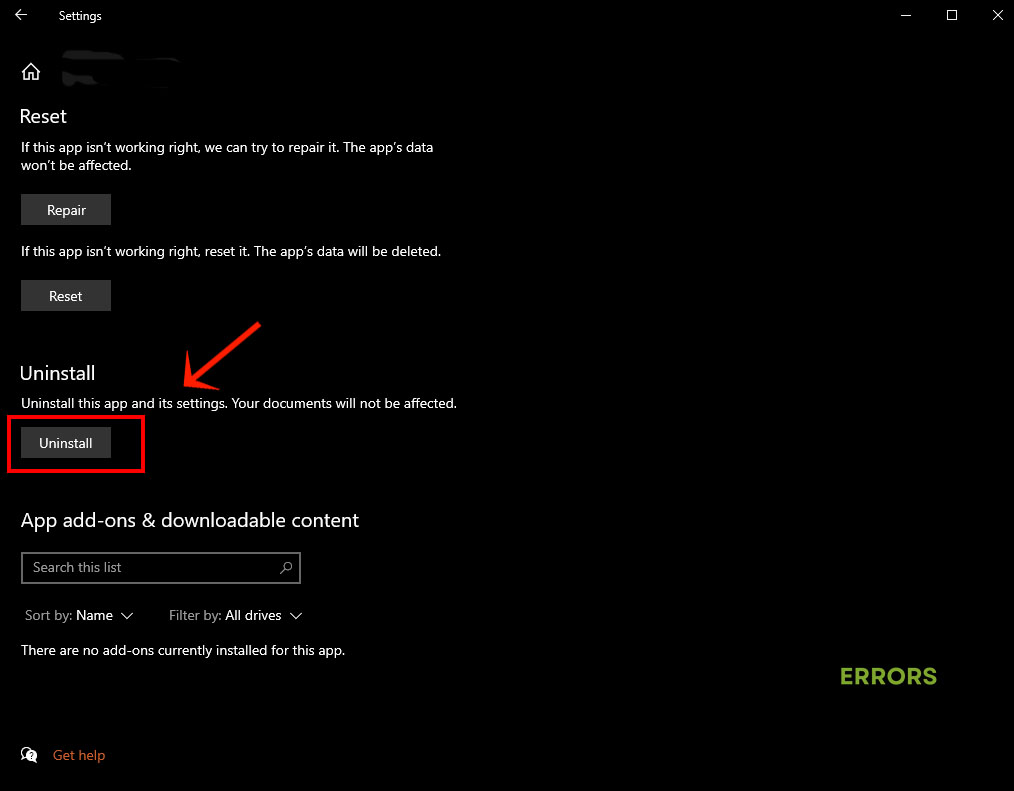
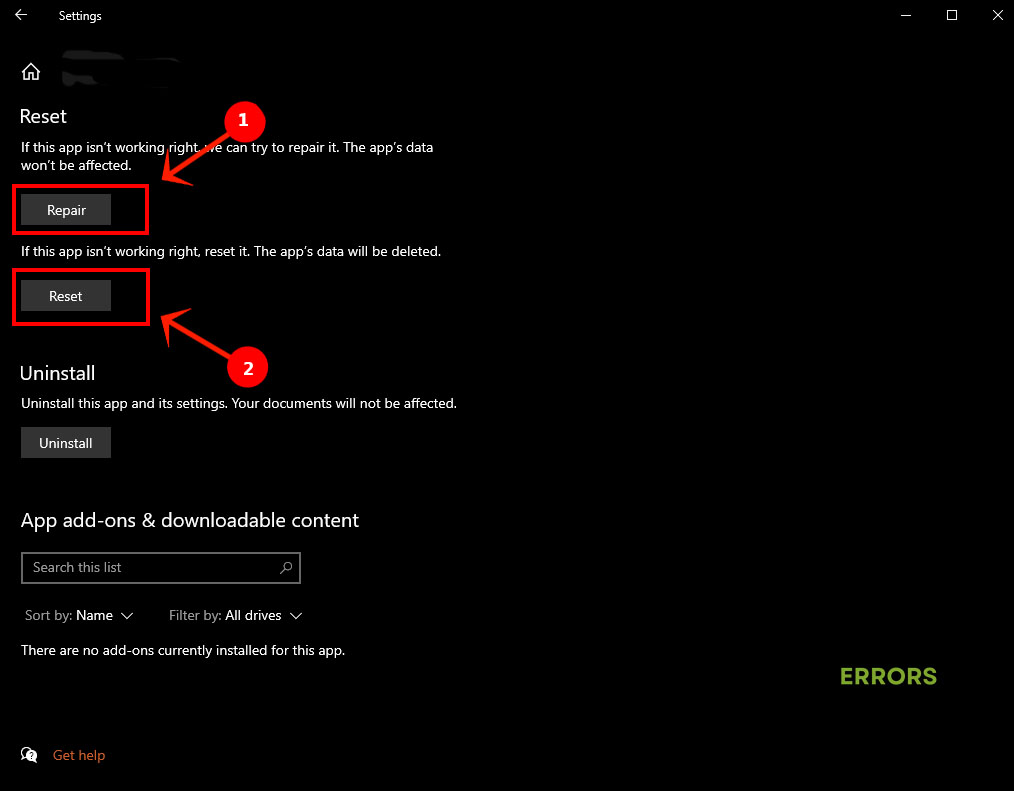
4. Reset the Launcher
If you have already reinstalled the Minecraft launcher but it still doesn’t work or it has stopped working suddenly, then chances are the launcher cache files are corrupted. Maybe junk files left from the previous installation are blocking the new launcher from working. Or it could be that the new installation wasn’t clean and didn’t exit successfully. Either way, resetting the launcher should fix this problem.
- Right-click the Start button and select Apps and Features.
- Go down the list of installed apps until you find Minecraft Launcher.
- Click the app and choose Advanced options.
- Scroll down the new screen and click the Repair button.
- When the process finishes, click the Reset button on the same screen.
- Close all open windows and launch Minecraft Launcher.
5. Reset Windows Store
If you downloaded your Minecraft Launcher from Windows Store and still doesn’t work even after repairing and resetting the launcher, then you’ll need to reset Windows Store itself. Some gamers have reported that this solution fixed all their Minecraft Launcher not working issues. Just follow these simple steps.
- Open Settings > Apps
- Scroll down to Minecraft Launcher, click to expand it then select Uninstall.
- Press Win + R to launch the Run app.
- Type the following command and press OK: WSReset
- Wait for Windows Store to reset itself.
- Now type Minecraft Launcher in the search bar and click Enter
- Select Get to download and install the new launcher.
- Launch the game and make sure that it’s working.
Related Articles:
- Minecraft Stuck On Locating Server: Easy Steps To Solve It
- Minecraft Error Code -1073741819: Easy Fix [2023]
- Minecraft Error Code L-401: How To Fix It Really Quick
Don’t let the Minecraft launcher not working error get you down. The above solutions tackle all aspects of the issue and will help you fix the problem and get your game going in no time. Let us know in the comments section below if you have other solutions for this issue.

Improve this guide
User forum
0 messages