
Mouse Not Working In Valorant: How to Make It Work
Is your mouse refusing to take and follow orders when you play Valorant? It’s probably not the mouse, but your game settings. Fix it here
Not every gamer uses a gamepad. For all their advantages, they fall short when it comes to pointing and shooting or where precision is at stake. That’s where your mouse comes in. This handy device follows your every whim and goes wherever you want it to go. Until it doesn’t. When you have a mouse not working in Valorant, try out the solutions here.
Why is Mouse Not Working in Valorant?
There are many reasons why your mouse may not be working when playing Valorant. If it’s a wireless mouse, then check the batteries and replace them. But if you still have trouble getting the cursor to move smoothly on the screen without lags or stuttering, then look for one or more of the following reasons.
- CPU is maxed out with too many apps running at the same time.
- The mouse driver is corrupted
- VSync is turned on.
- Game settings are set too high.
How to Fix Mouse Not Working In Valorant
1. Turn off VSync
Time needed: 1 minute
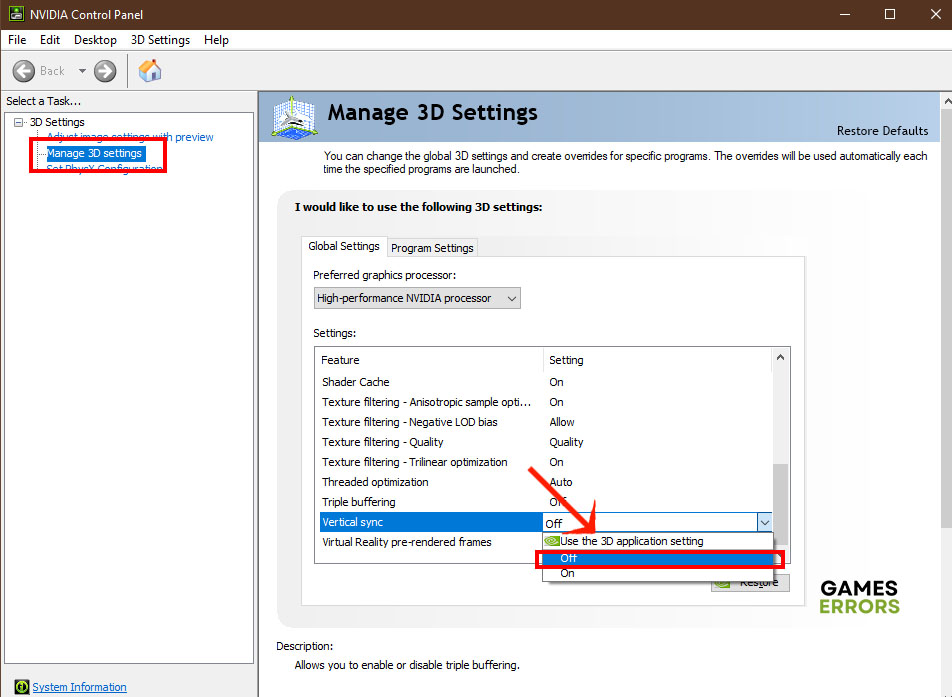
Vsync or vertical synchronization, is an incredible feature in games with open worlds. It improves the quality of the image rendering and makes navigating these worlds a lot more enjoyable. But this heightened quality comes at the cost of performance. The CPU has to work double-hard to keep the game running smoothly. This can lead to degraded performance and mouse stuttering. You can switch off Vsync in NVIDIA or AMD control panels.
- Launch NVIDIA control panel from the taskbar.
- Click the Manage 3D Settings on the left and open the Global Settings tab.
- Scroll down to Vertical sync, double-click it to open the dropdown list and select Off.

- Click Apply and close the control panel.
- Launch Valorant and check that your mouse is not stuttering anymore.
2. Reset the Game Settings
Another issue that can cause the CPU to stay at 100 percent while you’re playing Valorant is that you have changed the settings of the game. Not all of those settings are necessary or will even lead to a better gaming experience. Furthermore, some of these settings might create conflicts with basic devices such as the mouse which causes it to stop functioning. Here’s how to reset Valorant settings back to default.
- Save and close Valorant.
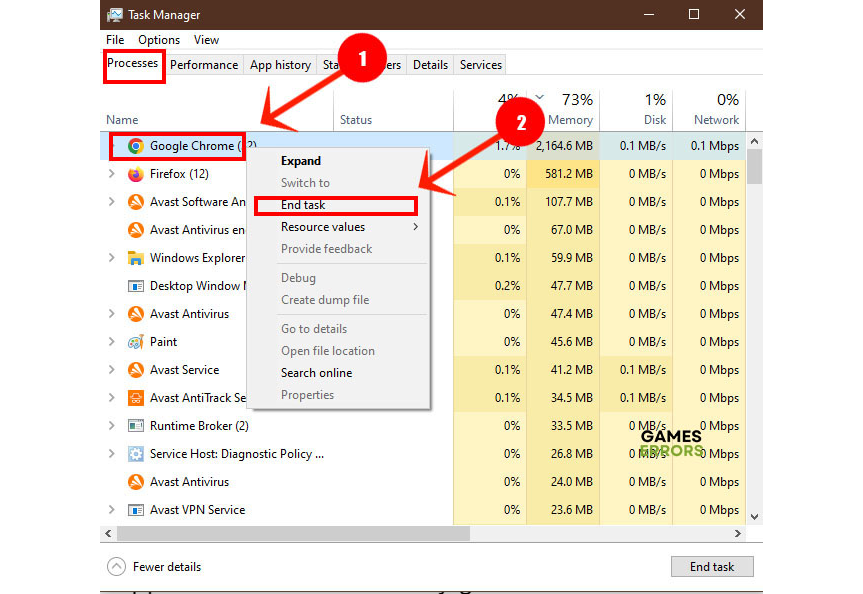
- Right-click the taskbar and launch Task Manager.
- Under Processes select all Valorant-related entries, right-click each one and select End Task.

- Close the task manager and press Win + R to launch the Run app.
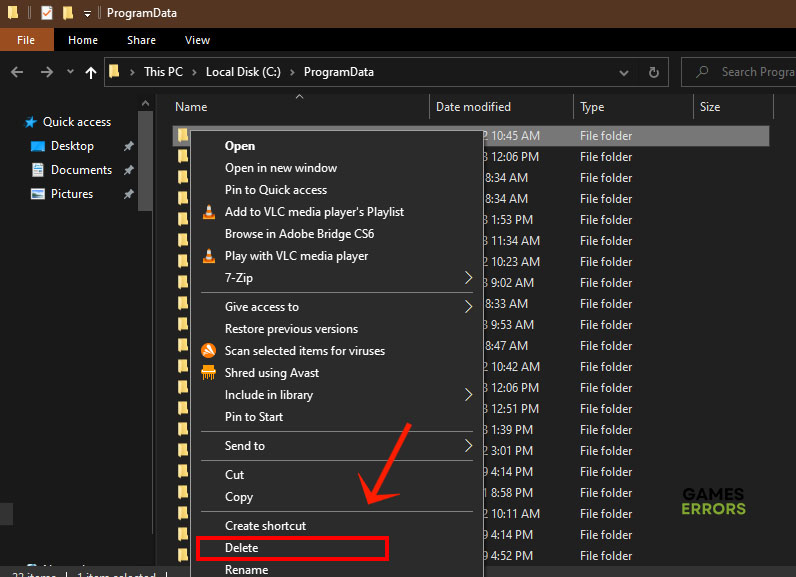
- Type %localappdata% in the run dialog and press OK.
- Scroll down to the Valorant folder, right-click it and select Delete.

- Restart Valorant and check that the mouse is working.
3. Reinstall the Mouse Driver
The mouse driver, like any other file on your system, can get damaged or corrupted for any number of reasons. To fix it, you’ll need to uninstall the driver and then reinstall it again. Usually, that fixes the problem of the stuttering mouse or the mouse not working at all. Here’s how to do it.
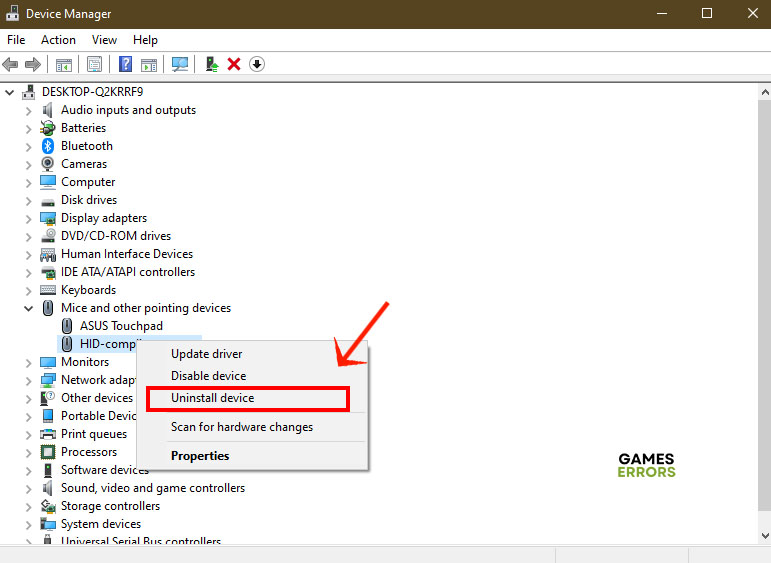
- Right-click the Start menu and select Device Manager.
- Scroll down to Mice and other pointing devices and click it to expand the list.
- Right-click HID-compliant mouse and select Uninstall.

- Close the device manager by pressing Alt + F4 (your mouse will not work).
- Press Alt + F4 again to restart your PC.
- After the computer starts, the mouse driver will be installed automatically.
In addition to uninstalling the mouse driver, if the device manager isn’t working, you may want to consider using a driver updater tool like PC HelpSoft to ensure your mouse is working correctly in Valorant. It will scan, download and install the mouse driver automatically hassle-free.
4. Edit the Settings File
When your mouse is not working in Valorant, there’s a good chance that your graphics settings are set too high. Your system, with its limited resources, cannot keep up with the game’s demands, so peripheral devices such as the mouse would stop working. The solution is to edit those settings in the GameUserSettings.ini file. Here’s how to do it.
- Close Valorant and press Win + R to launch the Run dialog.
- Type %localappdata% and press OK to open the hidden Local Data folder.
- Navigate down to the Valorant folder, open it, and go to Saved > Config.
- Find the GameUserSettings.ini file, right-click it and select Edit to open it in Notepad.
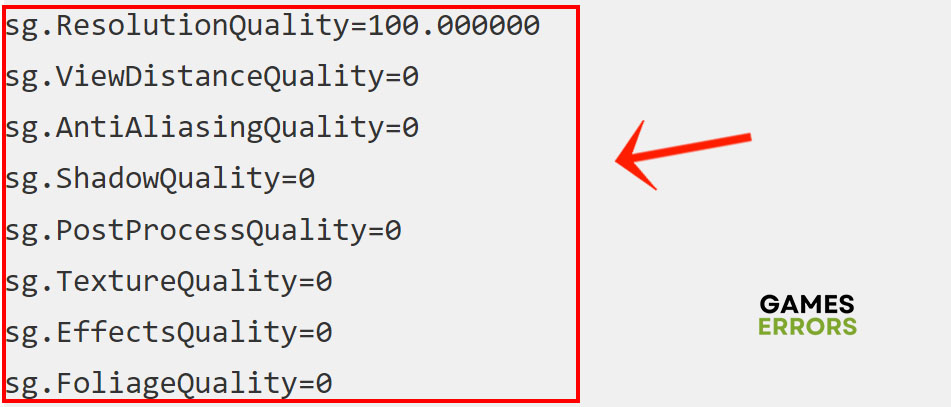
- Scroll down to the line sg.ResolutionQuality, now set the graphics settings values as in the picture below.

- Save the file and restart the Valorant game.
Related Articles:
- Valorant Error Code 62: How To Fix It Easily
- Valorant Stuttering & Lag: How To Make It Run Smoothly
- Valorant Error Code VAN 81 – How To Fix
A mouse stuttering while gaming is not an inconvenience, it can make the game totally unplayable. Fix your stuttering mouse with one or more of those solutions. If you have other fixes that worked for you, let us know in the comments section below.

Improve this guide
User forum
0 messages