
Valorant Won't Install: Why It Happens & How to Fix
Here's everything you need to know about Valorant won't Install, why it even happens and how to fix it🎯

In a digital world where warriors clash, Valorant stands out as a 5v5 tactical shooter that draws players into its immersive world. However, not everyone who wants to take part in this epic battle finds it easy to play the game.
Some players trying to install the game on their Windows 11/10 computers face a daunting challenge – Valorant Won’t Install.
So why are fans of the franchise experiencing this problem? The answers are as varied as the champions themselves. Read on to find out why Valorant Won’t Install and how to fix it as quickly as possible.
Why is Val not installing?
There could be many reasons why Valorant won’t Install. Some of the common reasons why this problem happens may include:
- Lack of permissions to install the game
- Antivirus blocking the installation
- Outdated game patch
- Technical issues with the computer or network settings
How To Fix Valorant Won’t Install?
You may be able to fix the error by simply troubleshooting your network connection. Also, try restarting the Riot Client and your PC and check if your system’s firewall is blocking Riot Client from running. If none of these work, try the following solutions to see if you can fix this problem ASAP.
Table of contents:
- Update your Network Driver
- Uninstall Vanguard.
- Try switching to a different DNS
- Set the priority for Riot Client to High
1. Update your Network Driver
By updating your network drivers, you ensure a stable and secure network environment, reducing the likelihood of Valorant won’t install. To update your network drivers:
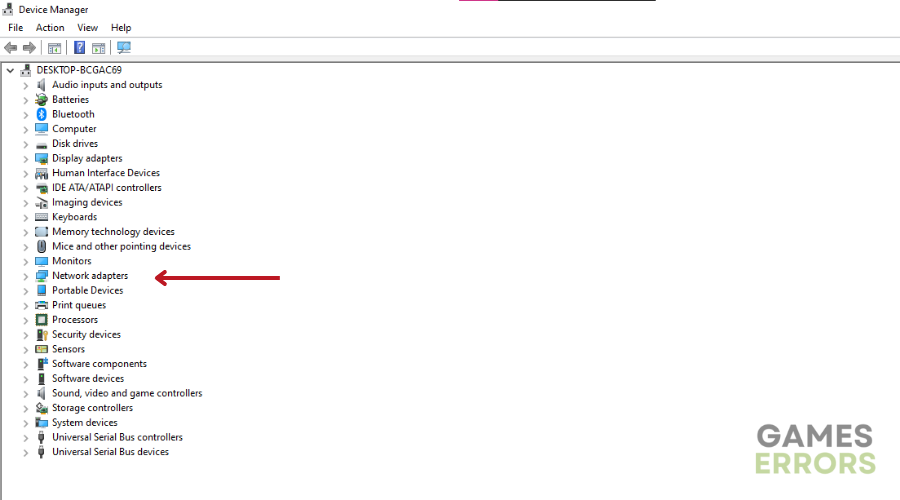
- .Click the Start button and Select “Device Manager” from the search results.
- In the Device Manager window, locate the “Network adapters” drop-down menu.

- Choose the appropriate Network Adapter from the list.
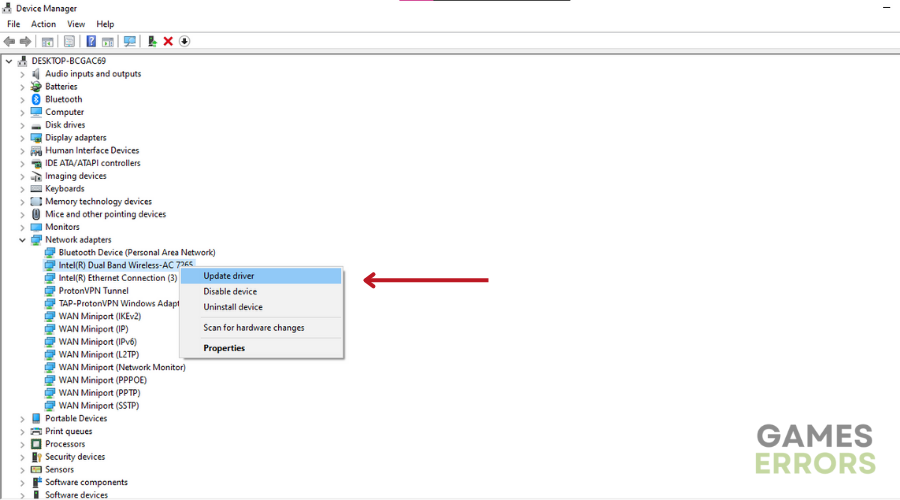
- Right-click on the selected adapter From the drop-down menu, choose “Update Driver Software.”
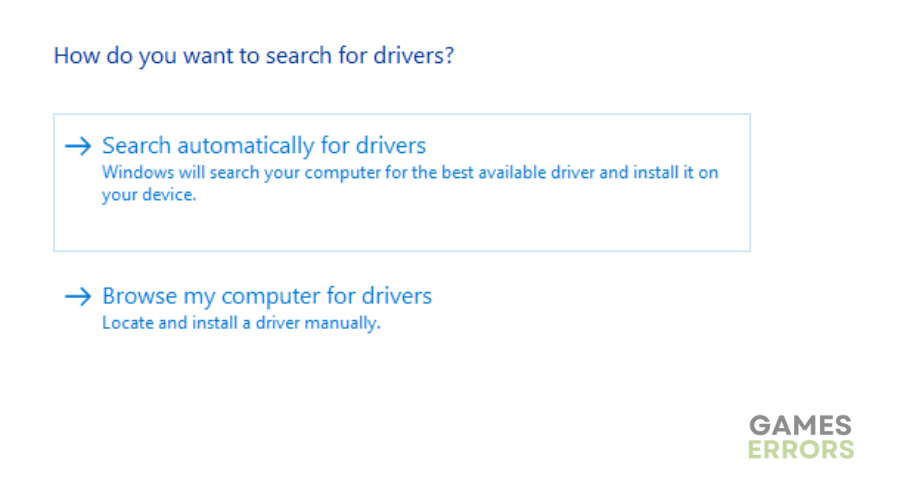
- Click on “Search Automatically for Updated Driver Software.”
- Follow the instructions provided on the following screens to complete the updating process.
- Finally, restart your computer to apply the changes.
📌 Alternatively, you can use PC HelpSoft. This third-party tool fixes broken drivers, providing you with the ones that are updated as it scans the internet and finds the best driver for your PC.
2. Uninstall Vanguard
Time needed: 3 minutes
Riot Games relies on the Vanguard anti-cheat system for their games. Therefore, If Vanguard is missing or not functioning correctly, even if the game files are present, Valorant might not register and allow the installation to proceed. By uninstalling Vanguard, you can attempt to fix this issue. To do this:
- Open the System Tray from the Taskbar.
- Right-click on the Riot Vanguard icon.
- Click on the Exit Vanguard option to stop the anti-cheat from running in the background.
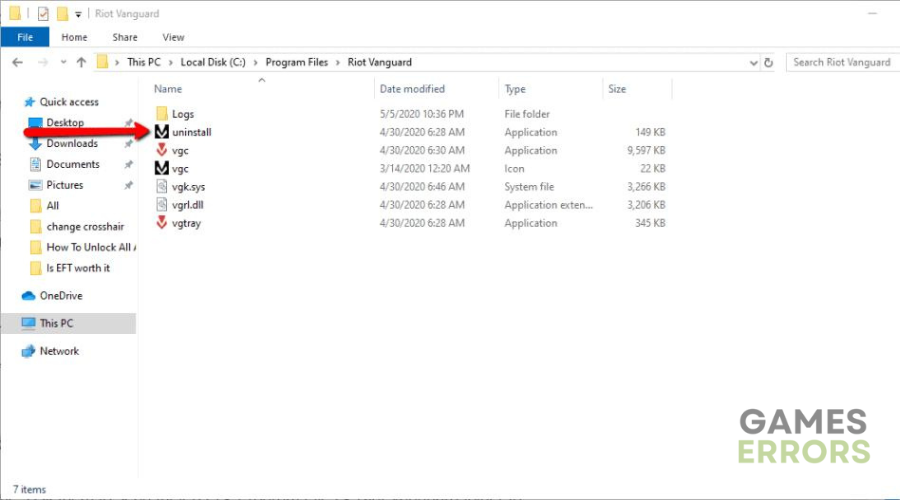
- Press the Windows key + E shortcut and Open the File Explorer
- Go to in (C:) Program Files and click on Riot Vanguard.
- Click the uninstall file.

- Relaunch the game to see if the problem is fixed.
3. Try switching to a different DNS
We also suggest suggest to the popular Google DNS for the best gaming experience. To do this:
- Open Network Adapter Settings from Windows settings.
- Right-click on the current network and choose “Properties.”
- For IPv4 :Double-click “Internet Protocol Version 4 (TCP/IPv4)” and select “Use the following DNS server addresses.”
- Enter the Preferred DNS server as 8.8.8.8 and the Alternate DNS server as 8.8.4.4.
- For IPv6 (if applicable): Double-click “Internet Protocol Version 6 (TCP/IPv6)” and select “Use the following DNS server addresses.”
- Enter the Preferred DNS server as: 2001:4860:4860::8888 and the Alternate DNS server as 2001:4860:4860::8844.

- Save the changes and exit the network adapter properties.
- Restart your PC to apply the new DNS settings.
- Check if the issue with downloading updates and internet connection is resolved.

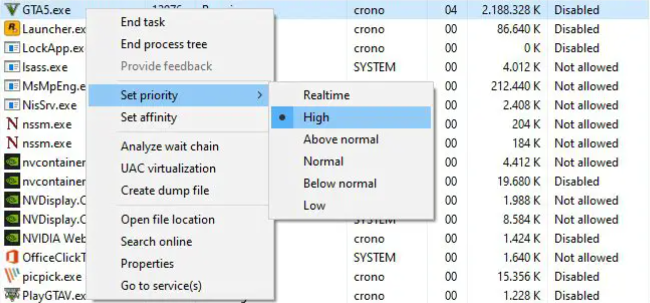
4. Set the priority for Riot Client to High
- Open Task Manager.
- Under the “Processes” tab, locate “Riot Client” and right-click on it.
- Choose “Go to details.”
- Find “RiotClientService.exe” in the “Details” tab.
- Right-click on “RiotClientService.exe.”
- Select “Set Priority” and choose “High.“

- Close Task Manager and Relaunch Riot Client.
Related Articles:
- Valorant Not Updating: How to Fix It if it Got Stuck
- Fix: Valorant Randomly Freezing & Crashing Without Any Error
- Valorant Secure Boot Error: How To Fix It
- Valorant Error 59: 3 Best Methods to Resolve This Issue
- Valorant Has Encountered A Connection Error [Fixed]
Conclusion
By addressing common problems like outdated network adapters, network settings, and antivirus interference, players can ensure issues like Valorant won’t install can be fixed.
Remember to update network drivers, uninstall Vanguard if necessary, switch to a different DNS, and prioritize Riot Client in Task Manager for optimal results. Happy gaming!

Improve this guide
User forum
0 messages