
Apex Legends Won't Update: Easy Ways to Fix This Problem
Repair the game and change DNS if you face Apex Legends not updating issue on Windows 11 or 10 🎯
Is Apex Legends not updating? Like you, many others are having this problem. This article will tell you how to fix this issue.
This free-to-play battle royale game has a huge user base. Like other multiplayer titles, it needs regular updates. However, Apex Legends won’t update on your PC for a few reasons. If you can tweak the right things, you can be able to fix this problem completely.
Learn the methods to fix games not launching on the EA app if necessary.
Why is my Apex Legends not updating?
Usually, Apex Legends not updating issue may appear on your Windows 11 or 10 PC because of the following reasons:
- Server problem: If the update server has issues, the EA app or Steam may fail to update Apex Legends.
- Third-party services: Some third-party services, like your antivirus and firewall, can be the reason why this game is not updating.
- Network problem: Internet connection problems also can trigger Apex Legends not updating or similar situations.
This updating issue also may occur due to corrupted or outdated components. Whatever causes this problem, the methods featured in the next part will help to get rid of this situation.
How do I fix Apex Legends won’t update?
Before going through the actual steps, we suggest you verify the following things:
- Check the EA server status and Steam status page to confirm that there is no outage.
- Disable your antivirus and firewall temporarily.
- Use either Origin or EA app. We suggest the EA app as Origin is no longer supported. Don’t use them together, as it may create conflicts.
- Ensure you have a very stable internet connection and no active proxy or VPN connection.
After ensuring the above things, do these tricks to solve Apex Legends not updating problem:
- Clear client cache
- Change DNS
- Verify the Apex Legends game files
- Reset Network
- Re-install the game client
1. Clear client cache
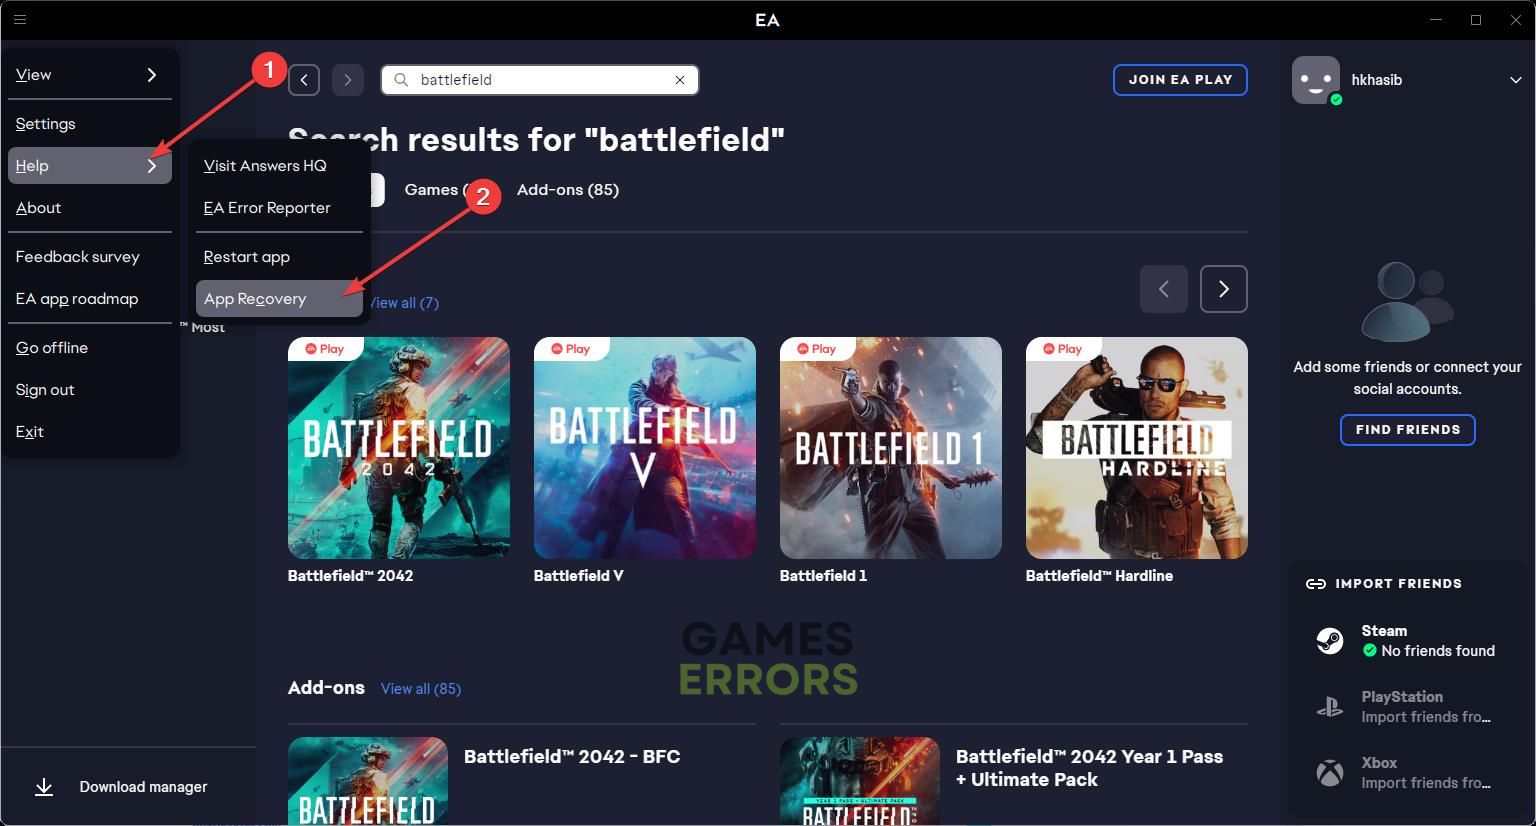
- Open the EA app.
- Click on three vertical lines in the top right corner.
- Go to Help and click on App Recovery.

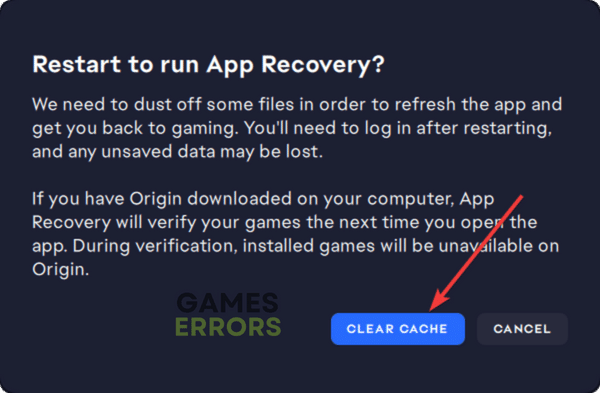
- Then, click on Clear cache.

- Relaunch the EA app.
For Steam, go to its Settings and then the Downloads tab. After that, click on Clear Download cache. It will do the same job. Now, you can try to update Apex Legends again and see if it works.
2. Change DNS
Time needed: 2 minutes
If you want to fix Apex Legends won’t update at all, change the DNS settings and see if it helps.
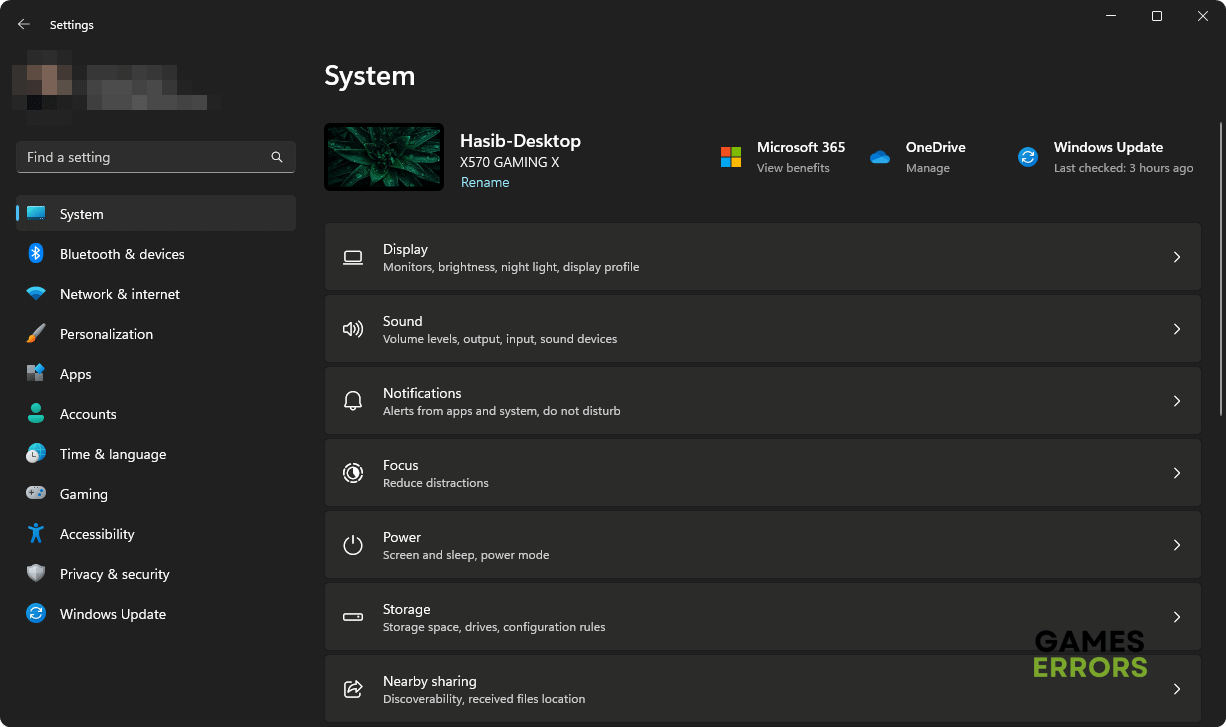
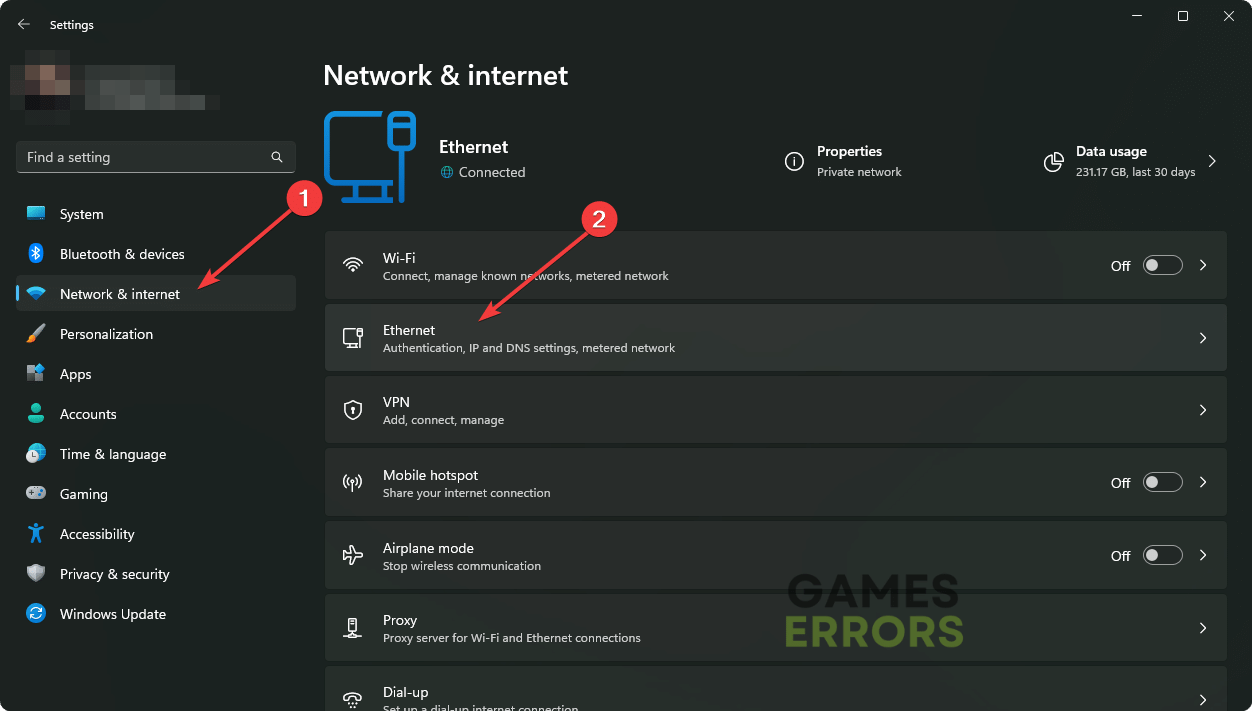
- Press Win + I on the keyboard to open Windows Settings.

- Go to Network & Internet and then click on Wi-Fi or Ethernet, depending on which connection you are using.

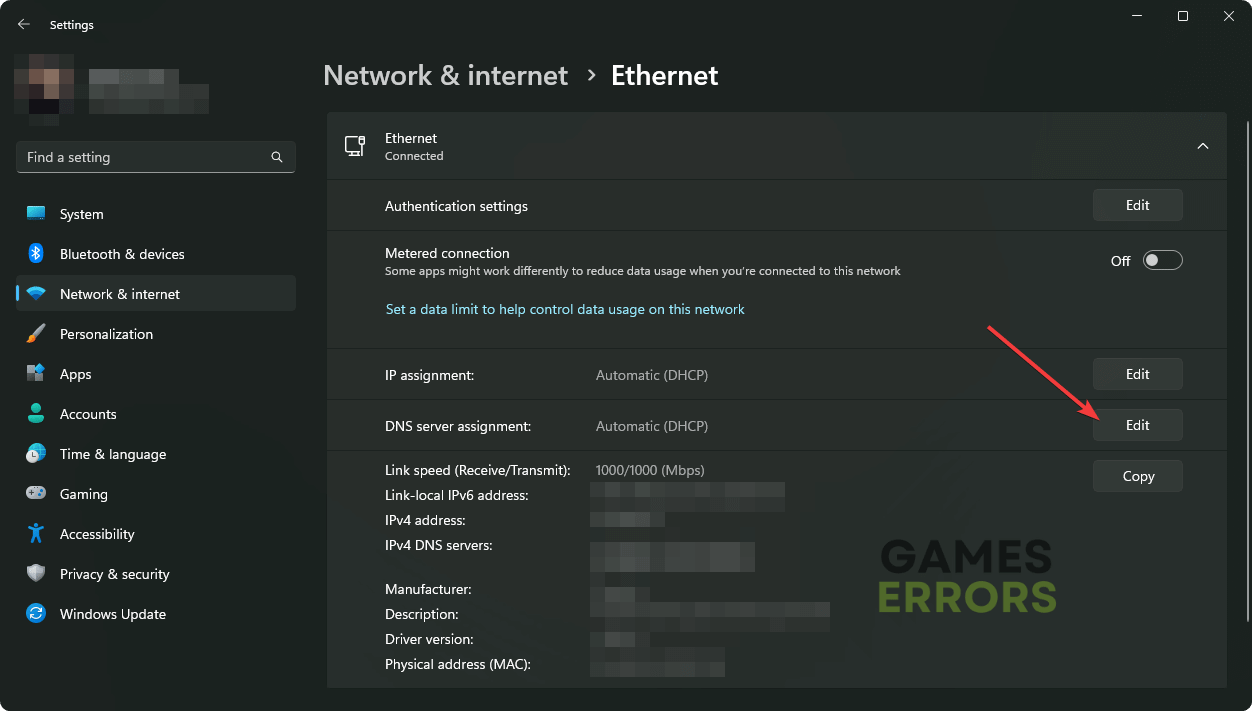
- Locate the DNS server assignment and click on Edit next to it.
- Select manual.
- Enable IPv4.
- Set 8.8.8.8 as preferred and 8.8.4.4 as your alternate DNS, and then click on Save.
- Restart Windows.
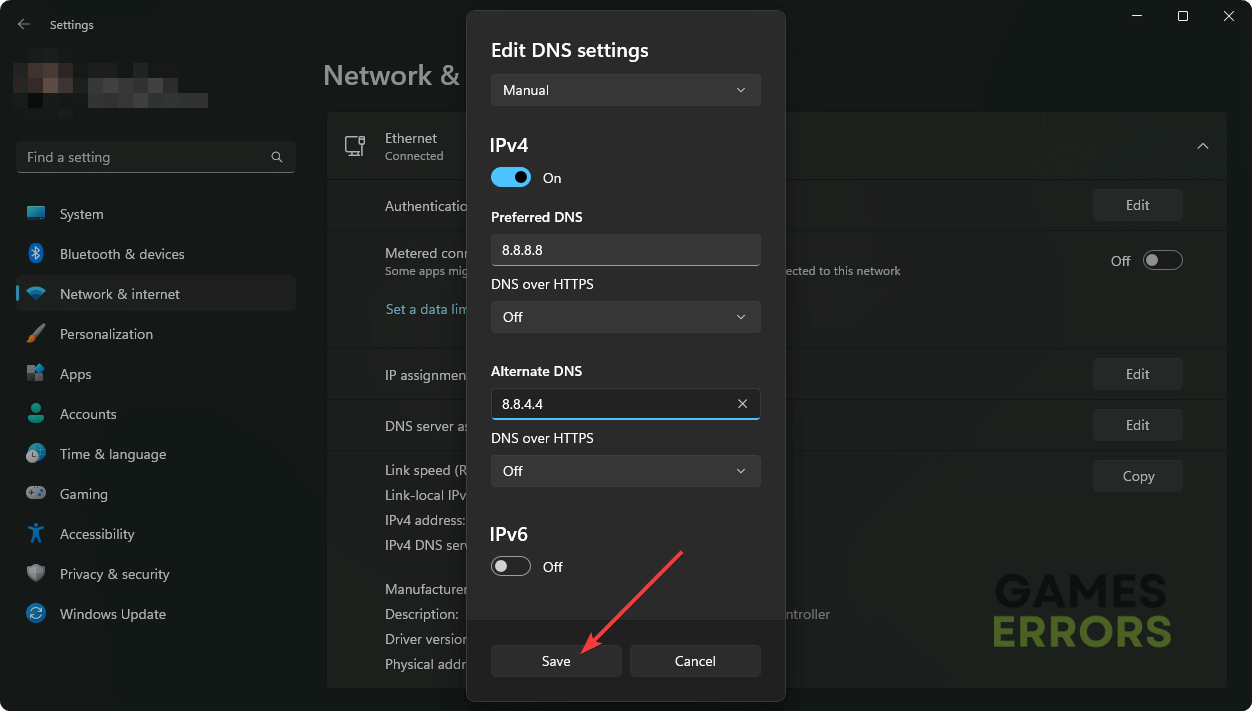
In the above instructions, we have used Google DNS. If you wish, you can use other stable public DNS addresses too.
3. Verify the Apex Legends game files
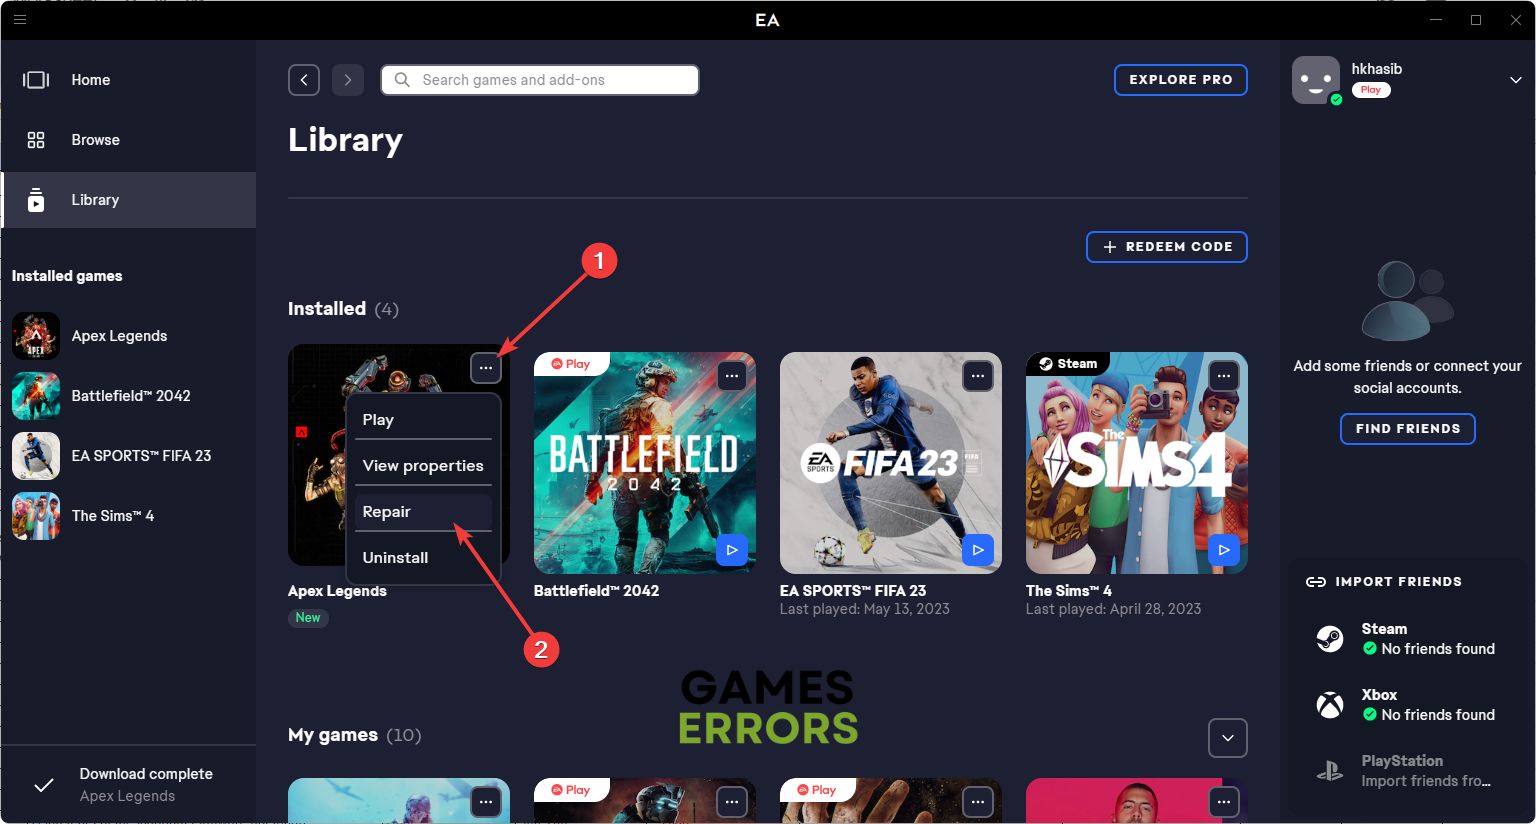
- Open the EA app and go to Library.
- Click on three horizontal dots on the Apex Legends’ thumbnail and then go to Repair.

- Give it some time to finish the process.
If you have Steam for this game, go to the Steam game library. Right-click on Apex Legends and go to the Properties. Then, navigate to the Local files tab and then click on Verify integrity of game files.
Now, verify if it has solved the Apex Legends not updating issue or not. This method will also help if Apex Legends gets stuck on the loading screen.
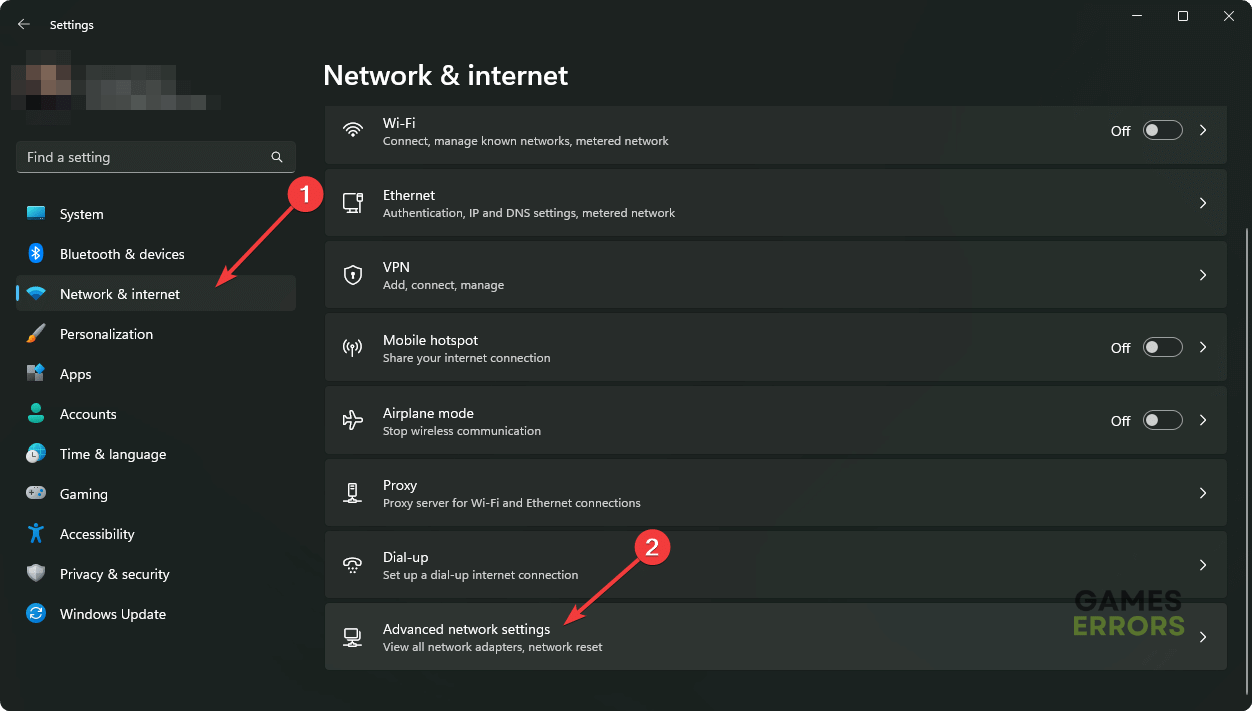
4. Reset Network
In case this battle royale game is still not updating, reset your network settings by following these steps.
- From Windows Settings, go to Network & Internet and then Advanced network settings.

- Click on Network Reset.
- Then, click on Reset now.
- Restart your PC.

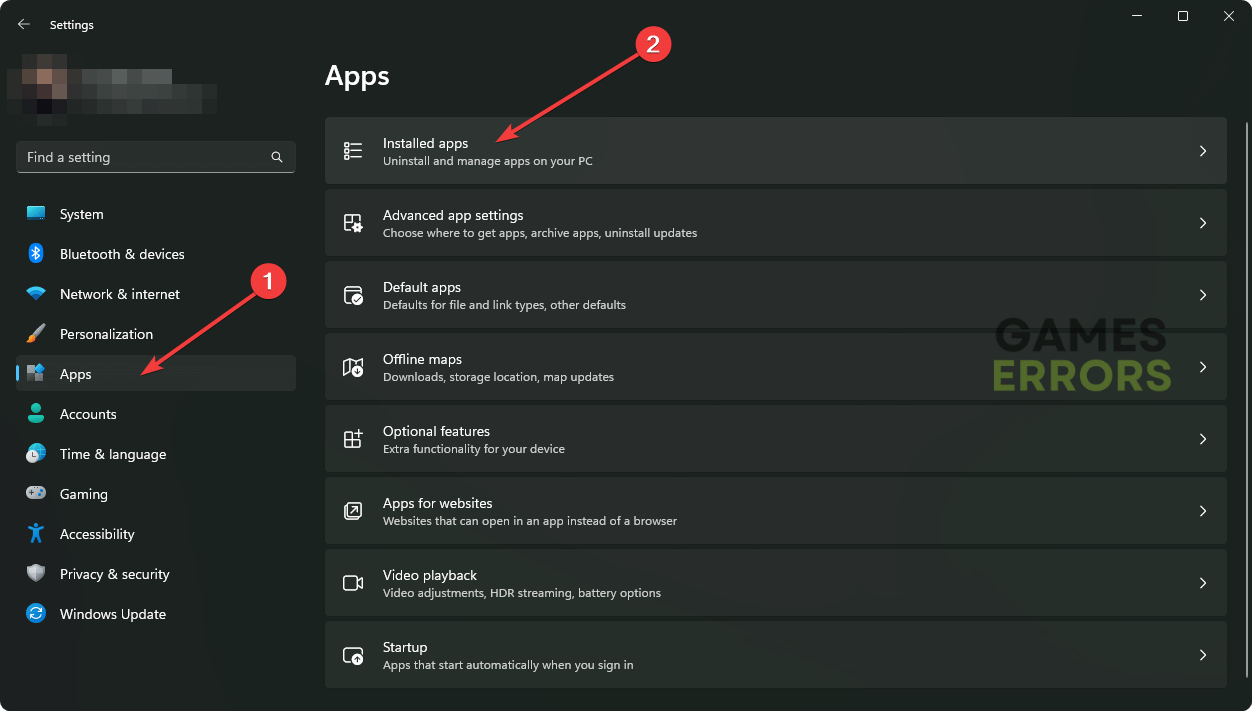
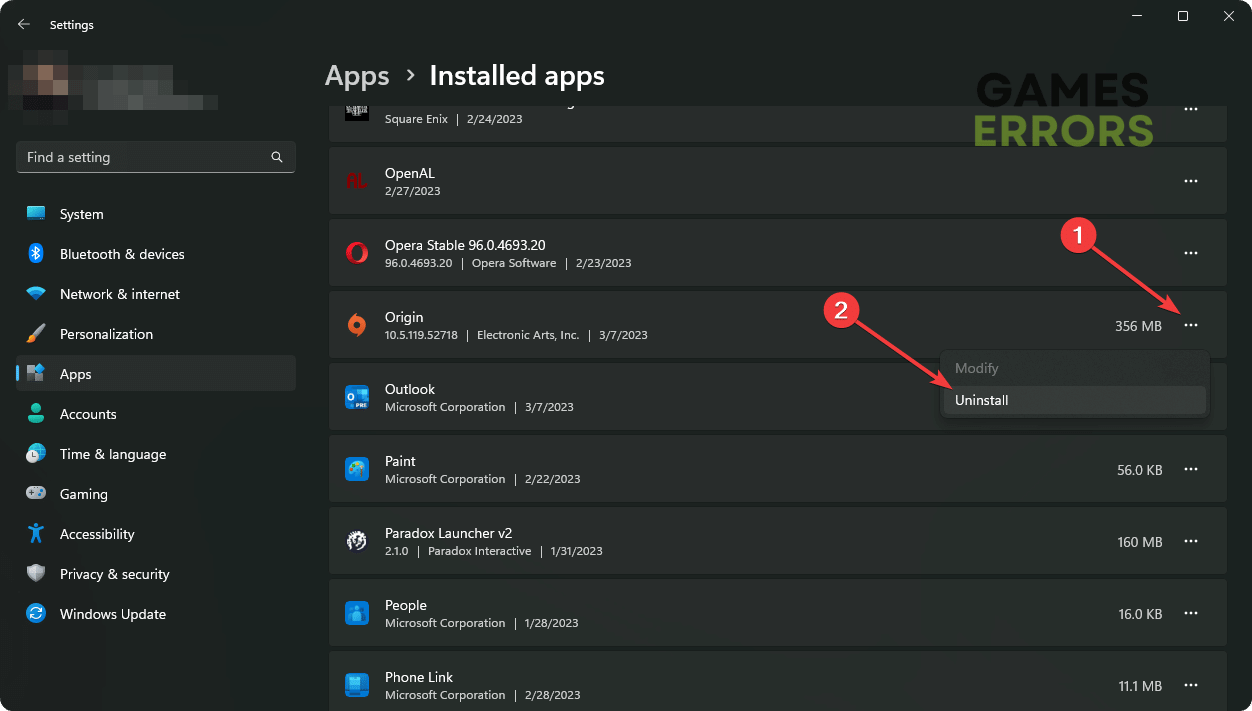
5. Re-install the game client
- Go to Windows Settings.
- Navigate to the Apps and then Installed apps.
- Then, click on the three horizontal dots next to Steam or EA app, or Origin, depending on whatever you are using, and then click on Uninstall.
- After uninstalling, re-install the game client.
After that, try to update Apex Legends and see whether it has fixed the problem or not. If necessary, perform a clean boot and try again.
You may still encounter the same problem. In this case, consider re-installing the game and updating Windows to the latest version.
If you are interested, learn how to solve High Ping issues on Apex Legends.
This article has explained how to fix Apex Legends won’t update on Steam and EA app on Windows 10 and 11. Do you have any questions or suggestions regarding this topic? Feel free to write them down in the comment box.

Improve this guide
User forum
0 messages