
What is Diablo 4 Error Code 7? Fix It Quickly
Not only the game causes certain error codes, but the game launcher isn't perfect as well. We can assist you in resolving this annoying issue! 🤝
The Diablo 4 error code 7 has been around for some time now, frustrating players and preventing them from enjoying the latest game from the Diablo series. We took time, looked into the issue, and created an ultimate list of the most frequent causes and solutions for error code 7 in Diablo 4.
If you can’t even reach the main menu and see nothing, learn how to fix the Diablo 4 black screen.
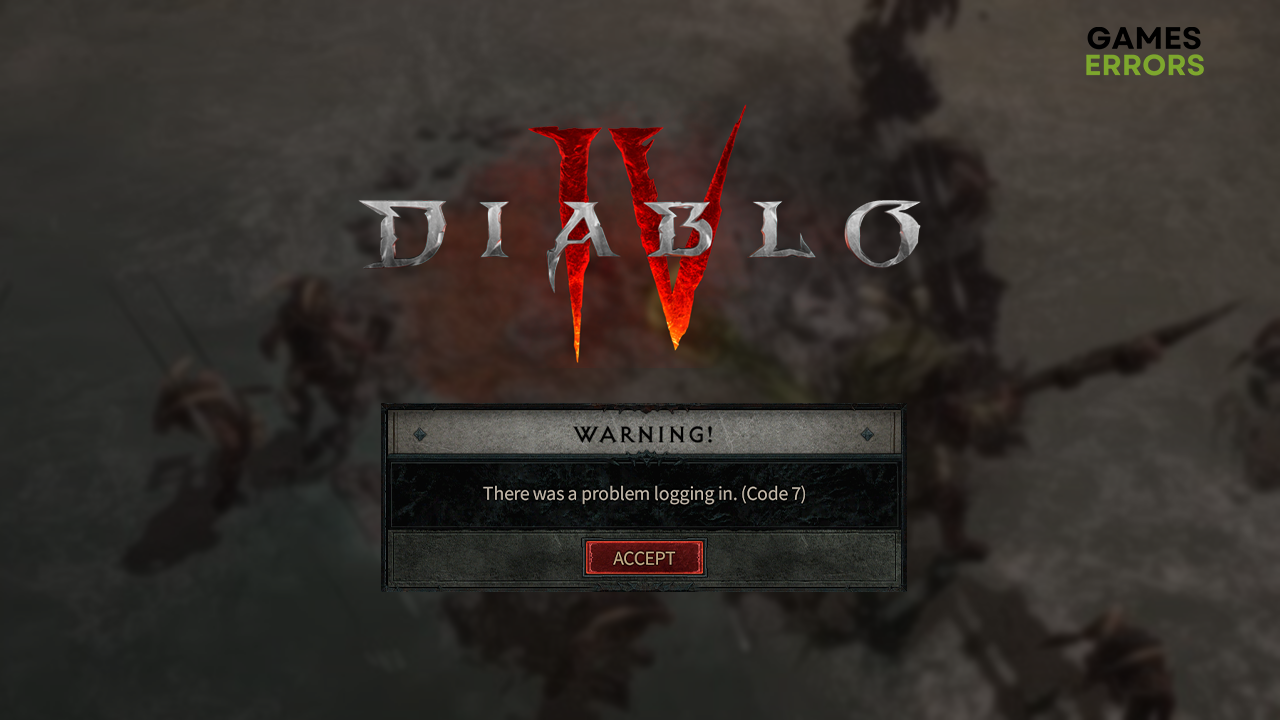
There was a problem logging in. (Code 7)
What is Diablo 4 Error Code 7?
Error code 7 in Diablo 4 means there are problems with the Battle.net launcher, temporary issues on your PC, compatibility problems with background apps, an outdated network driver, incorrect DNS settings, problematic network settings, or pilled-up cache files.
How to fix Diablo 4 error code 7?
Get started with the following checks and fixes:
- Restart your PC: This will ensure no temporary issues are causing the error code and your PC is running correctly.
- Launch Diablo 4 directly: Instead of using the Battle.net launcher to which the error code is related, launch the game through the executable (.exe) file.
- Close background apps: Blizzard team is aware of the error code 7 and recommends launching Diablo 4 without any apps running in the background.
Proceed with the step-by-step solutions to eliminate error code 7 in Diablo 4.
1. Update the network driver
Your network adapter relies on communicating with the rest of your PC, home network, and the internet. If the driver is outdated, your game client might be unable to connect with Battle.net, which will cause the login error 7.
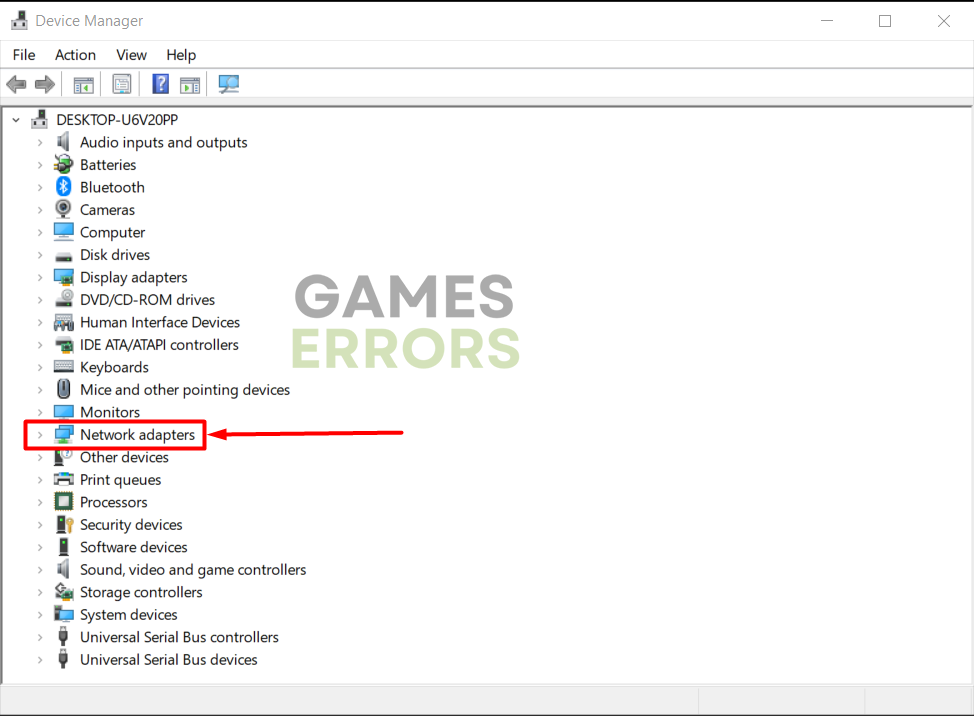
- Click on the Windows icon, type Device Manager, and open it.

- Double-click on the Network Adapters section.

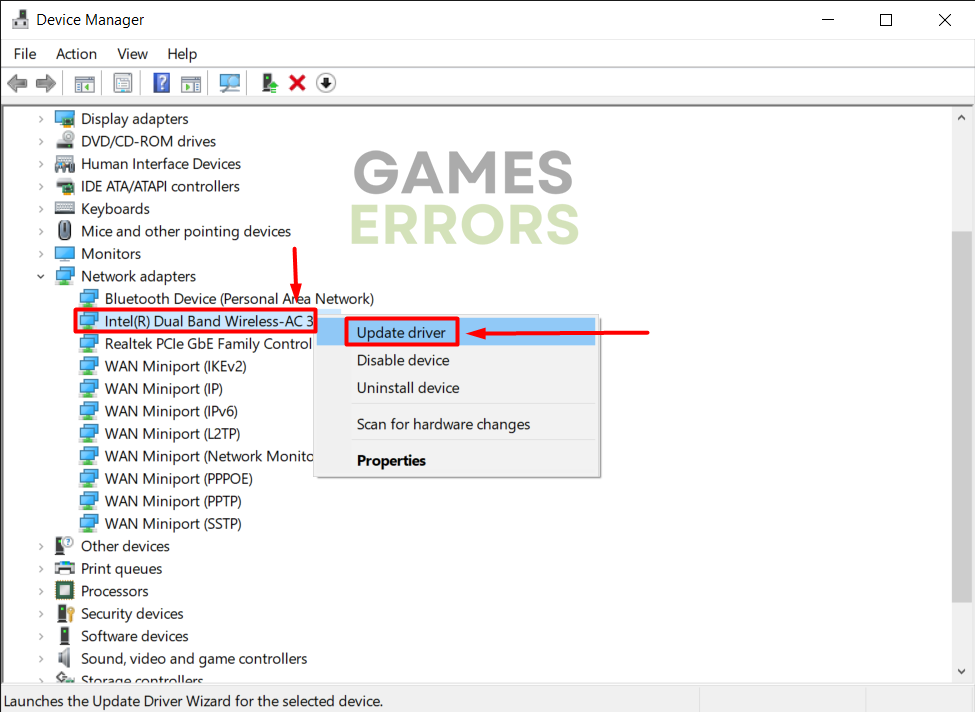
- Right-click on your network device and select the Update driver option.

- Select the Search automatically for drivers option.
- Install the driver update.
- Restart your PC.
PC HelpSoft is an amazing driver updater tool that handles the complete driver management process. It scans, monitors, and updates the network driver whenever an update comes out!
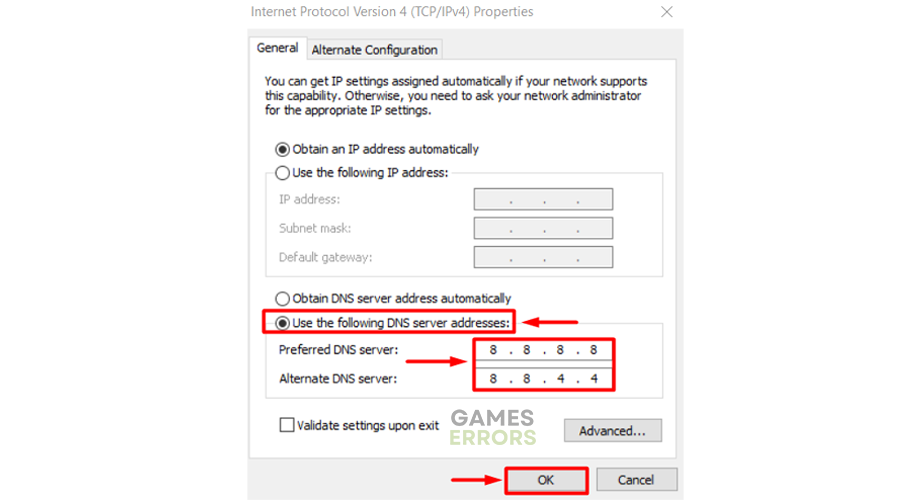
2. Use the Google DNS
Time needed: 5 minutes
Windows automatically assigns a Domain Name System server address based on your location. We recommend manually setting Google DNS as the default since it is the most reliable.
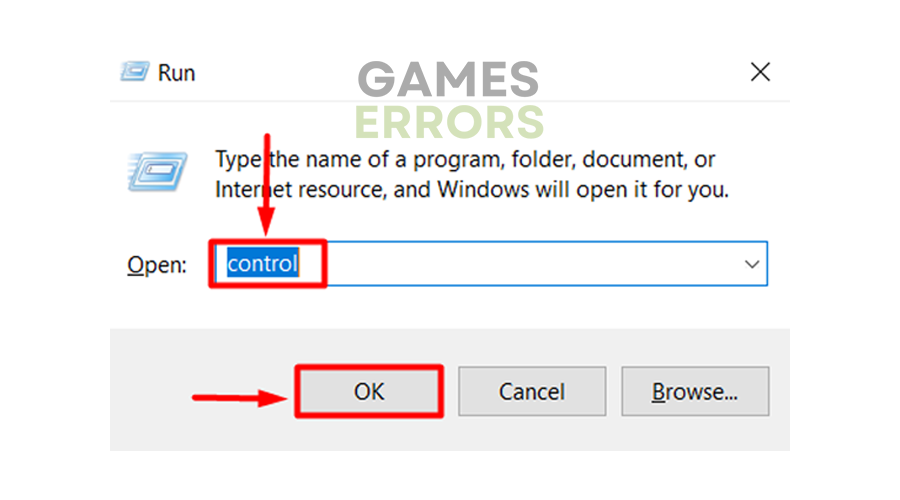
- Using the Windows Key + R shortcut, open the Run dialog, type control, and hit OK.

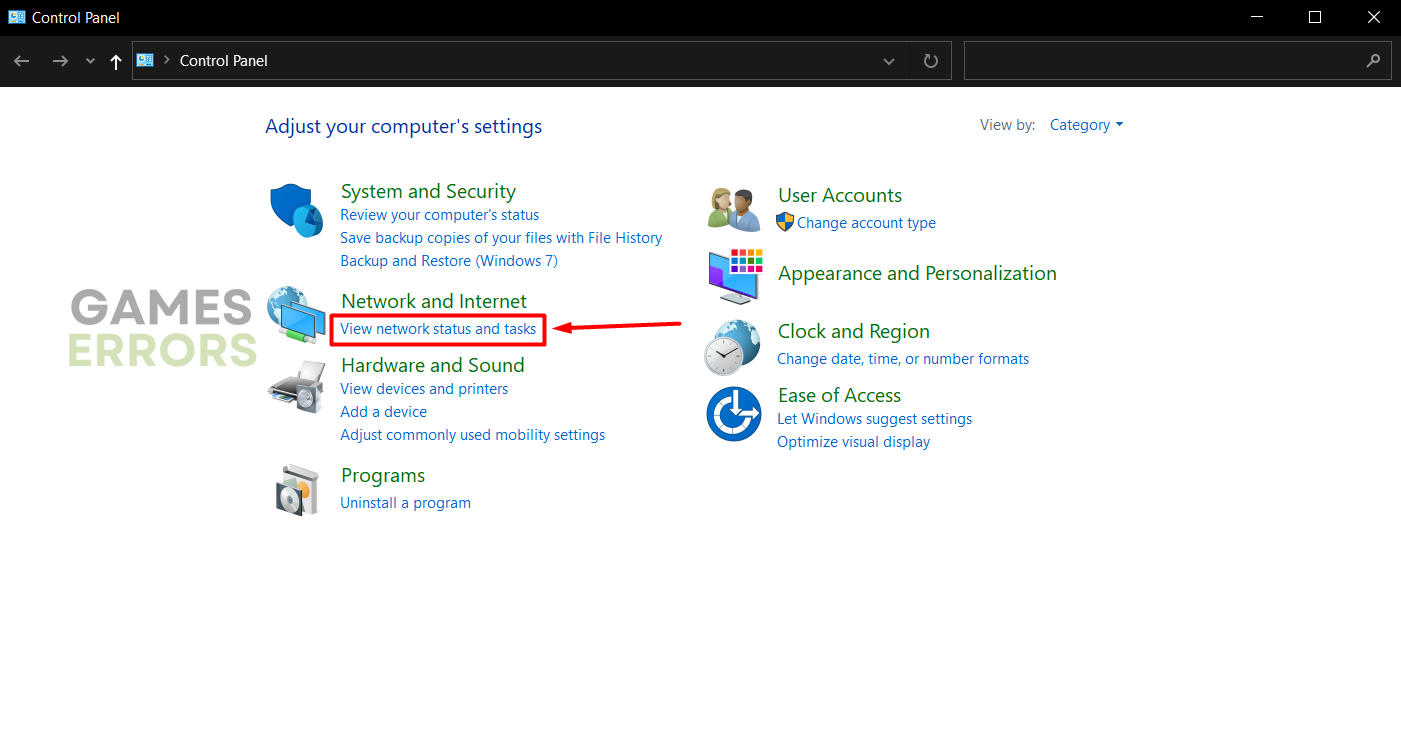
- Click on View network status and tasks.

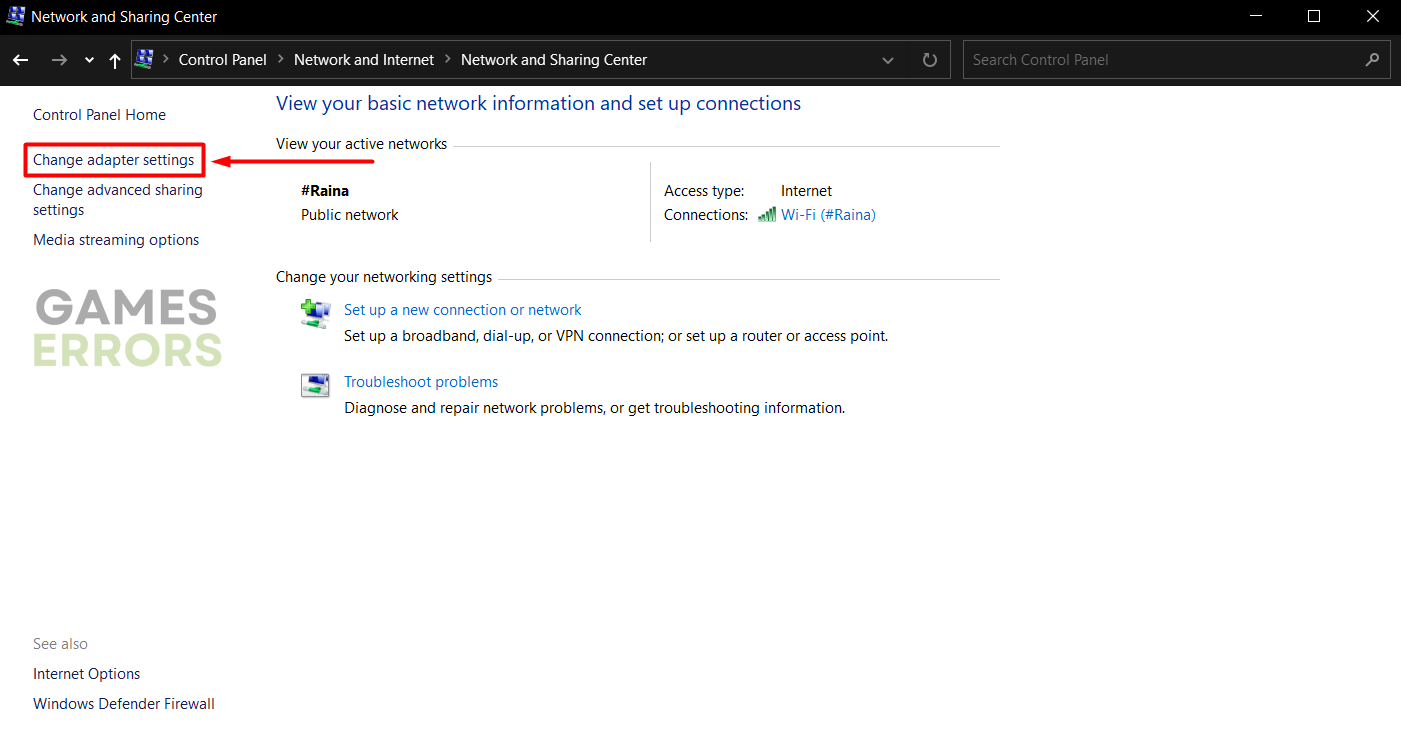
- Click on the Change adapter settings.

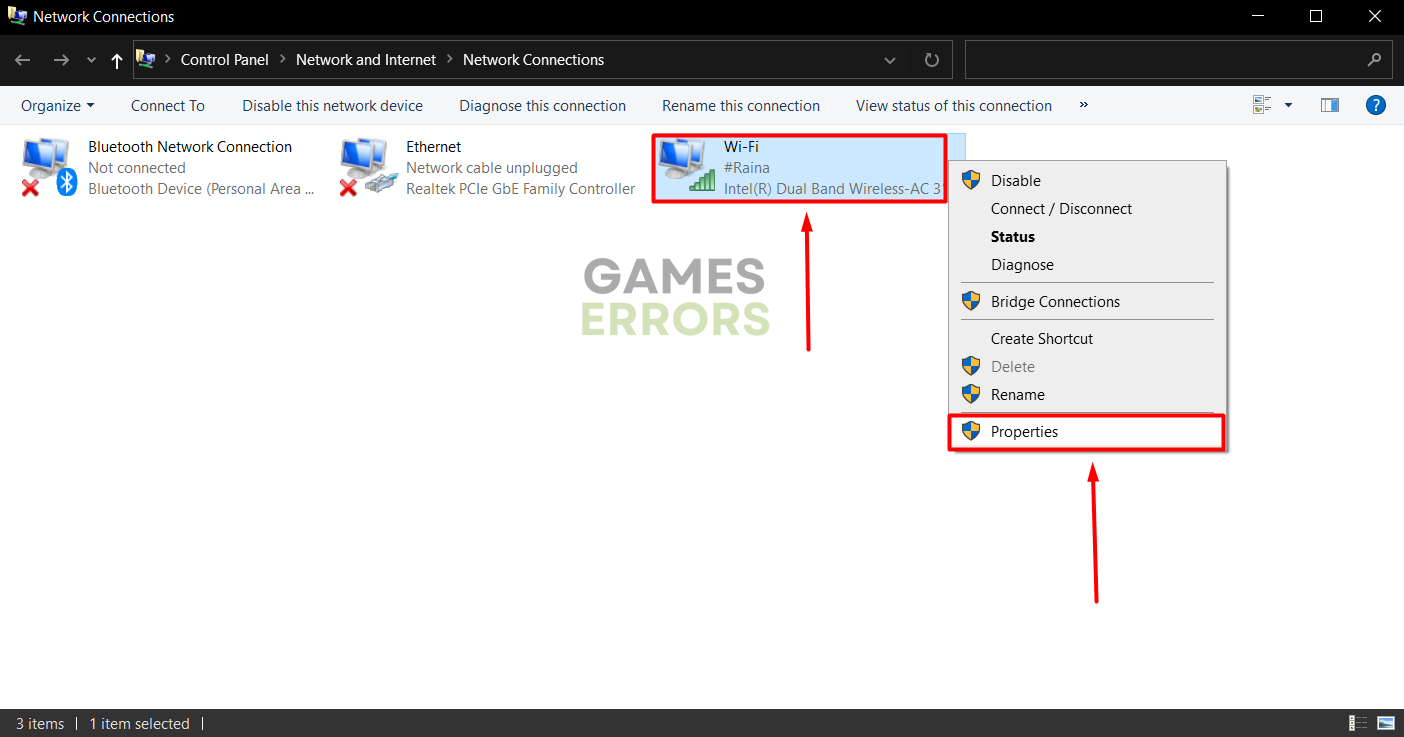
- Right-click the internet network you use and select Properties.

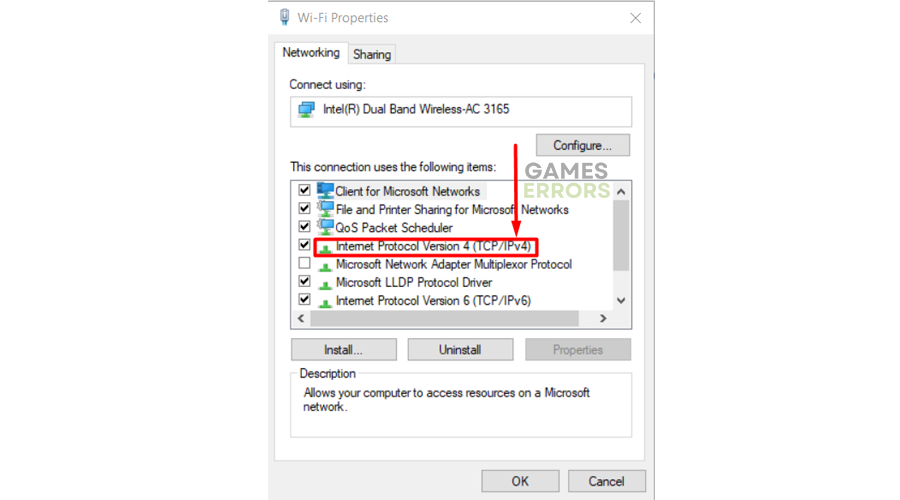
- Double-click Internet Protocol Version 4 (TCP/IPv4).
- Enable Use the following DNS server addresses and add:
➡ 8.8.8.8 for the Preferred DNS server
➡ 8.8.4.4 for the Alternate DNS server - Click OK and restart your PC.
3. Restart network settings
Even after installing the latest network driver update, your PC might have outdated network settings that can create issues. Restart them manually through Command Prompt.
- Click on the Windows icon, type Command Prompt, and open it.
- Type each of the commands listed below individually and hit Enter after everyone:
ipconfig /flushdns
ipconfig /registerdns
ipconfig /release
ipconfig /renew
netsh winsock reset
- Restart your PC.

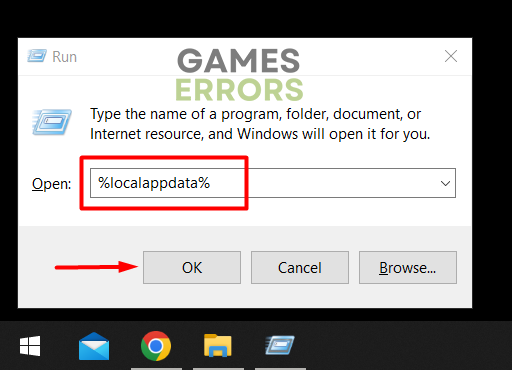
4. Clear cache files
Pilled-up cache files cause troubles when an app or a game is launched. They can prevent Diablo 4 from fully loading or communicating with the Battle.net service.
- Use the Windows Key + R shortcut to open the Run dialog, type %localappdata%, and hit OK.

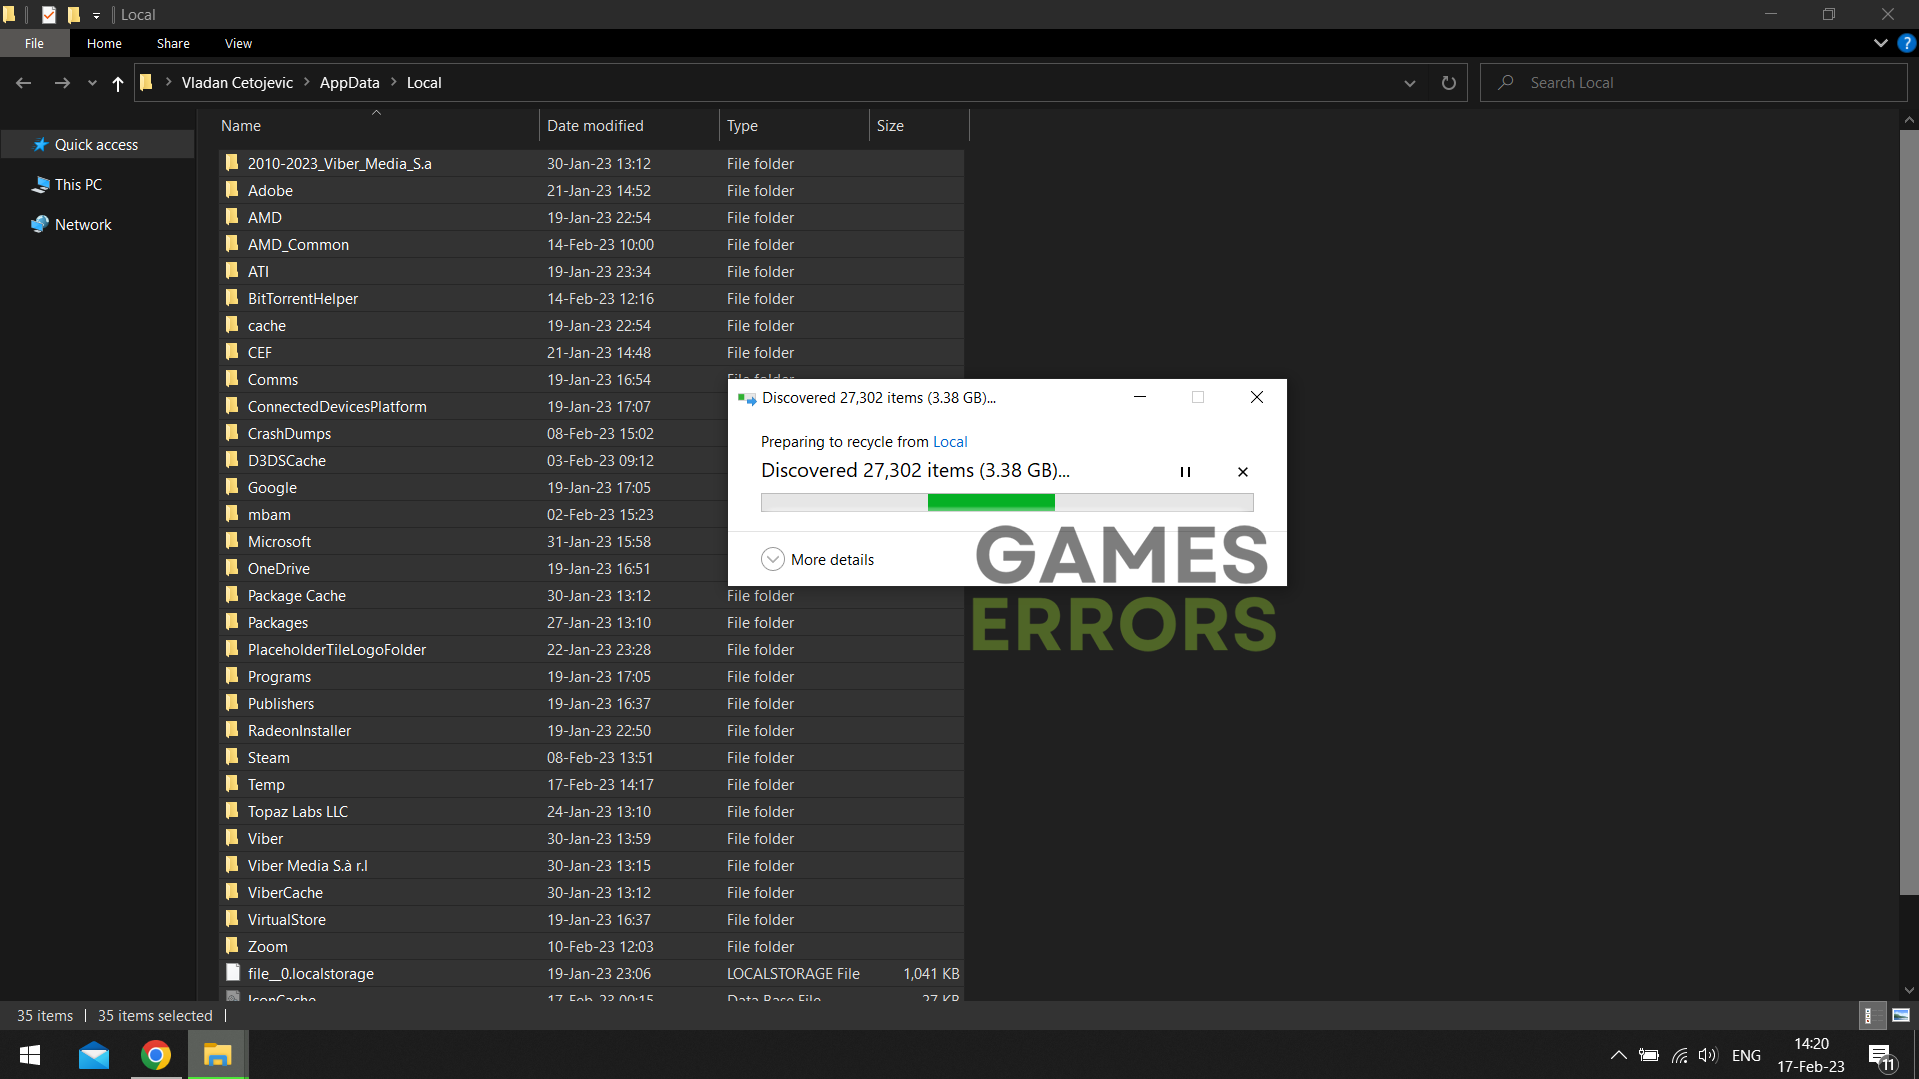
- Use the CTRL + A shortcut to select all files in the folder.
- Press the Delete key on your keyboard to delete all the files in the folder.
➡ If prompted to confirm, click on Yes.
➡ If some files can’t be deleted, click on Skip.
Extra steps
If you still get error code 7 when you want to play Diablo 4, try to do the following:
- 🔐 Restart your password: Login into your Battle.net profile and change your password. Restart your PC, enter your login credentials in the game launcher, and start Diablo 4.
- ⏳ Wait between logins: Some players claim that waiting 15 minutes after the unsuccessful attempt solved the issue for them.
- 🔁 Reinstall Diablo 4: Uninstall the game and delete all game files and folders, restart your PC, and perform a clean installation of Diablo 4.
Related articles:
- Diablo 4 Error Codes List: How To Fix Them As Easy As Possible
- Diablo 4 Drivers Out Of Date Error [Solved]
- Diablo 4 Slow Download Speed: Fix It Quickly
- Diablo 4 High RAM Usage: Fix It Quickly
- Diablo 4 Won’t Install: How To Force It – Easy Guide
Conclusion
These were the most reliable solutions for Diablo 4 error code 7. Comment with feedback about how it went, and let us know if you discover any alternative solutions.

Improve this guide
User forum
0 messages