
Elden Ring Network Status Check Failed: Effective Solutions
Change DNS or play offline if Elden Ring keeps failing to check the network status 🎯
After launching, you may notice the Network status check failed message on Elden Ring. If it keeps bugging you, don’t worry. This problem is very easy to fix.
This RPG is one of the most anticipated titles for any fantasy action game lover. However, the gameplay experience doesn’t go straight in some cases. Particularly, the Network status check failed error may stop you and give you the feeling that this game is not running well.
Learn how to Fix Elden Ring is not updating if necessary.
What causes the network status check failed error on Elden Ring?
In case the network status check fails every time you launch Elden Ring, you should try to understand why it’s happening. If you dig deeper, you will find any of the following reasons:
- Server issues: If the Elden Ring server is overloaded or going through some problems, you may see that the network status check process keeps failing.
- Security program: Your antivirus or firewall may interfere and prevent Elden Ring from communicating with the remote server properly. It may be a reason behind this problem.
- Network problems: Problematic internet connection and corrupted or incorrect configuration also may be why this error message is popping up.
- Corrupted game files: Corrupted, missing or problematic game files also can be the reason behind this issue.
How can you fix Elden Ring network status check failed?
We have featured the most working methods to troubleshoot this problem. However, before that, do these quick things:
- Check Elden Ring’s Twitter account or any other source to know whether the servers are down or not.
- Power cycle your router and PC.
- Ensure that you have a stable internet connection.
- Make sure that you are not using any VPN or proxy.
After confirming the above things, follow these solutions to fix the network status check failed error on Elden Ring:
- Whitelist Elden Ring in the firewall
- Change DNS
- Reset network
- Repair the game files
- Update network driver
- Play Offline
1. Whitelist Elden Ring in the firewall
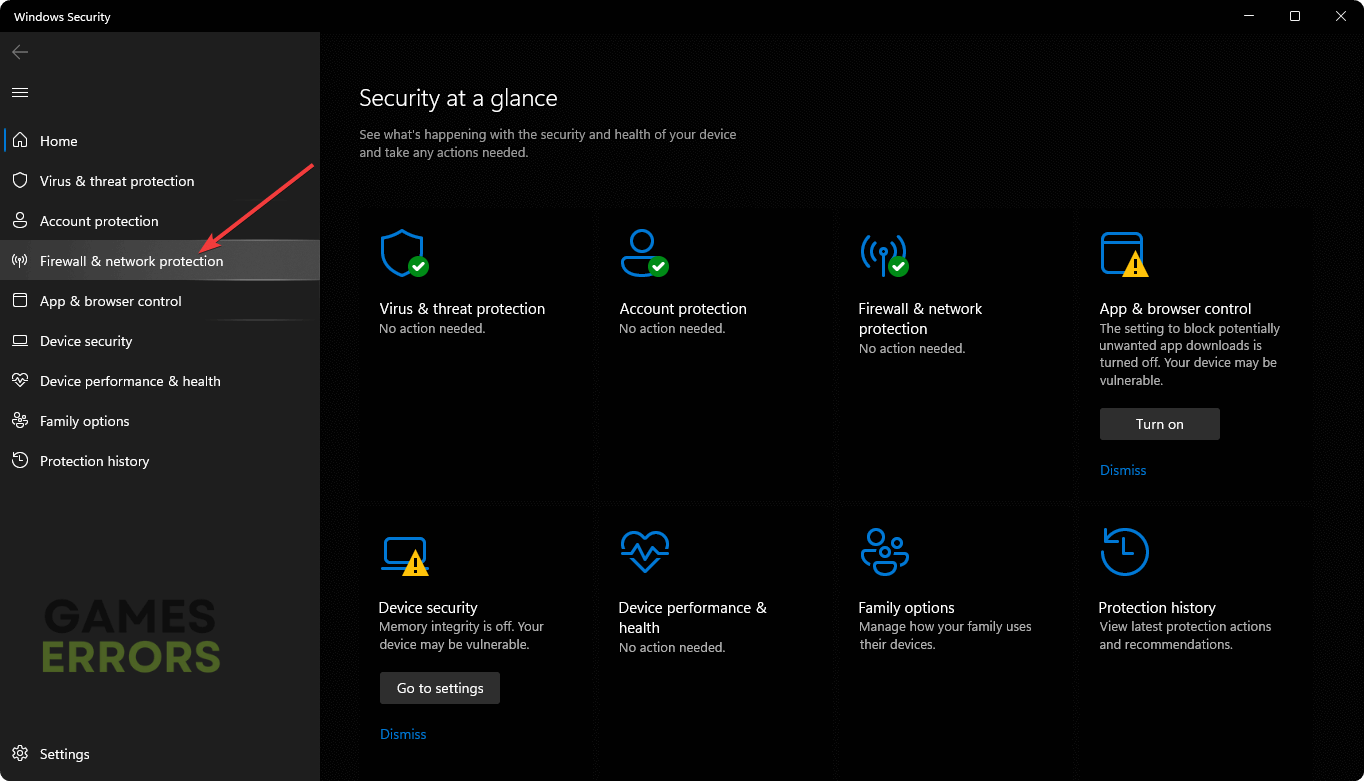
- Open the Windows Search box, type Windows Security, and hit Enter.
- Go to Firewall & network protection.

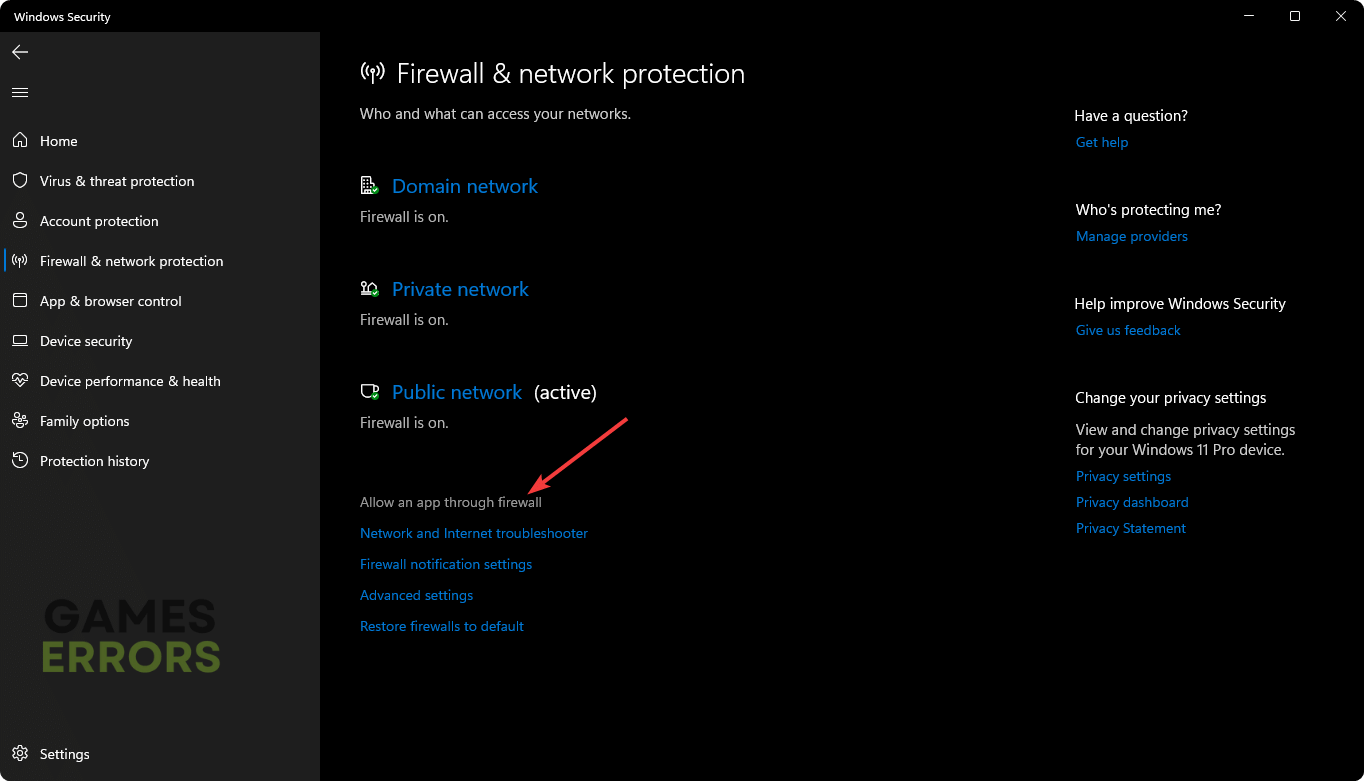
- Click on Allow an app through firewall.
- Next, click on Change settings.
- Tick Private and Public for Elden Ring and Steam.
- Click on OK.
2. Change DNS
Time needed: 2 minutes
If Elden Ring constantly keeps failing to check network status, change the DNS server settings to fix this problem.
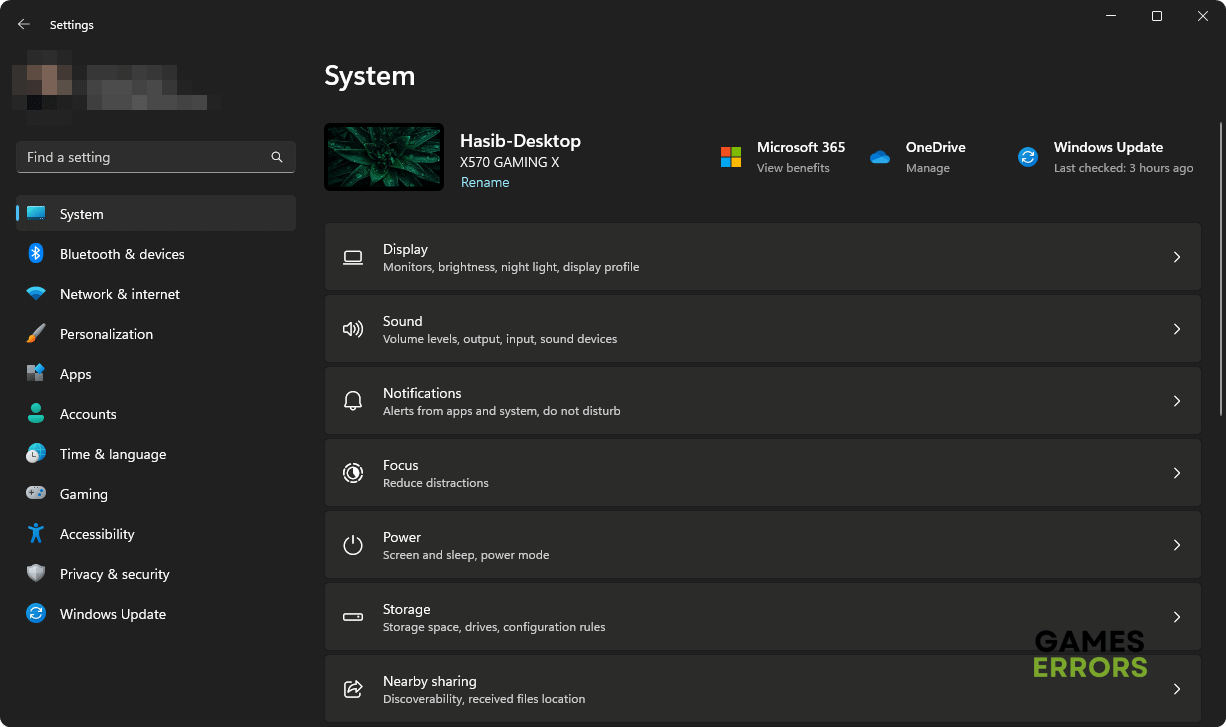
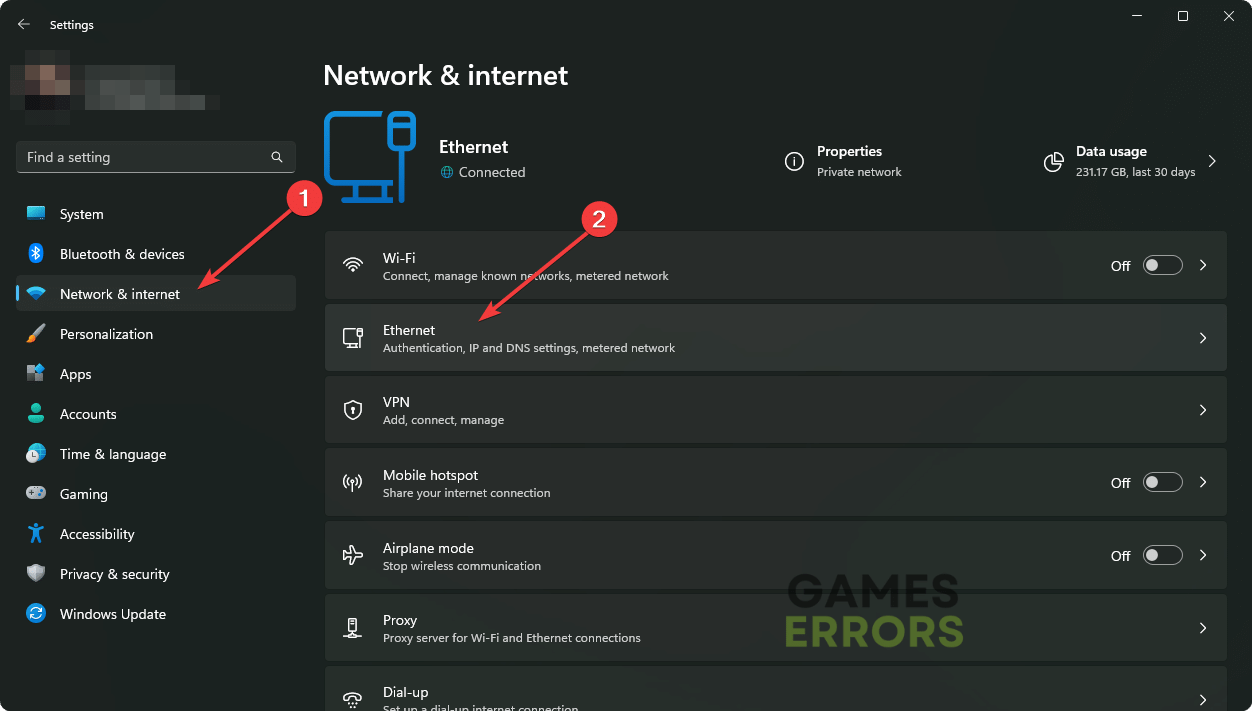
- Press Win + I on the keyboard to open Windows Settings.

- Go to Network & internet and then Ethernet or WiFi, depending on the connection you are using.

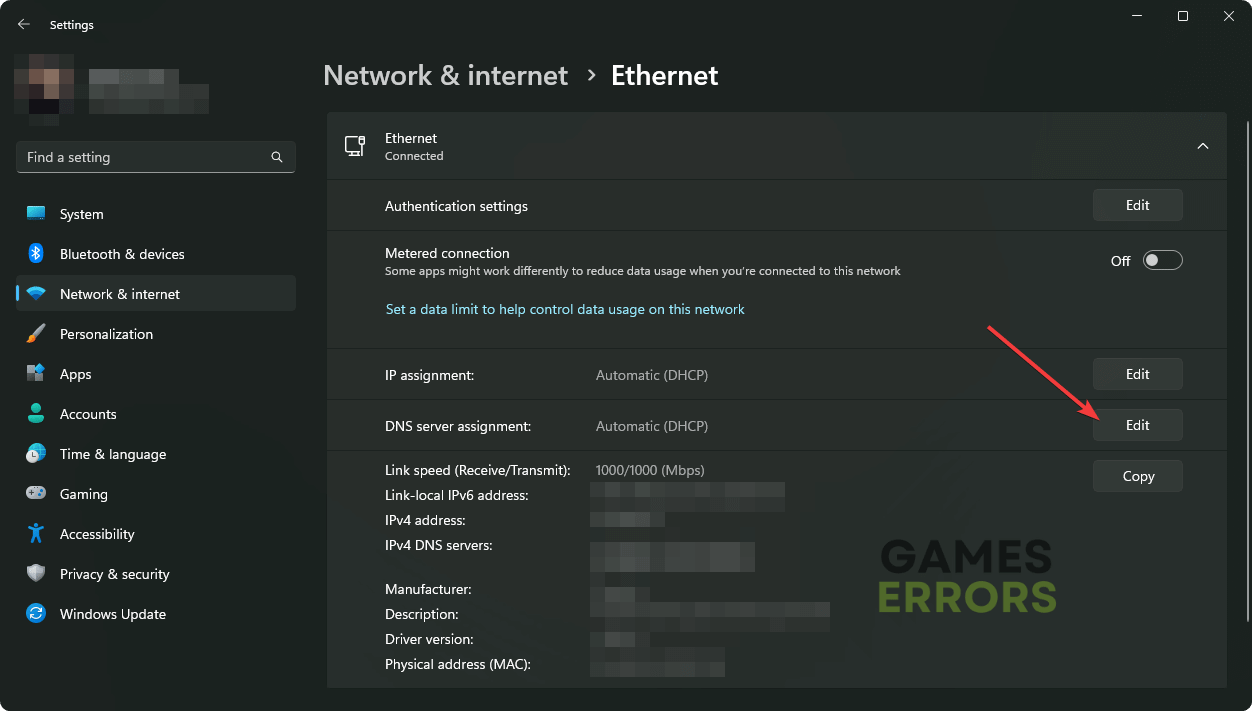
- Click on Edit next to the DNS server assignment.
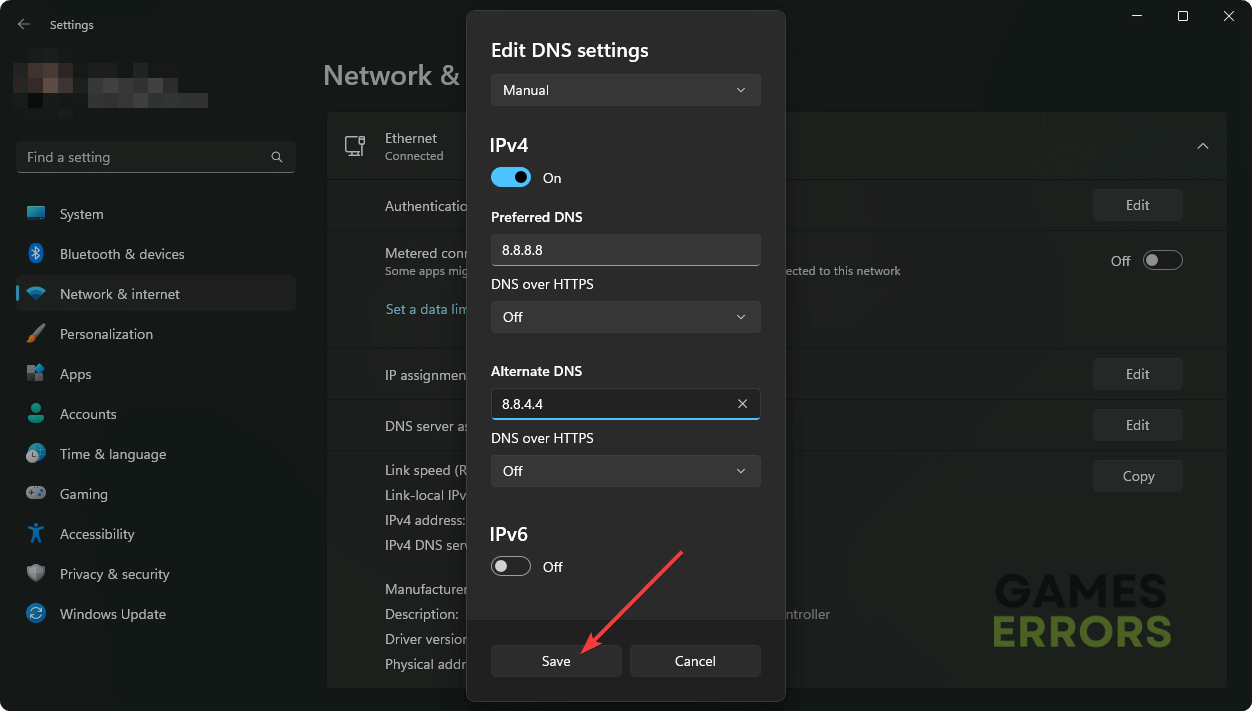
- Select Manual from the dropdown menu and enable IPv4.
- Type 8.8.8.8 and 8.8.4.4 or any other public DNS addresses as Preferred and Alternate DNS, and then click on Save.
- Restart your PC.
3. Reset network
Reset the network to get rid of the network status check failed error on Elden Ring. For this, follow these steps:
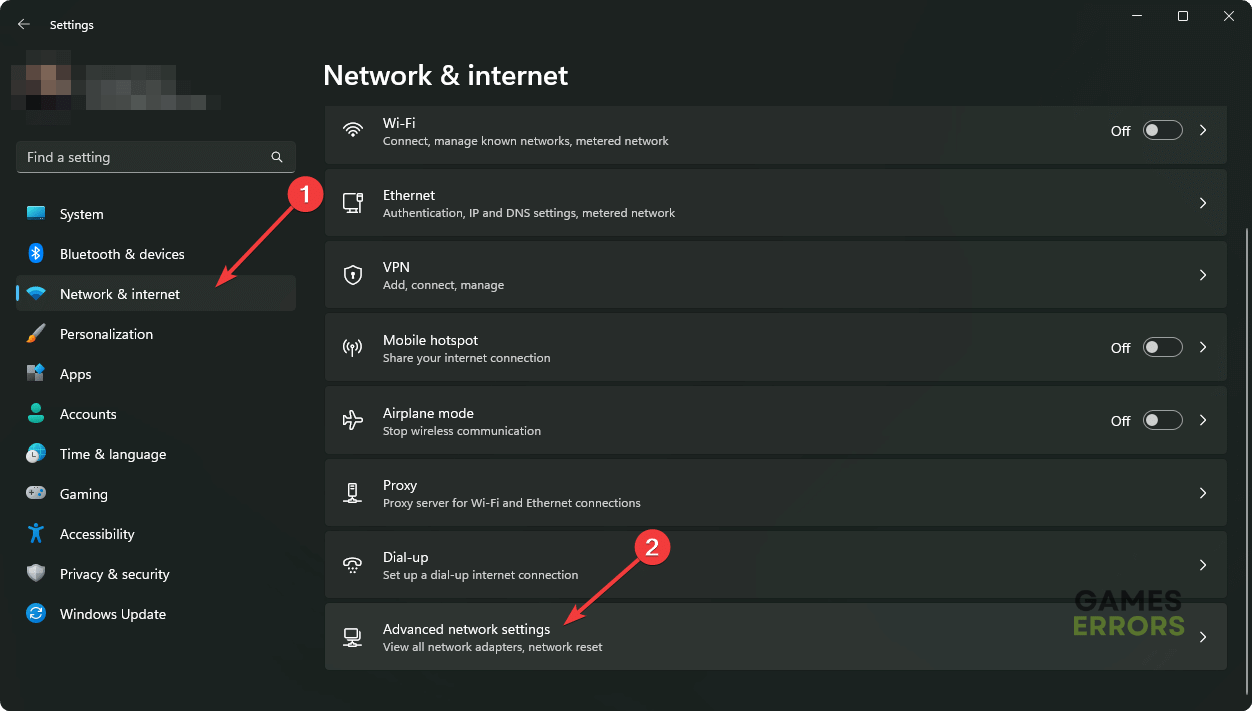
- Go to Windows Settings.
- Navigate to Network & internet and then click on Advanced network settings.

- Go to Network reset.
- Click on Reset now.
- Restart your PC.

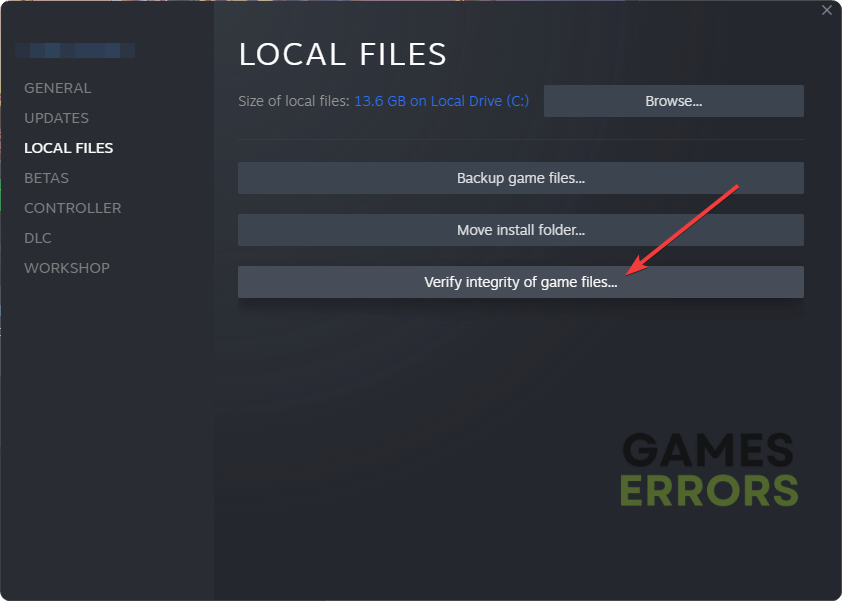
4. Repair the game files
- Launch Steam and go to the game library.
- Right-click on Elden Ring and then go to Properties.
- Navigate to the Local Files tab, and click on Verify integrity of the game files.

- Give it some time to finish the process.
It will also help if Elden Ring won’t launch on your PC.
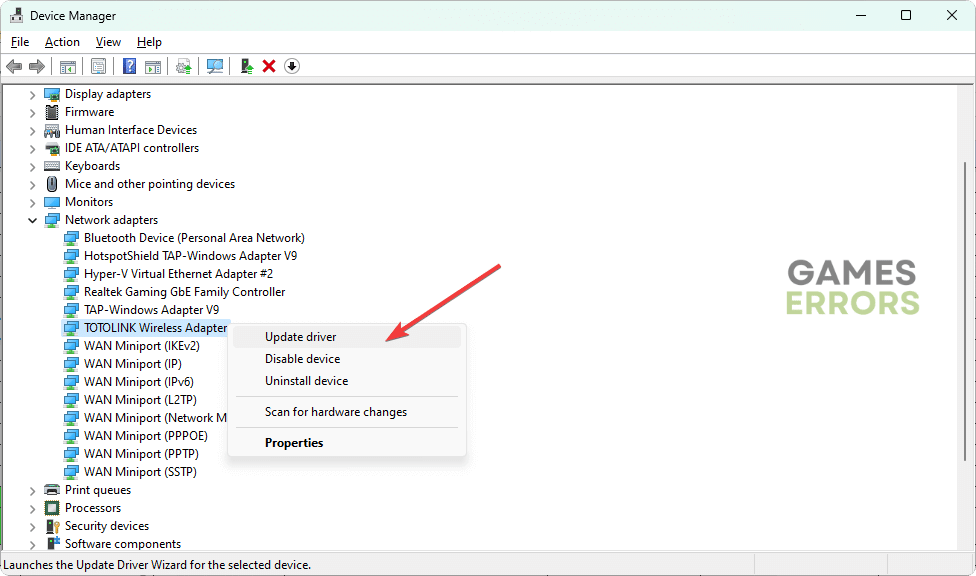
5. Update network driver
- Press Win + R to open Run.
- Type the following command and hit Enter:
devmgmt.msc - Expand Network adapters.
- Right-click on the network driver you want and then click on Update driver.

- Click on Search automatically for drivers.
- Go ahead and finish the process.
- Restart your PC.
To update any driver on your Windows 11 or 10 PC, you should use PC HelpSoft. It can find the latest compatible official version of the drivers for any devices like GPU, network adapter, etc., and install them automatically on your PC accurately.
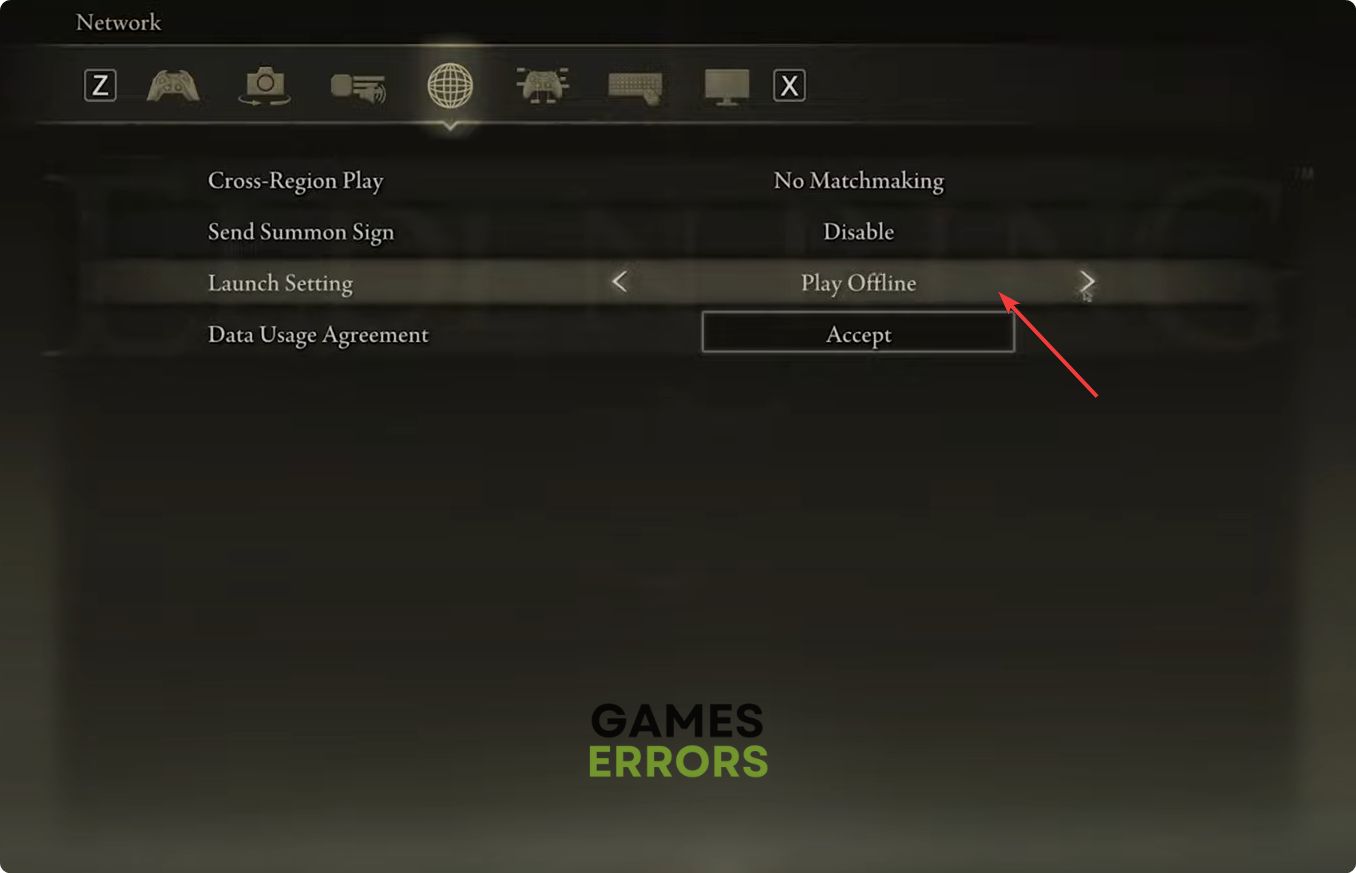
6. Play in offline mode
- Launch Elden RIng.
- Go to System.
- Navigate to the Network tab.
- Change Launch Setting from Play Online to Play Offline.

- Save it.
- Relaunch the game.
You should no longer encounter network status check failed error on Elden Ring. However, if it still keeps bugging you, disable your antivirus and firewall to see if it helps. Or consider re-installing the game completely. You also can update Windows to the latest version.
If needed, learn the methods to fix Elden Ring stuck on the loading screen.
You have just learned how to fix Elden Ring network status check failed error. Let us know in the comment box if you have any better suggestions.

Improve this guide
User forum
0 messages