
Fallout 4 Is Missing .INI: Follow These Steps
Fallout 4 missing .INI? No worries! Our guide has you covered with easy solutions and expert tips.
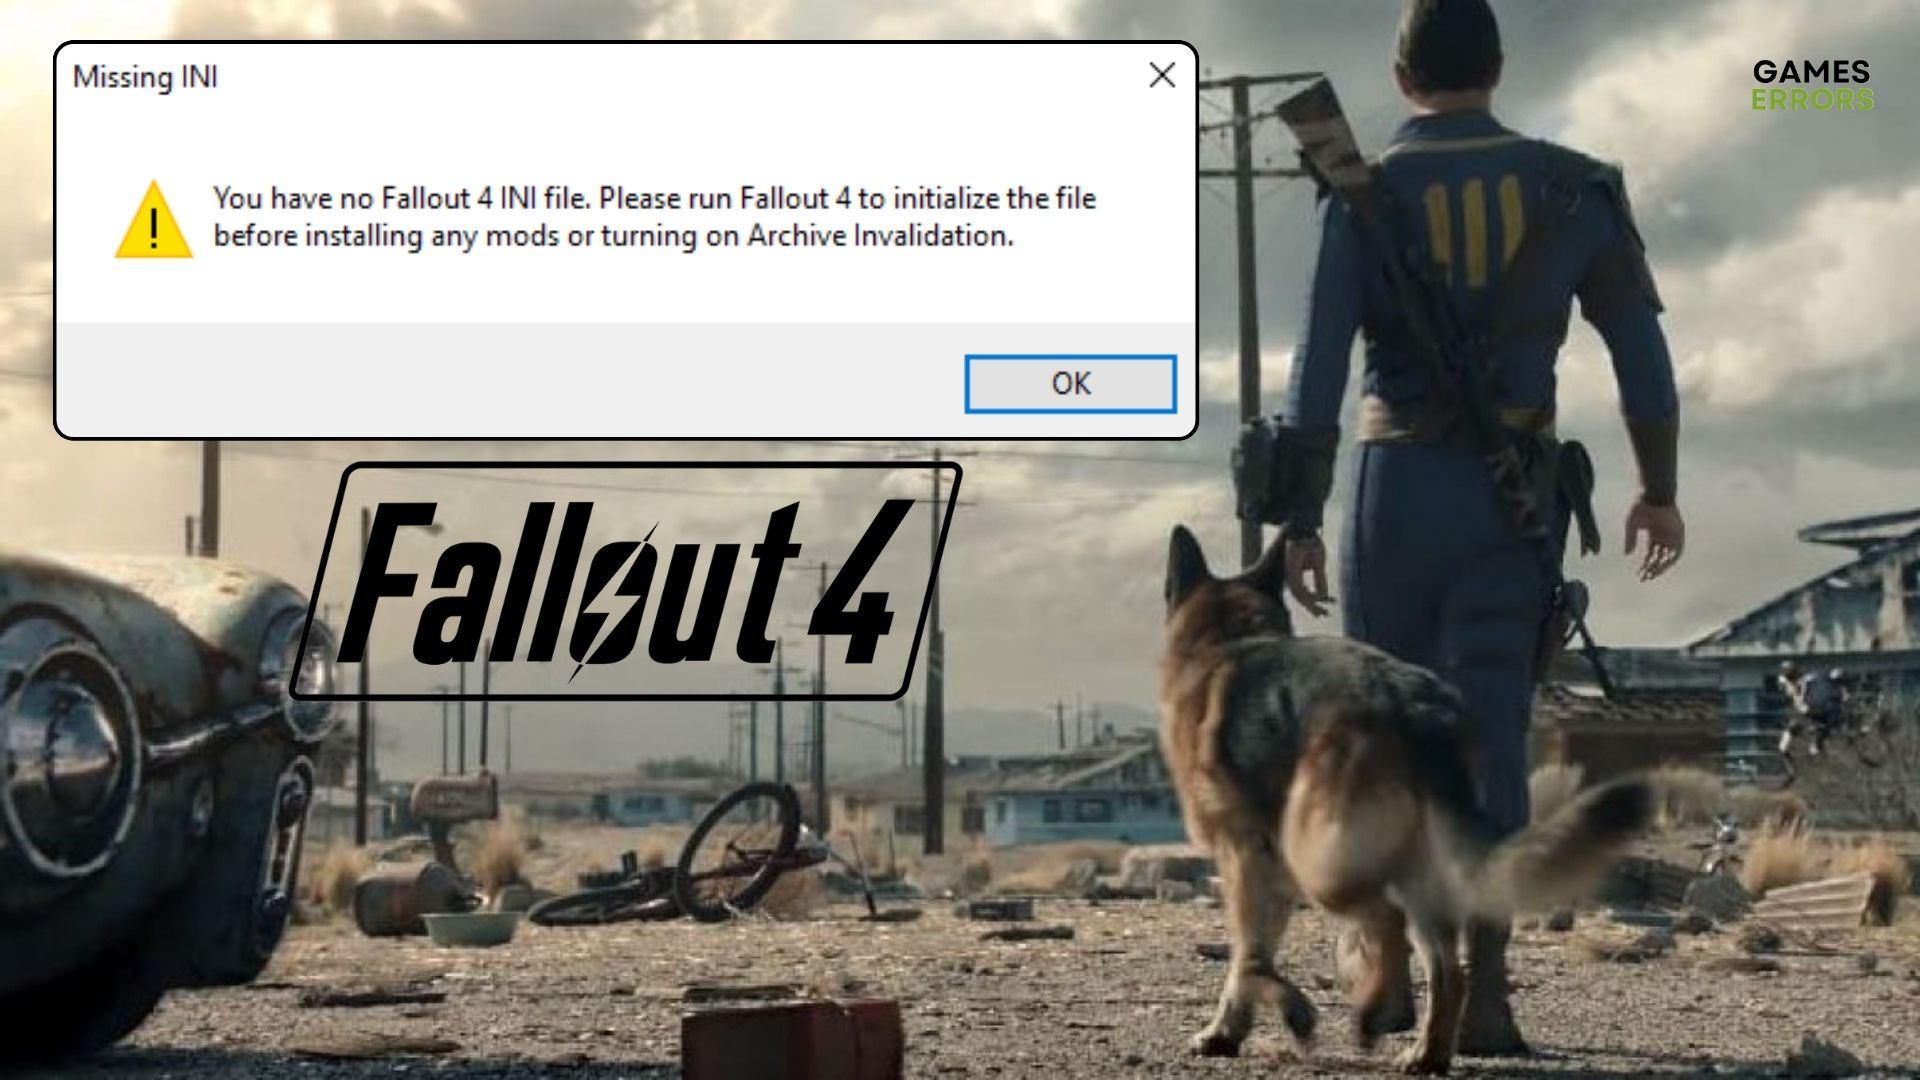
A significant number of worldwide players reported that Fallout 4 .INI files go missing or become corrupted, leaving them scratching their heads in frustration.
In the vast, post-apocalyptic world of Fallout 4, these files serve as the backbone for customizing and optimizing your gaming experience. They allow you to tweak settings, apply mods, and enhance your gameplay.
If you’ve found yourself facing the same issue, fear not! In this comprehensive guide, we’ll walk you through the steps to resolve this issue and get you back into the immersive wasteland of the Commonwealth.
Where is the Fallout 4 .INI file?💡
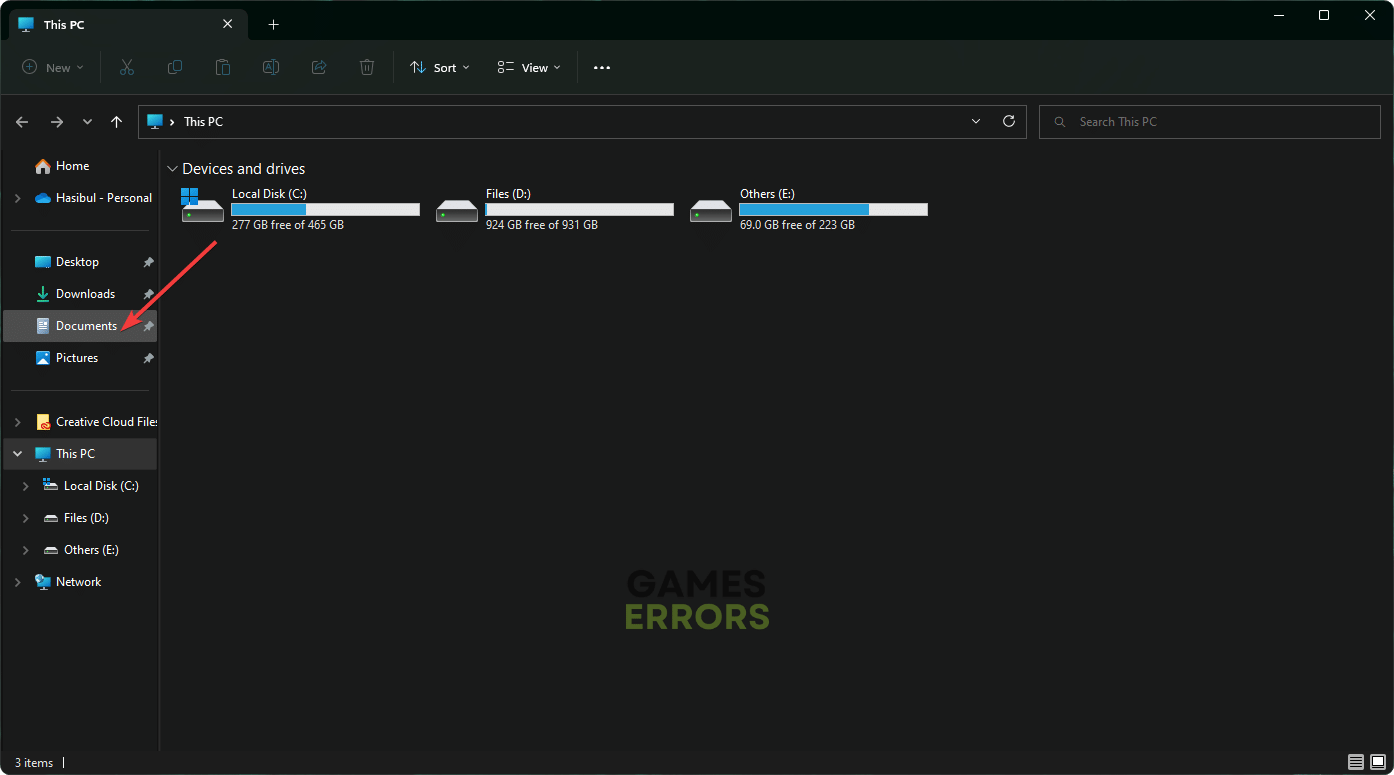
- Use this keyboard shortcut to open File Explorer: Windows + E.
- Navigate to the Documents folder. This is usually located on your system drive (C:) but may be on another drive if you’ve customized your setup.

- There, look for a subfolder called My Games and open it.
- You should see a folder named Fallout4. Open it.
- Now, you’ll find several INI files, including Fallout4.ini and Fallout4Prefs.ini.
There are two .ini files in this directory:
- Fallout4.ini – contains general game settings
- Fallout4Prefs.ini – contains graphics and performance settings.
You can edit the .ini files to change various settings, such as the difficulty level, the field of view, and the maximum frame rate. However, it is important to be careful when editing the .ini files, as making changes can cause the game to crash or become unstable.
If you are not comfortable editing the .ini files yourself, you can use a mod manager such as Nexus Mod Manager to install mods that change the game’s settings.
Where is Fallout 4 INI on Steam?🔎
The Fallout 4 INI file on Steam is located in the following directory:
C:\Program Files (x86)\Steam\steamapps\common\Fallout 4What can I do if Fallout 4 is missing .INI file?👀
- Modify a random setting
- Manually build .INI File
- Look for .INI file drives
- Launch the Mod Manager with Administrator privileges
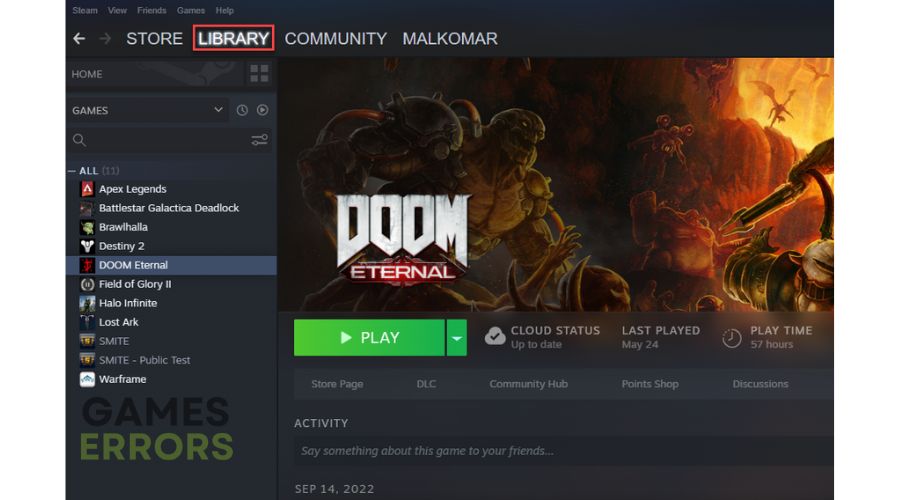
1. Modify a random setting
- Launch Steam, then navigate to Library.

- From the game list located on the left side, open Fallout 4.
- Now, hit Options, then modify a random setting.
- Now, start the game and check if the issue is gone.
2. Manually build .INI File
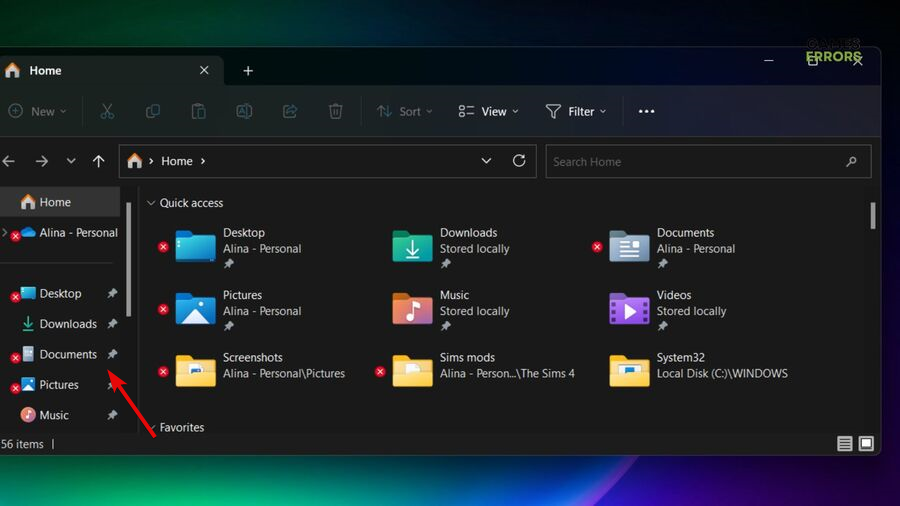
- Open File Explorer, by simultaneously pressing these keys: Windows + E.
- Navigate to the Documents folder.

- There, look for a subfolder called My Games. Open it, then launch the folder named Fallout4 (In some cases, you might directly see the game’s folder without being necessary to navigate through the My Games step).
- Create a new txt file.
- Now, open the txt file, then copy and paste these:
- [Display]
- iLocation X=0
- iLocation y=0
- [Archive]
- bInvalidateOlderFiles=1
- sResourceDataDirsFinal=
- Make sure you save the file Fallout4Custom.ini.
- Open the game.
3. Look for .INI file drives
If you’re not aware, the Fallout 4 .ini file typically resides in the drive where you’ve installed the game. So, if your Fallout 4 installation isn’t on the C drive, you should search through your drives to find the .ini file. To ensure a comprehensive search, it’s advisable to configure your folders to display file extensions. You can easily do this by going to the “View” tab and checking the box next to “File name extensions.”
Once you’ve successfully located the .ini file, simply relocate it to the Documents\My Games\Fallout 4 directory. With this step completed, you can now launch Fallout 4 and enjoy your gaming experience without any hindrances.
4. Launch the Mod Manager with Administrator privileges
- Find the executable file (.exe) for your mod manager, then right-click on it and select Properties.
- Navigate to the Compatibility tab, and ensure that you tick the option that says Run this program as an administrator.
- Click on Apply and then confirm by selecting OK.
🗝️Related articles:
In the unforgiving world of Fallout 4, where every choice you make can alter your fate, resolving the missing .INI dilemma should be a straightforward quest.
With this guide as your trusty source, you’ve gained the knowledge and skills needed to overcome this technical hurdle.
Remember, the Commonwealth awaits your return, and your adventures are just a few steps away. So, equip your power armor, grab your trusty weapons, and dive back into the captivating wasteland of Fallout 4. The missing .INI files are no longer a formidable obstacle on your path to victory.

Improve this guide
User forum
0 messages