
Atomic Heart VSync not Working: Why & How to Fix it
Here's how to fix the Atomic Heart vsync not working error⚒
Atomic Heart, an alternate history shooter game, features amazing aesthetics and visual designs.
Suppose you are currently experiencing the Atomic Heart vsync not working error. In that case, it must be quite frustrating as avid gamers understand the importance of having a seamless and smooth gaming experience.
Fortunately, we have a number of solutions to fix the Atomic Heart vsync not working error. Read on to find out why this happens and what you can do about it.
Why is Atomic Heart vsync not working?
With vsync enabled, the game’s refresh rate matches its frame rate resulting in a seamless game and visual experience.
Reasons for Atomic Heart vsync not working can be varied and multiple. Some of the common culprits include:
- In-game settings
- Outdated graphics drivers
- MSI Afterburner or RTSS
- Windows Game Mode
- Graphics card control panel settings
- Configuration file settings
- Monitor refresh rate
Without wasting any time, let’s dive into the solutions. You’ll be back playing Atomic Heart in no time.
How to fix Atomic Heart vsync not working?
Before jumping into the solutions, ensure your PC meets the minimum system requirements to run Atomic Heart.
Table of contents:
- Enable Vsync in Atomic Heart
- Update your Graphics Driver
- Disable Windows Game Mode
- Disable MSI Afterburner or RTSS
- Edit configuration file
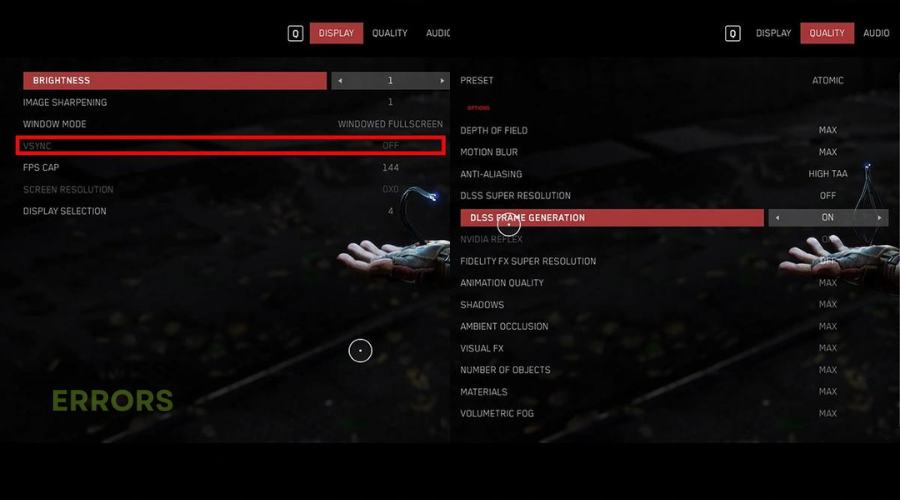
1. Enable Vsync in Atomic Heart
- Start Atomic Heart and allow it to load.
- Access the main menu and select the Options menu.
- From the Options menu, choose the Display tab to access the game’s graphics settings.
- Locate the Vsync option by scrolling down and switch it on.

- Save the changes by selecting Apply, then exit the settings menu.
2. Update your Graphics Driver
Time needed: 4 minutes
If Atomic Heart Vsync is not working, try updating your PC graphics driver to improve performance and overall game stability. To do this:
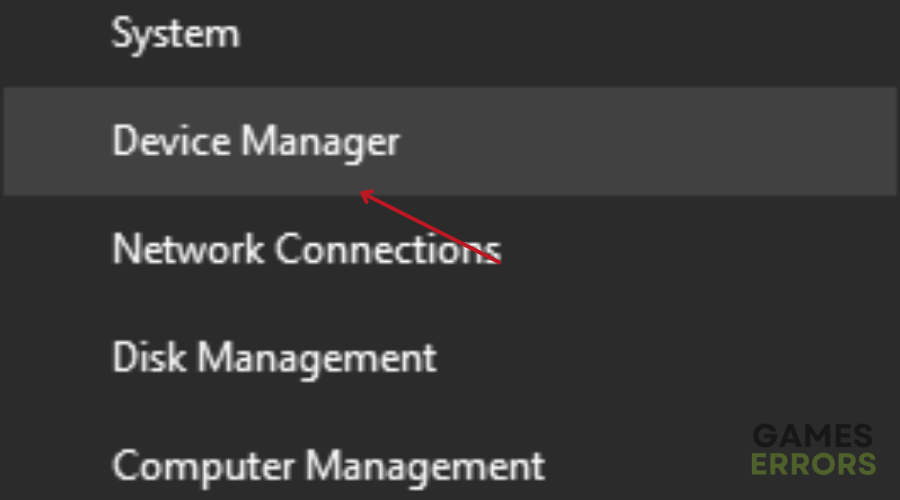
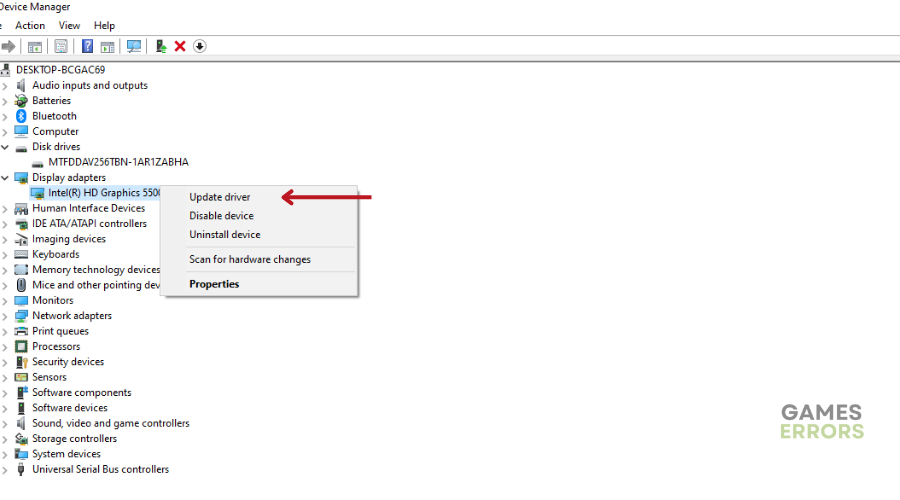
- Press Windows + X simultaneously on the keyboard.
- Select Device Manager from the menu.
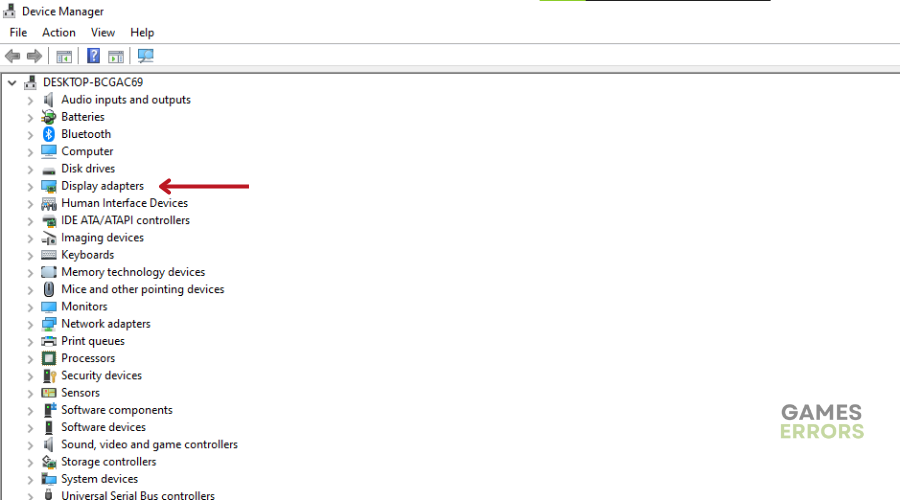
- In Device Manager, locate and double-click the Display Adapters section.
- Right-click the appropriate driver and select Update Driver.
- Select the option to automatically search for drivers.
- Wait for the system to scan and update the required components.
Instead of depending on a device manager that might fail from time to time, try using Drivefix. This is a third-party tool that automatically finds, downloads, and installs the best game-ready driver for your PC.
3. Disable Windows Game Mode
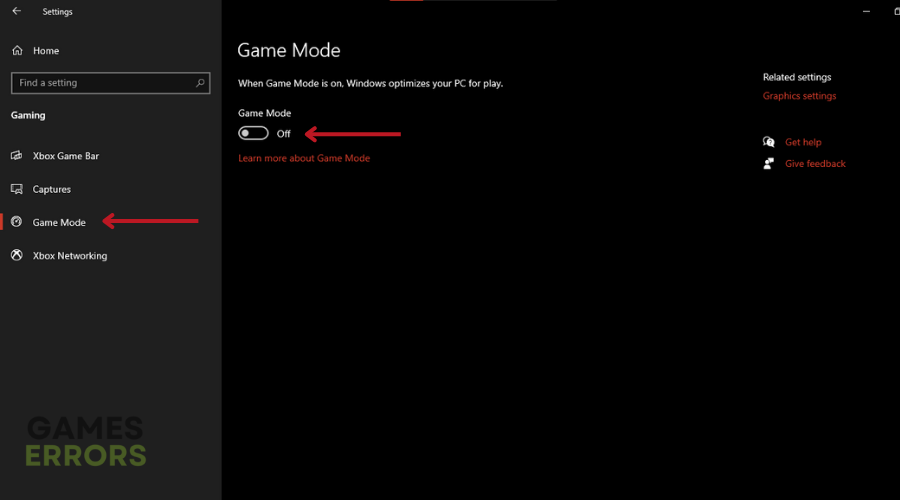
Disabling Windows Game Mode ensures that Atomic Heart is not competing for system resources with other background processes. To do this
- Open the Settings menu.
- Go to the Gaming category.
- Click on the Game Mode button.
- Turn off the Game Mode option.
4. Disable MSI Afterburner or RTSS
Although MSI Afterburner allows users to customize various graphics settings, It can conflict with the game and cause performance problems. Disabling MSI Afterburner and RTSS ensures that Atomic Heart is using its default graphics settings. To do this:
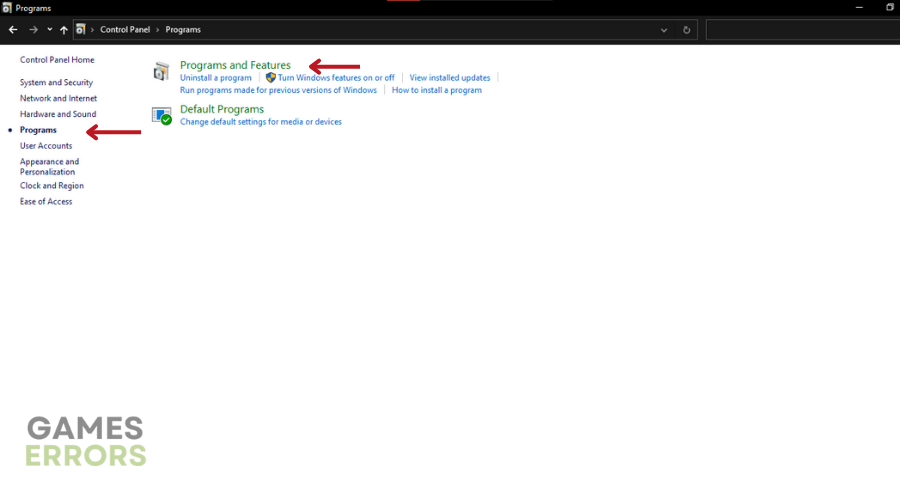
- Open the Start menu by clicking the Windows logo icon in the taskbar.
- Search for ‘Control Panel’ and click on the top result.
- In the Control Panel, select ‘Programs’ or ‘Programs and Features’ (depending on your OS version)
- Locate MSI Afterburner in the list of installed programs and click on it.
- Click on the ‘Uninstall’ button that should appear when you click on MSI Afterburner.
- Follow the Uninstall Wizard to complete the uninstallation process.
- When the uninstall process is complete, restart your computer to ensure that all traces of MSI Afterburner have been removed.
5. Edit the configuration file
- Press Windows+R on PC to launch the Run command window.
- Enter the command: %LOCALAPPDATA%\AtomicHeart\Saved\Config
- Locate the configuration file in the game’s installation directory.
- Open the configuration file with a text editor.
- Locate the line corresponding to “Vsync”.
- Change the value to 1 to enable Vsync.

⭐It’s always a good idea to back up the original file before making any changes, such as editing the configuration file. Also, ensure you know what you’re doing before proceeding, as incorrect configuration file editing can lead to worse problems.
Extra steps
- Try changing the refresh rate on your PC
- Disable any third-party software like antivirus software or firewall
- For Nvidia card users, turn on “Global Vertical Synchronization” for all games that use this card.
Related articles:
- Atomic Heart Low FPS: Quickest Ways to Improve Performance
- Atomic Heart Crashing: Here’s Why and How to Fix it
- Atomic Heart Won’t Launch: Here’s a Simple Fix
- Atomic Heart Stuck on Loading Screen: How to Fix
Conclusion
We hope the solutions listed above have helped you fix the Atomic Heart vsync not working error. Feel free to leave us a question, comment, suggestion, or concern in the comment section below.

Improve this guide
User forum
0 messages