
Overwatch 2 Failed to Connect to Game Server: Fix it Easily
As if long queues in Overwatch 2 are not annoying enough, now your client failed to connect to game server? 🤔 Don't worry, many users experience it, and we know how to fix it! 😎

Overwatch 2 failed to connect to the game server error has been causing frustrations for many players lately. Some even complain that after trying to reconnect, they succeeded, only to see their team losing while being one man short. Usually, this won’t happen since the match would be canceled, but the best idea is to fix this error’s possible causes, and rest assured it will not reappear.
👾 Problems for some players don’t end there since they get kicked out of the game even when they connect. If this happens to you, check out our article on the server closed due to an unexpected error in Overwatch 2 problem.
Why am I getting a server error on Overwatch 2?
This error occurs due to problems with Overwatch 2 servers, bad internet connection, outdated network driver, and faulty DNS settings. Additionally, it can be caused by user-made game modifications and VPN service.
How to fix Overwatch 2 failed to connect to game server error?
Start with these easy fixes:
- Check if Overwatch 2 servers are down. If so, the problem is not on your end.
- Restart your PC.
- Check if your internet connection works properly in other games or internet browsers.
- Restart your internet router or modem.
If this doesn’t help, proceed with the solutions listed below.
1. Change the game server
Most likely, the problem is happening with the game server. This can be easily checked by changing the region of the server you are connecting to.
- Open the Battle.net Launcher.
- Find Overwatch 2 in the Games tab.
- Click the Regions button (globe icon) and select a different game server region.

- Hit the Play button to launch Overwatch 2.
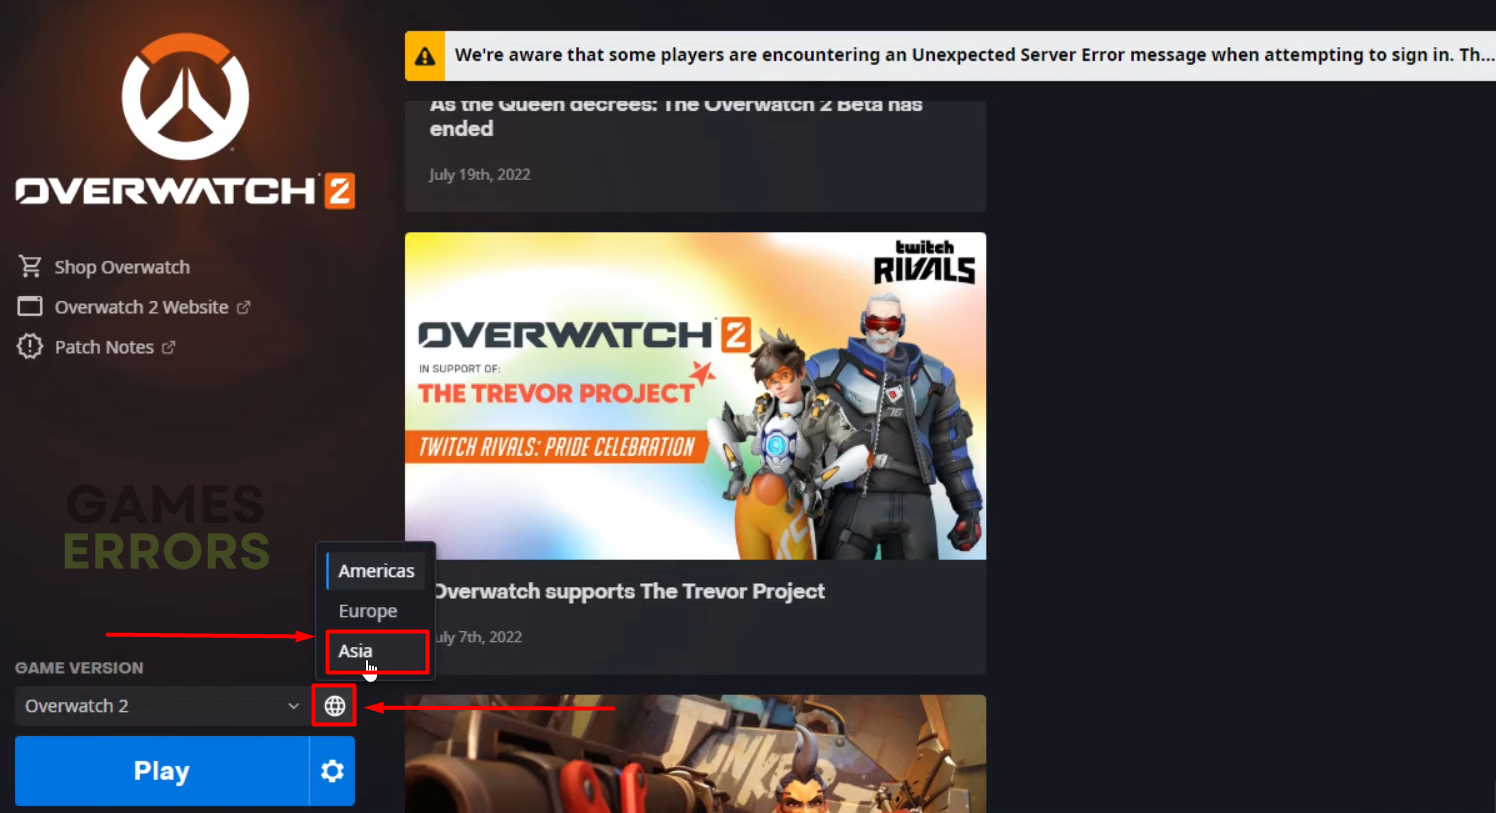
👉 If this solution works out for you, you can continue playing if the latency is not too high (the further the server is from you, latency will be more significant). Once the game server in your area is running again, switch back to it.
2. Update the network driver
A universal solution for connection-related errors is updating the network driver. This will ensure that your network adapter runs the latest software needed for connecting to the internet.
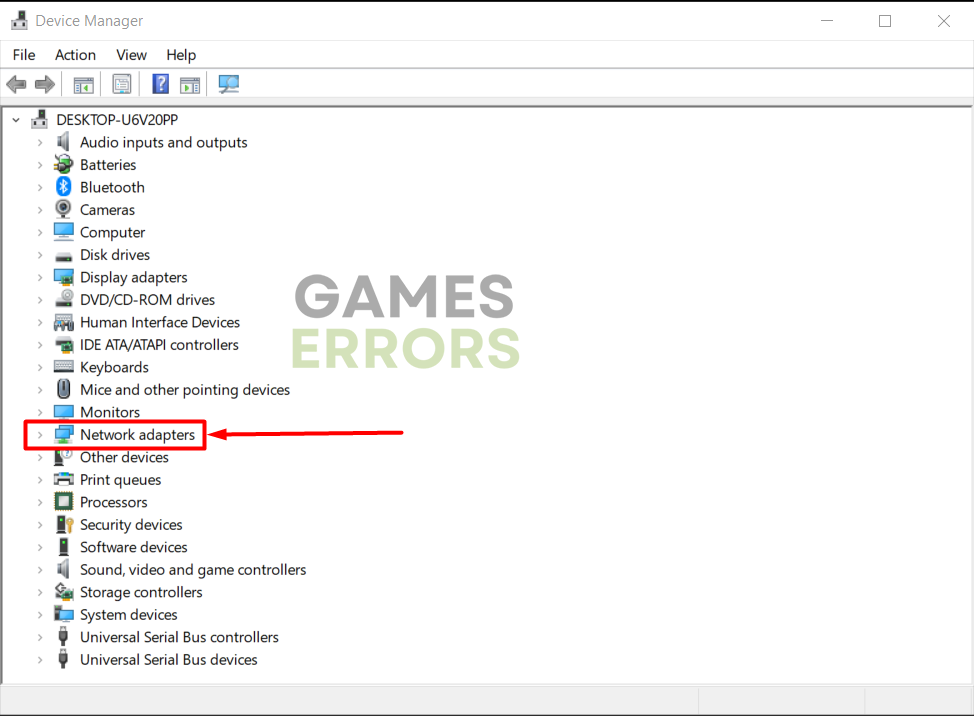
- Click the Windows icon, type Device Manager, and click on this tool to open it.

- Double-click on the Network adapters.

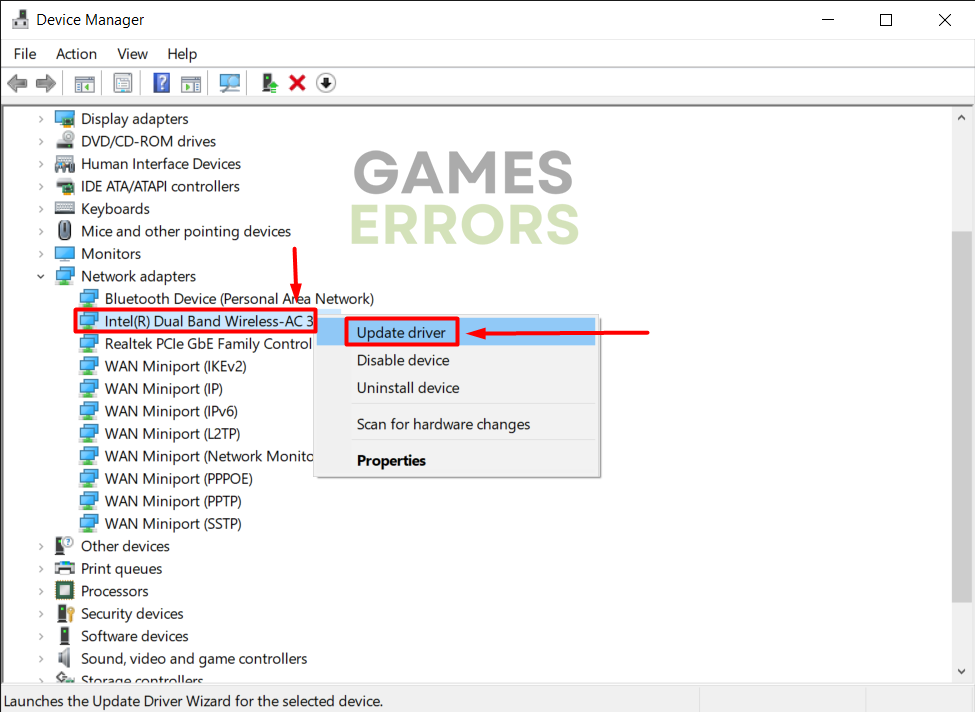
- Right-click on the network device you use and select the Update driver option.

- Click on the Search automatically for drivers option.
- Driver Update Wizard will search for updates available within the driver database. If an update is found, follow the steps for driver installation.
- Restart your PC.
If no driver update is found, we recommend you use PC HelpSoft to ensure you are running the latest network driver. This tool has a huge database for network drivers and makes overall driver management easy.
3. Use the Google DNS
Time needed: 3 minutes
By default, Windows will connect you to the most reliable DNS server. However, if you experience the failed to connect to server error in Overwatch 2, we recommend you manually set these to Google DNS.
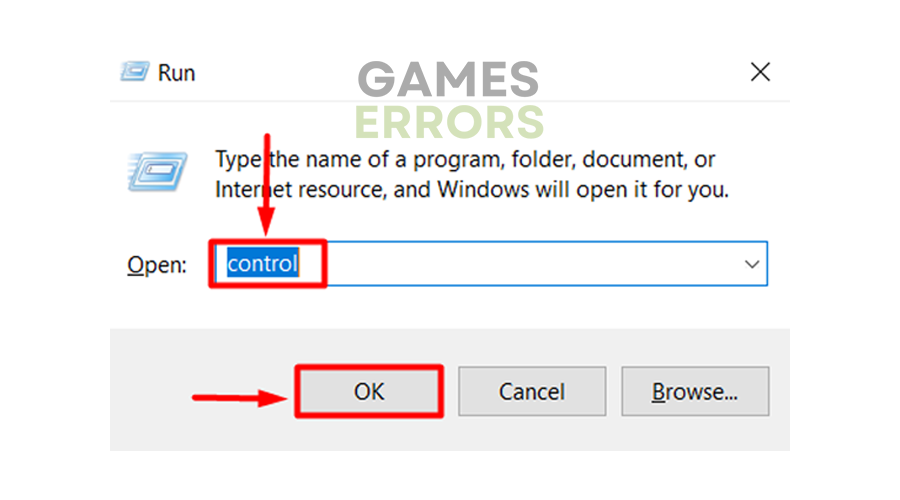
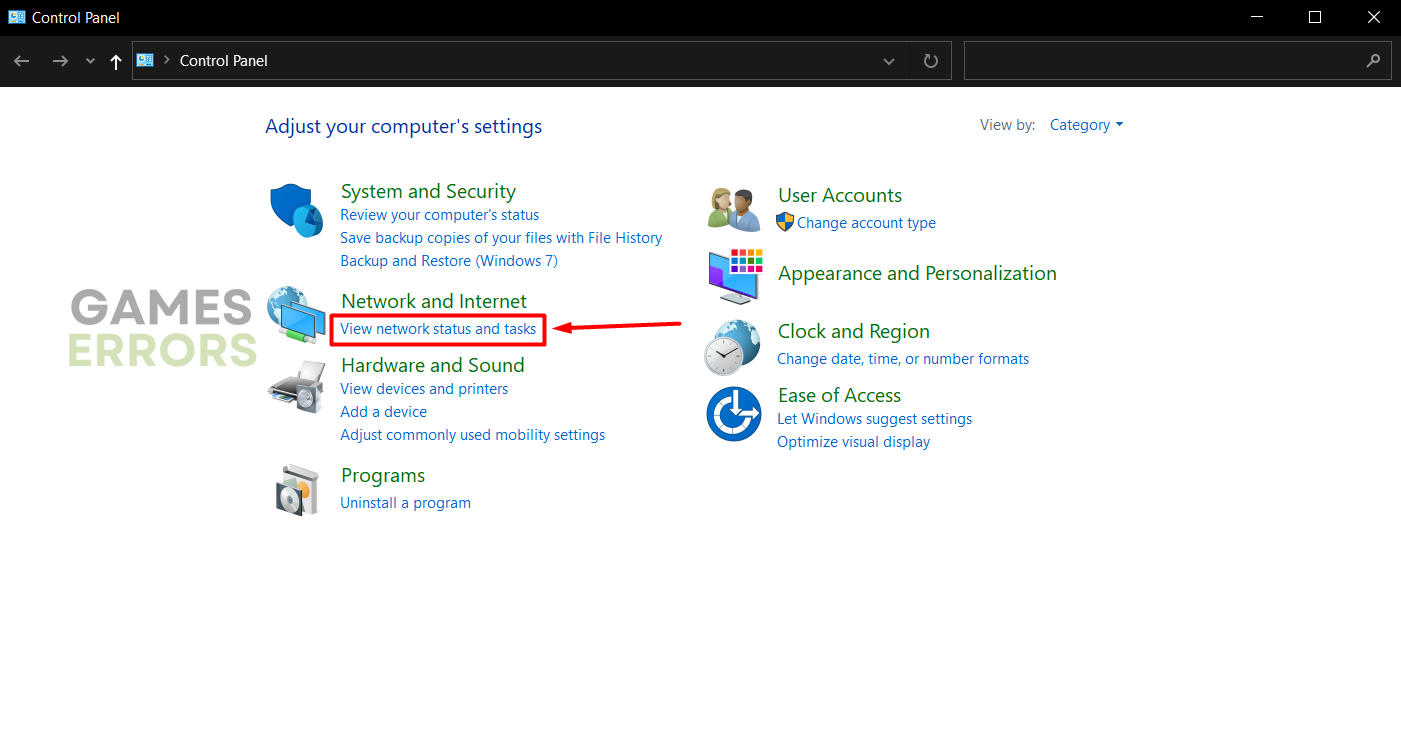
- Press Windows Key + R simultaneously to open the Run dialog, type control, and hit OK.

- Select View network status and tasks under the Network and internet section.

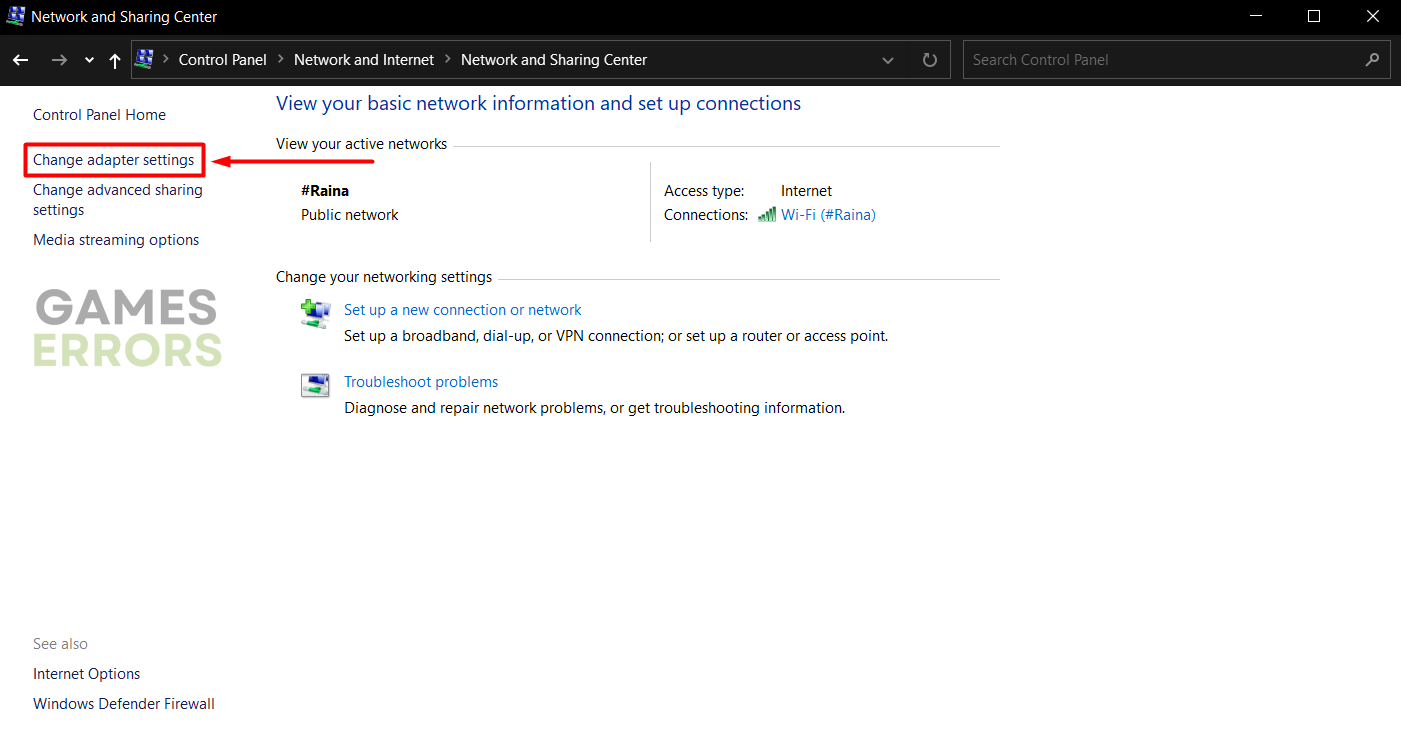
- Choose Change adapter settings.

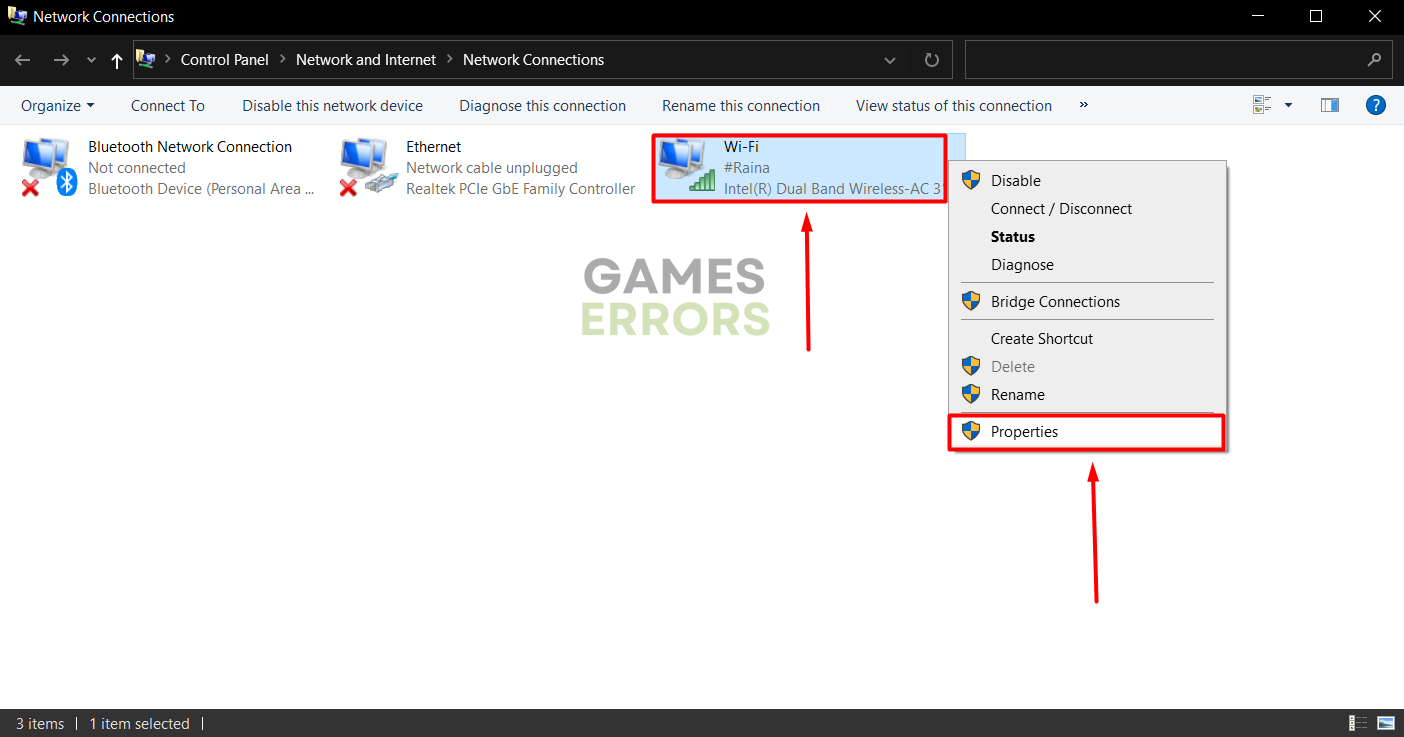
- Right-click your internet network and select Properties.
The green signal icon marks wireless, and the cable icon marks wired network.

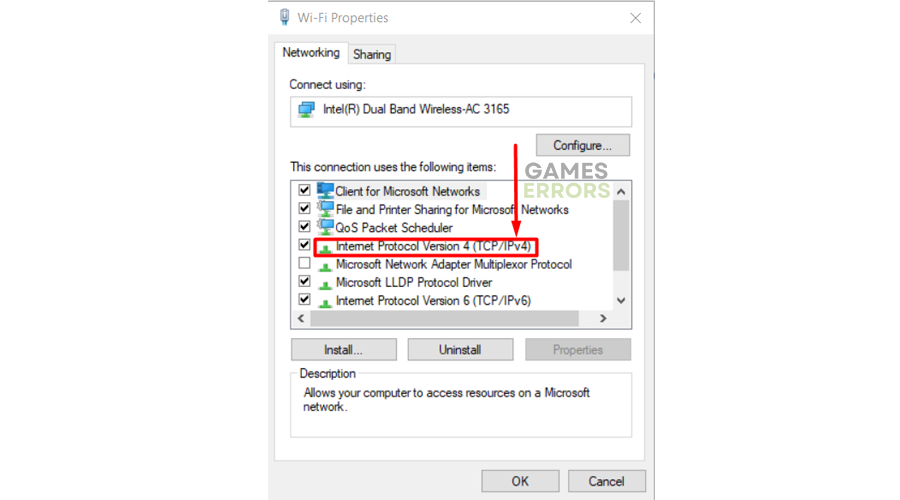
- Double-click Internet Protocol Version 4(TCP/IPv4).
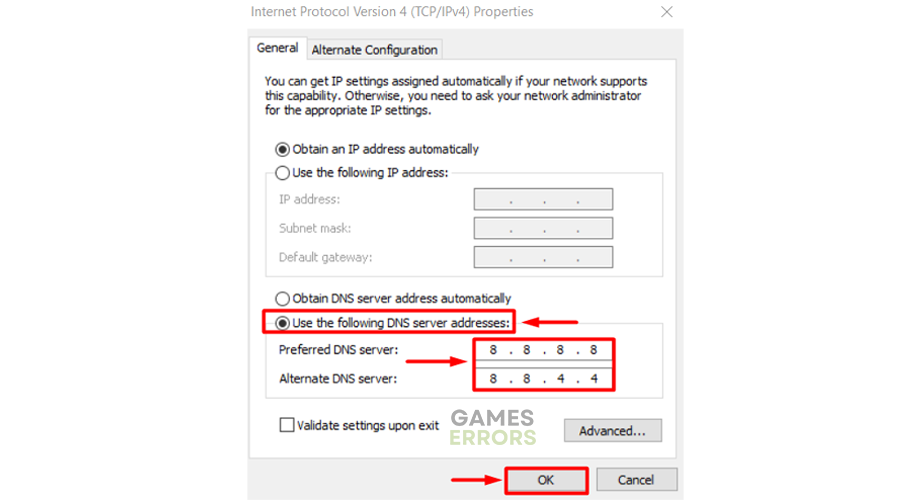
- Mark Use the following DNS server addresses, then type 8.8.8.8 for the Preferred DNS server and 8.8.4.4 for the Alternate DNS server.
- Press the OK button.
- Restart your PC.
4. Flush the DNS
After manually setting the DNS server addresses, flushing the DNS is a good idea. This should be done periodically regardless if you change your DNS or not.
- Click on the Windows icon, type Command Prompt, and click on it to open it.
- Copy/paste the following commands, line by line, and press Enter after each command.
ipconfig /flushdns
ipconfig /registerdns
ipconfig /release
ipconfig /renew
netsh winsock reset
- After completing the process for every command, restart your PC.

Extra steps
A small percentage of players experience problems with the game server connection in Overwatch 2, even after applying all the solutions. If this is your case too, try to:
- Disable VPN if you are using it.
- Disable any modifications (mods) that you use in Overwatch 2.
- Run Battle.net launcher as administrator.
- Update your Windows and Battle.net launcher.
Related articles:
- How To Accept Friend Request On Overwatch 2 [Gamer’s Guide]
- Overwatch 2 Battle Pass Credits Not Showing Up: How To Fix
- Overwatch 2 Stuck On Applying Update Screen Glitch [Easy Fix]
Conclusion
We hope the solutions we provided assist you in removing Overwatch 2 failed to connect to the game server error. Let us know what solution worked for you and if you find any fixes, we didn’t mention.

Improve this guide
User forum
0 messages