
A JNI Error Has Occurred In Minecraft: Fix It Step by Step
To fix a JNI error in Minecraft, update Java to the latest version and remove any problematic system path variables linked to Java. 🎯
Minecraft is a unique open sandbox made on exploration and construction with limitless creativity. Minecraft Java is the edition that allows you to customize, add, and modify your game with various mods. However, the Java edition may suffer from glitches and errors. One particular error that may occur is the JNI error. If this error affects you, don’t worry. We made this quick guide to show you how to fix a JNI error has occurred in Minecraft.
Why does a JNI error occur in Minecraft?
Usually, the JNI error occurs when you try to start Minecraft or a Minecraft server on your PC because there is an outdated version of Java on your PC. Yet, the other reason would be that your existing version of Java is corrupted or incorrectly installed, and as a result, a corrupted Java system path might interfere with your game. When this happens, Minecraft might consider Java to be missing from your PC.
⛏Older versions of Minecraft included code that worked with older Java versions.💎
How do I fix it if a JNI error has occurred in Minecraft?
To fix a JNI error in Minecraft, follow our next tips:
- Download and install a new version of Java
- Delete the environmental variable of Java
- Perform a clean boot
- Uninstall the previous version of Java
1. Download and install a new version of Java
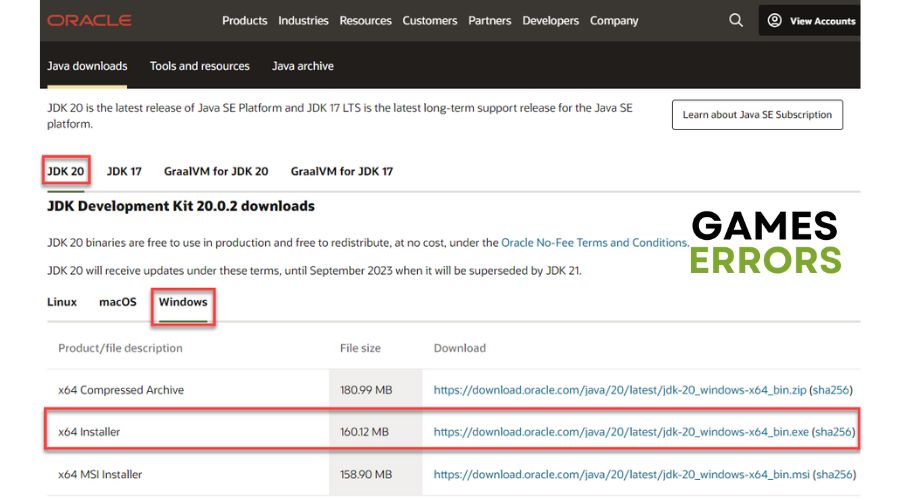
The first step to troubleshooting a JNI error in Minecraft is to download the latest Java installer. Follow these steps:
1. You can select your download based on whether you are on a Linux, Windows, or Mac machine. Select the latest Windows version and click on the x64 installer to download.
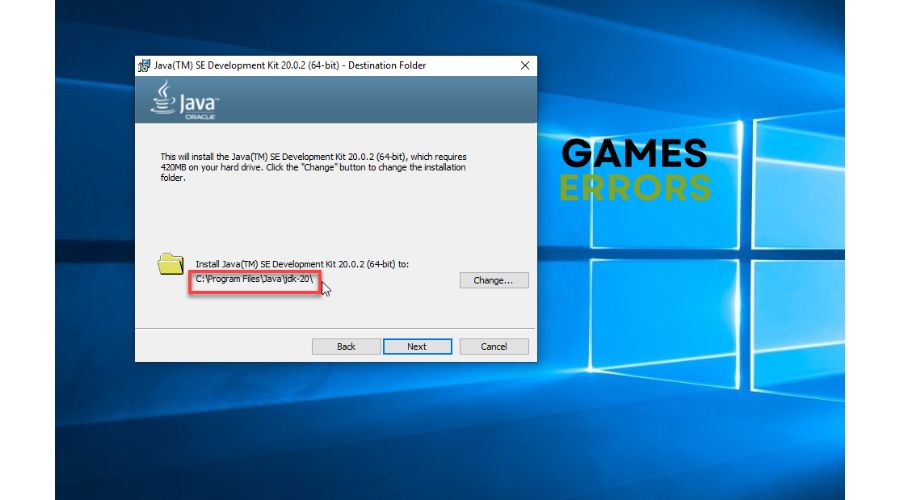
2. Run the Java installation and make sure the default path C:\Program files\Java is selected.
3. Press the Win + E keys to open File Explorer when the Java installation is complete. Check if a new folder is created in the given path.
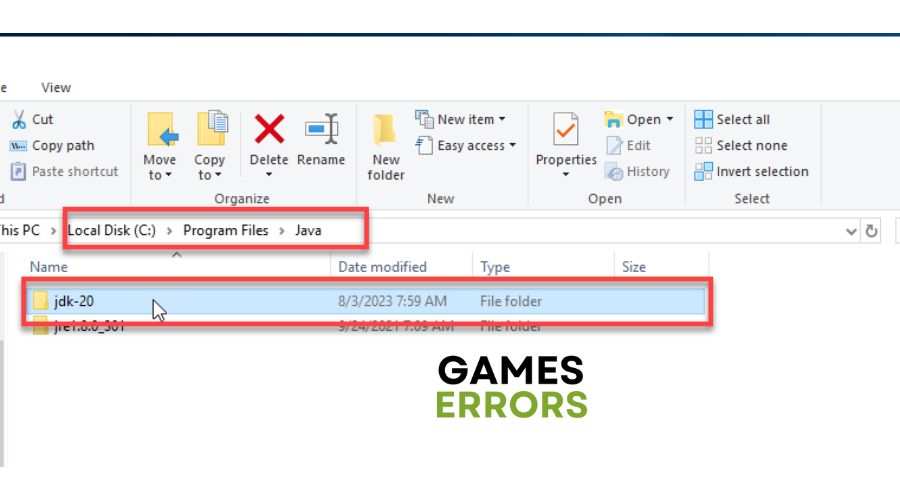
4. Right-click on the path and copy address C:\Program Files\Java\jdk-20\bin\

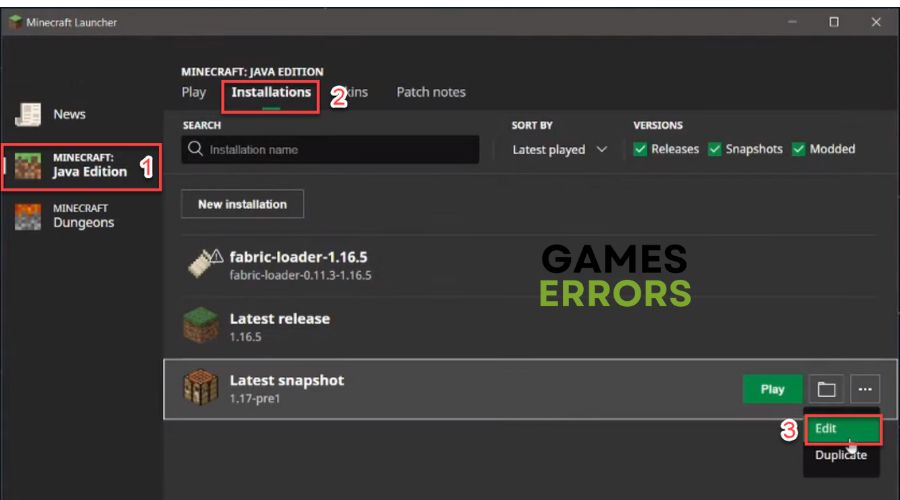
5. Open the Minecraft launcher, and select the Java edition of the game.
6. Under the Installations tab, select the Java version of your game.
7. Click the three dots next to the Play button and choose Edit.
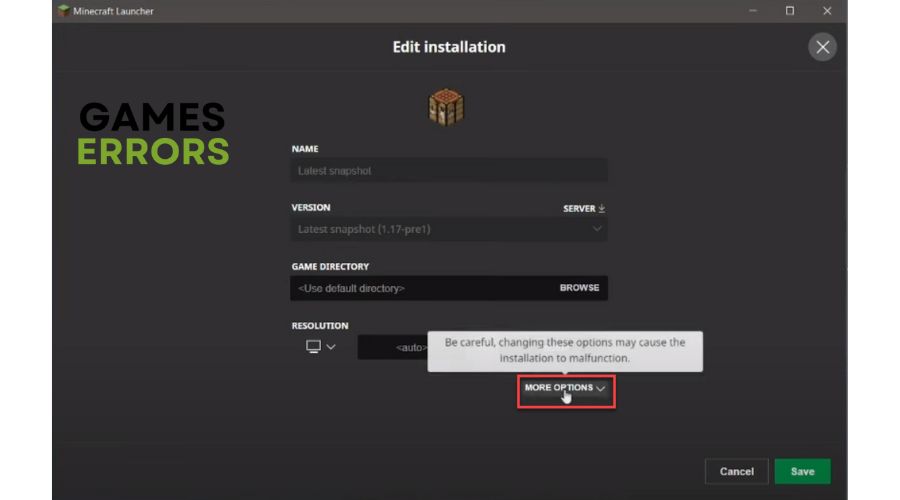
8. Now, expand More Options.
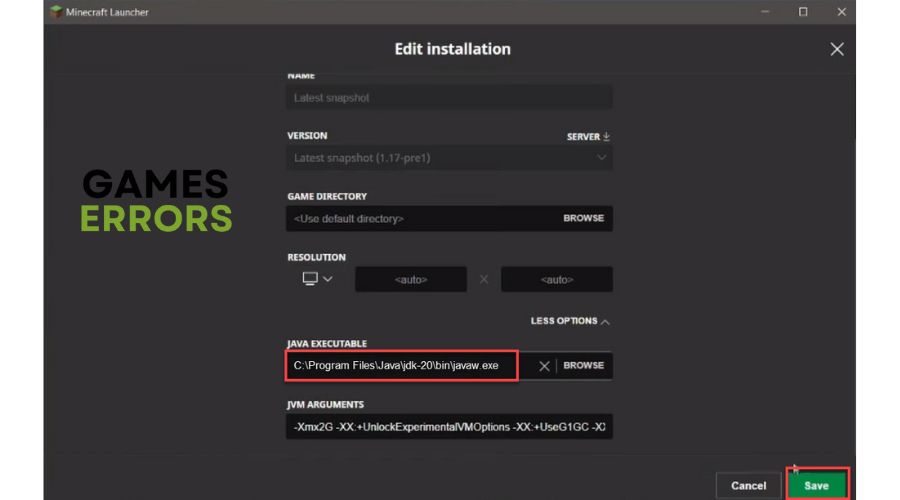
9. Under the Java Executable box, paste the address from Step 4 and add javaw.exe.
10. Complete path is C:\Program Files\Java\jdk-20\bin\javaw.exe. Confirm changes on the Save button.
11. Launch Minecraft and check if the JNI error is gone.
2. Delete the environmental variable of Java
Time needed: 1 minute
If you’re still encountering the error message ‘A JNI error has occurred’, it’s important to double-check that you don’t have any broken Java Environmental Variables. To do this, you’ll need to review the path variables in your settings and make any necessary adjustments.
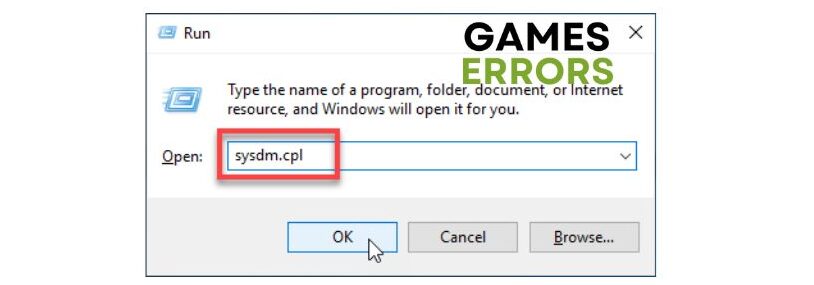
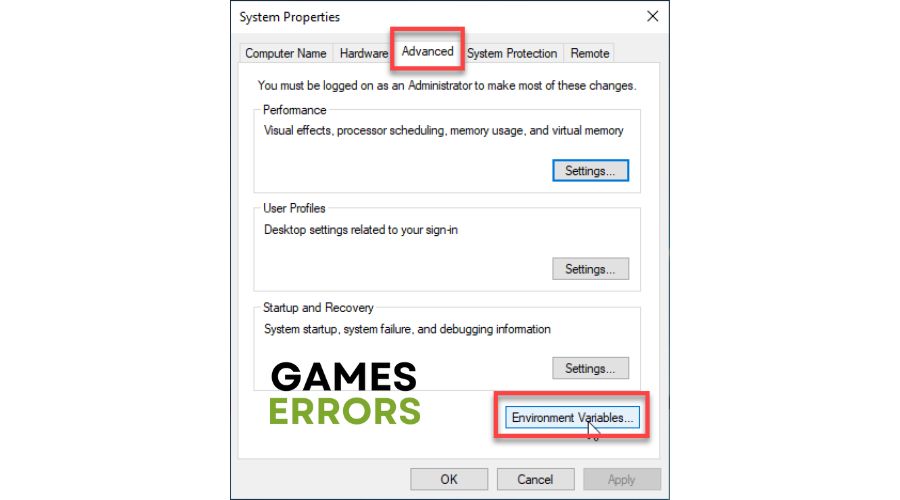
- Open System Properties
Press the Win+R keys to show the Run dialog box. Type: “sysdm.cpl” and hit Enter.

- Navigate to the Advanced tab
Select Environment Variables.

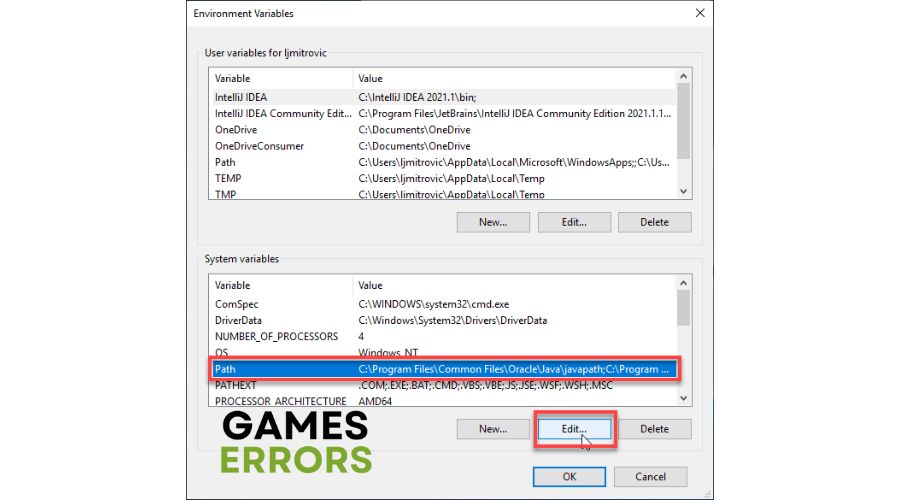
- From the Environment variables, select Path, and click on Edit.
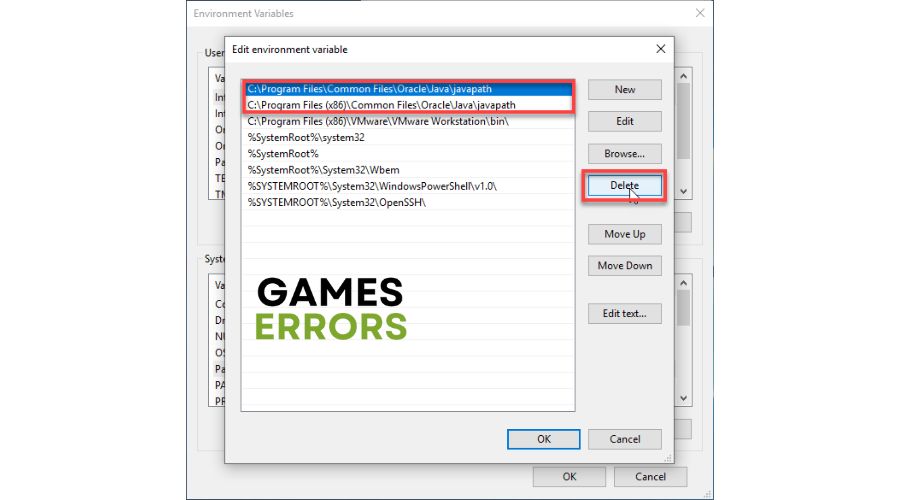
- Select the environmental variable of Java, select it, and click on Delete.
- Reboot your PC
Confirm changes and reboot your PC. Upon restart, launch Minecraft to check if the JNI error is gone.
3. Perform a clean boot
A JNI error may occur if an external application disrupts the Minecraft game. To remedy this, you can perform a clean boot and disable processes individually until you identify the source of the problem. Once you have determined the troubled process, you can remove it, and hopefully, the issue will be resolved.
4. Uninstall the previous version of Java
To avoid getting the error message ‘A JNI error has occurred’ while running Minecraft or any other JNI errors, ensure you have the latest version of Java installed and that it is not affected by any prior installations on your system. However, if you prefer, uninstall previous versions (from Control Panel) to free up space and ensure Minecraft uses the most recent installation.
Related Articles:
- Abandoned Connection Closed Minecraft: 4 Ways to Fix It
- Minecraft Packet Loss: How to Fix & Avoid It For Good
- Minecraft OpenGL Error 1282: Quick Fix
- There Is An Error With Your Account Minecraft [FIXED]
- Minecraft Error Code Creeper: Fix It Effortlessly
Conclusion
If you are experiencing a JNI error while playing Minecraft, we suggest updating Java to its latest version and removing any faulty system path variables related to Java. You can also try troubleshooting the problem in a clean boot and uninstalling all previous Java versions. If you have any other concerns, feel free to comment below, and we will be glad to help you.

Improve this guide
User forum
0 messages