
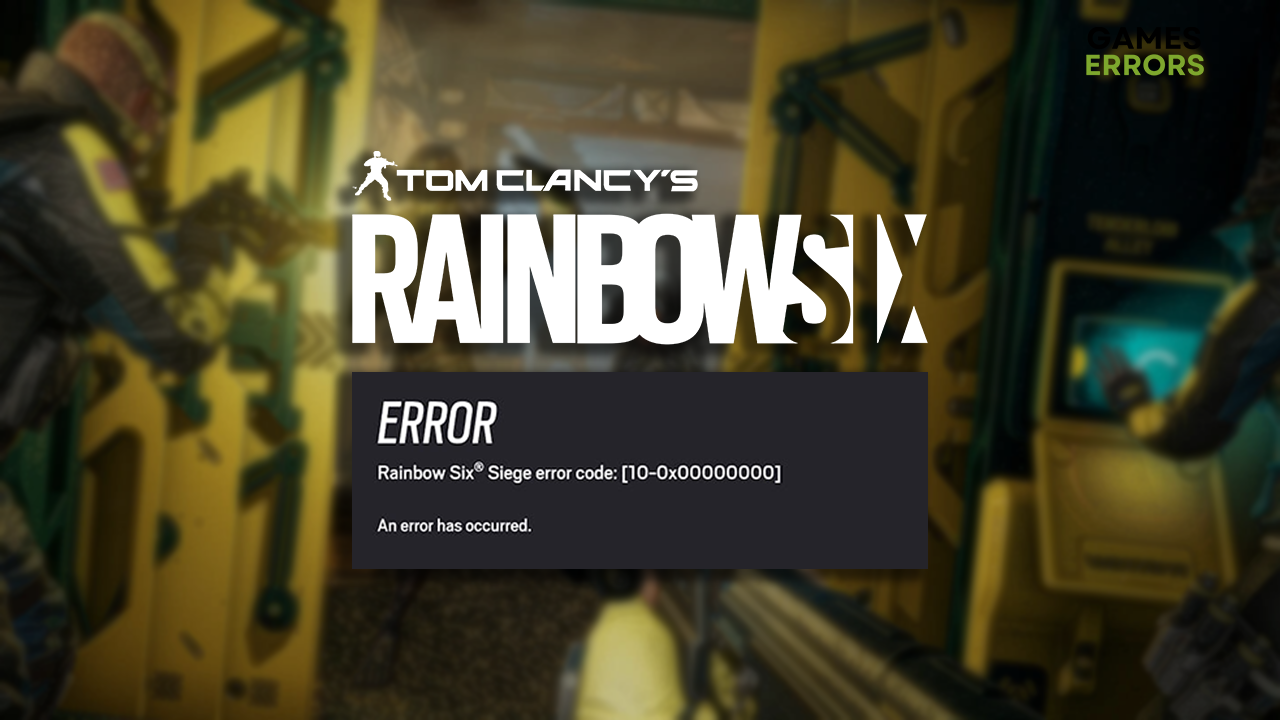
Rainbow Six Siege Error Code 10-0x00000000 [Solved]
If Ubisoft servers are up and running, this error code is likely caused by temporary issues on your device or network. Don't worry, we know how to fix it! 🌐
Many gamers complain about the annoying Rainbow Six Siege error code 10-0x00000000. Once we realized that there are many ways out there that can help you get rid of it, we decided to create an ultimate list of causes and solutions for fixing R6 error 10-0x00000000.
Are you experiencing problems with R6’s stability? Learn how to fix crashes in Rainbox Six Siege.
What is error code 10-0x00000000 in Rainbow Six Siege?
Rainbow Six Siege error code 10-0x00000000 is a network-related error caused by Ubisoft servers downtime, temporary issues on your PC or network, corrupted game files, problems with the ‘hosts’ file, faulty DNS settings, or disabled port forwarding.
How to fix Rainbow Six Siege error code 10-0x00000000?
Get started by applying some quick checks and fixes:
- Check Rainbow Six servers: Since the R6 error 10-0x00000000 is a network-related error, it is good to check if the problem is on the Ubisoft side before troubleshooting it.
- Restart your PC: Some gamers claim that the error occurs randomly, and the quick fix that works for them is a simple PC restart.
- Restart your network device: Your router and modem manage your network, and they can be restarted by pressing the button on the back panel.
- Verify game files: Every game distribution platform that R6 uses offers an easy and accessible system for game file verification and reparation.
Proceed with the step-by-step solutions for getting rid of R6 error 10-0x00000000.
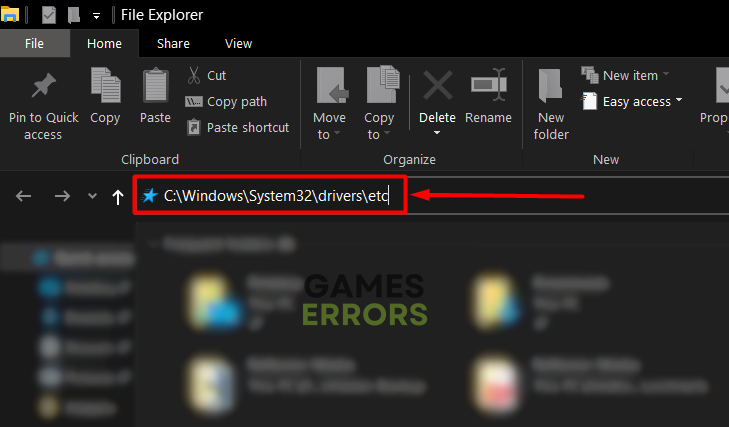
1. Reset the hosts file
This Windows file controls certain aspects of your network and navigates traffic to and from your PC. Additionally, you can use it to block certain websites, but if you get a network-related error in Rainbow Six, we advise you to reset it.
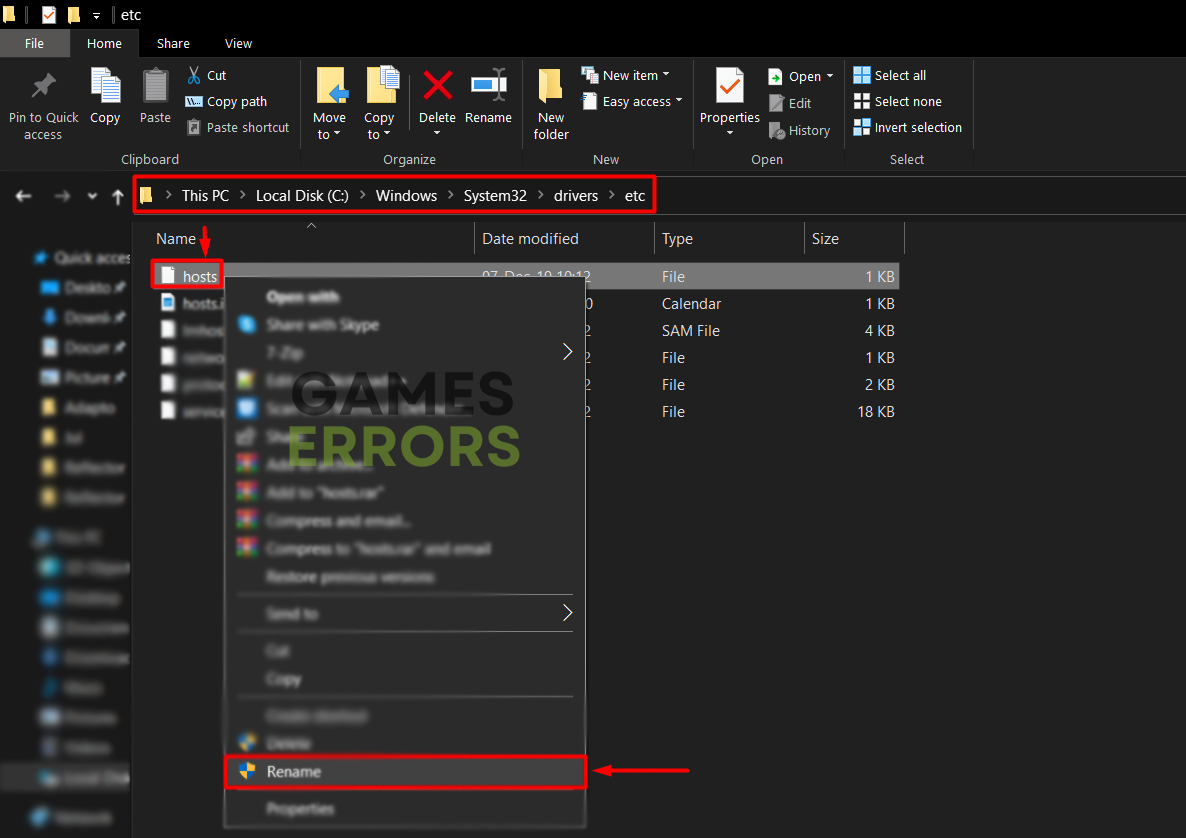
- Use the Windows Key + E to open File Explorer, and go to c:\Windows\System32\drivers\etc folder.

- Find and right-click on the hosts file and rename it to hosts.backup.

- Create a new Text Document, name it hosts, and paste the following text:
# Copyright (c) 1993-2009 Microsoft Corp.
#
# This is a sample HOSTS file used by Microsoft TCP/IP for Windows.
#
# This file contains the mappings of IP addresses to host names. Each
# entry should be kept on an individual line. The IP address should
# be placed in the first column followed by the corresponding host name.
# The IP address and the host name should be separated by at least one
# space.
#
# Additionally, comments (such as these) may be inserted on individual
# lines or following the machine name denoted by a '#' symbol.
#
# For example:
#
# 102.54.94.97 rhino.acme.com # source server
# 38.25.63.10 x.acme.com # x client host
# localhost name resolution is handled within DNS itself.
# 127.0.0.1 localhost
# ::1 localhost - Save the file as hosts.txt in the etc folder.
- Delete the .txt extension so Windows can use it.
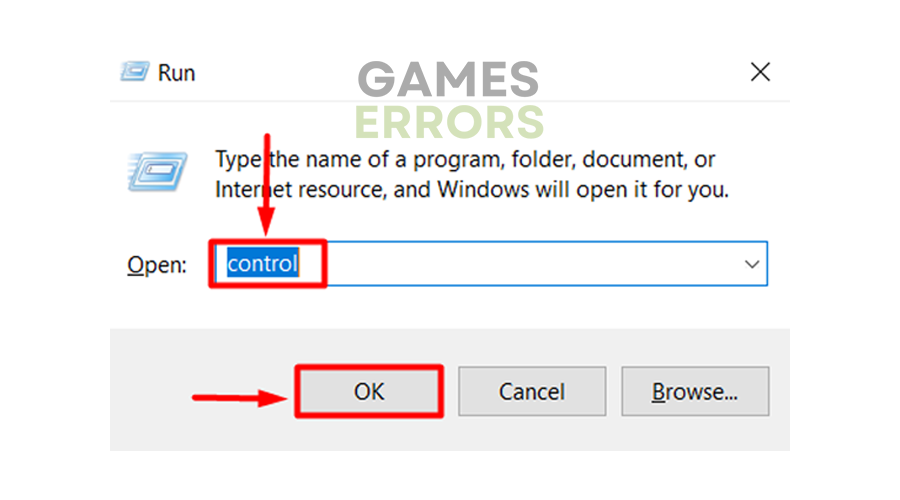
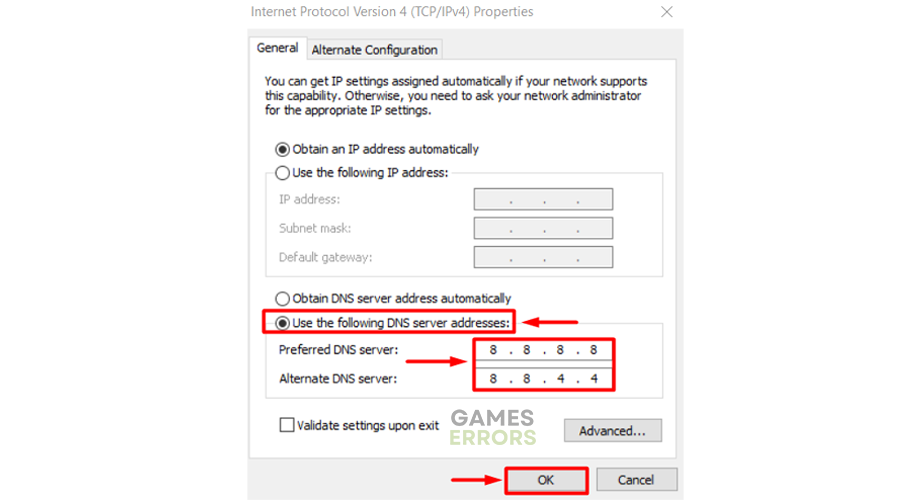
2. Use the Google DNS
Time needed: 3 minutes
The most reliable DNS for general use and gaming is Google DNS. Set it as default so Windows doesn’t automatically connect you to other DNS servers.
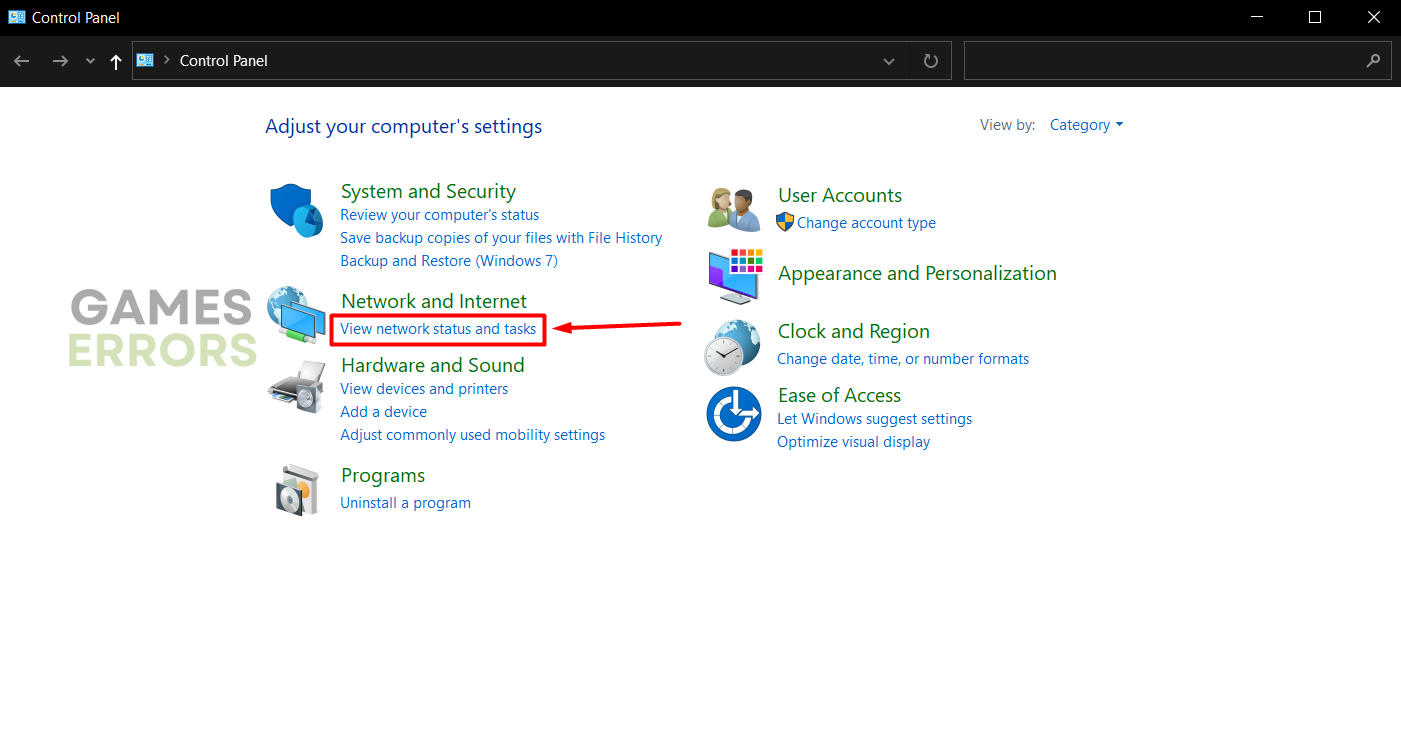
- Using the Windows Key + R shortcut, open the Run dialog, type control, and hit OK.

- Click on View network status and tasks.

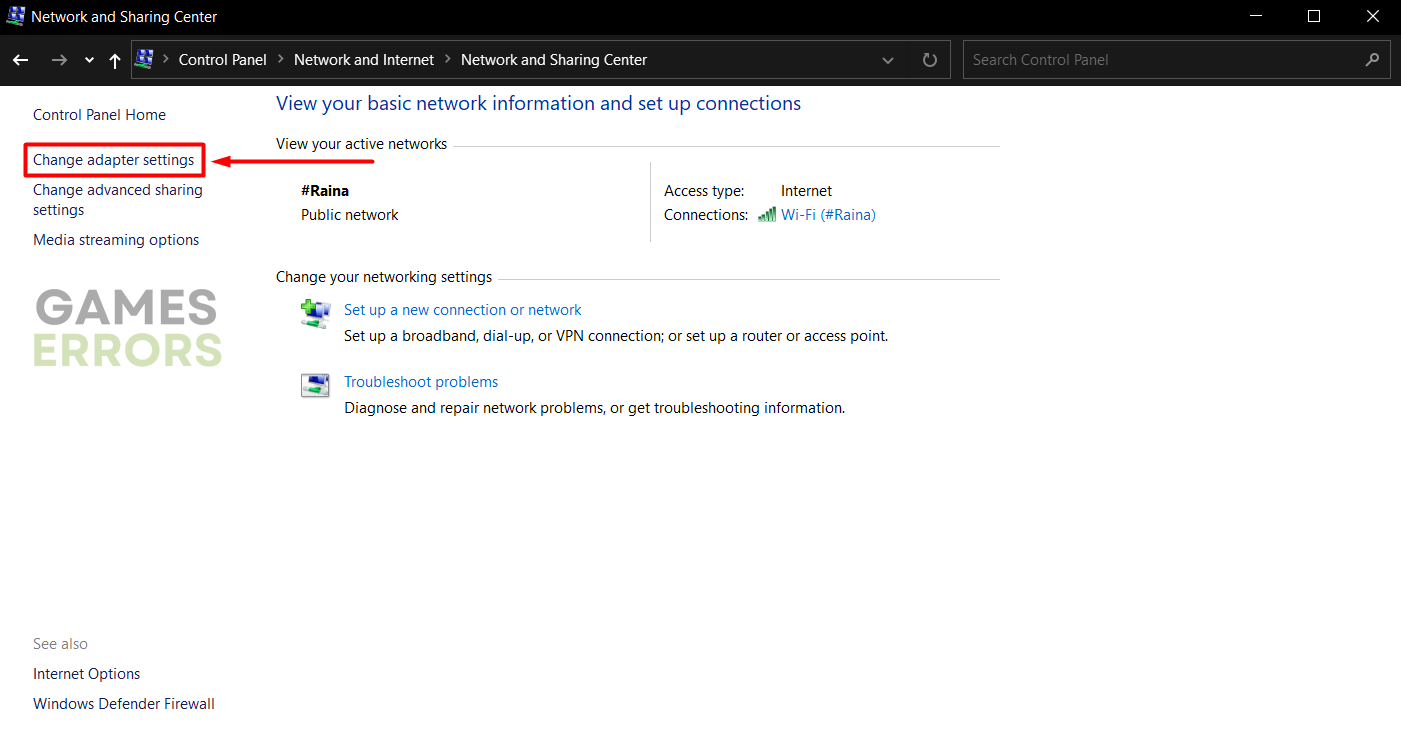
- Click on the Change adapter settings.

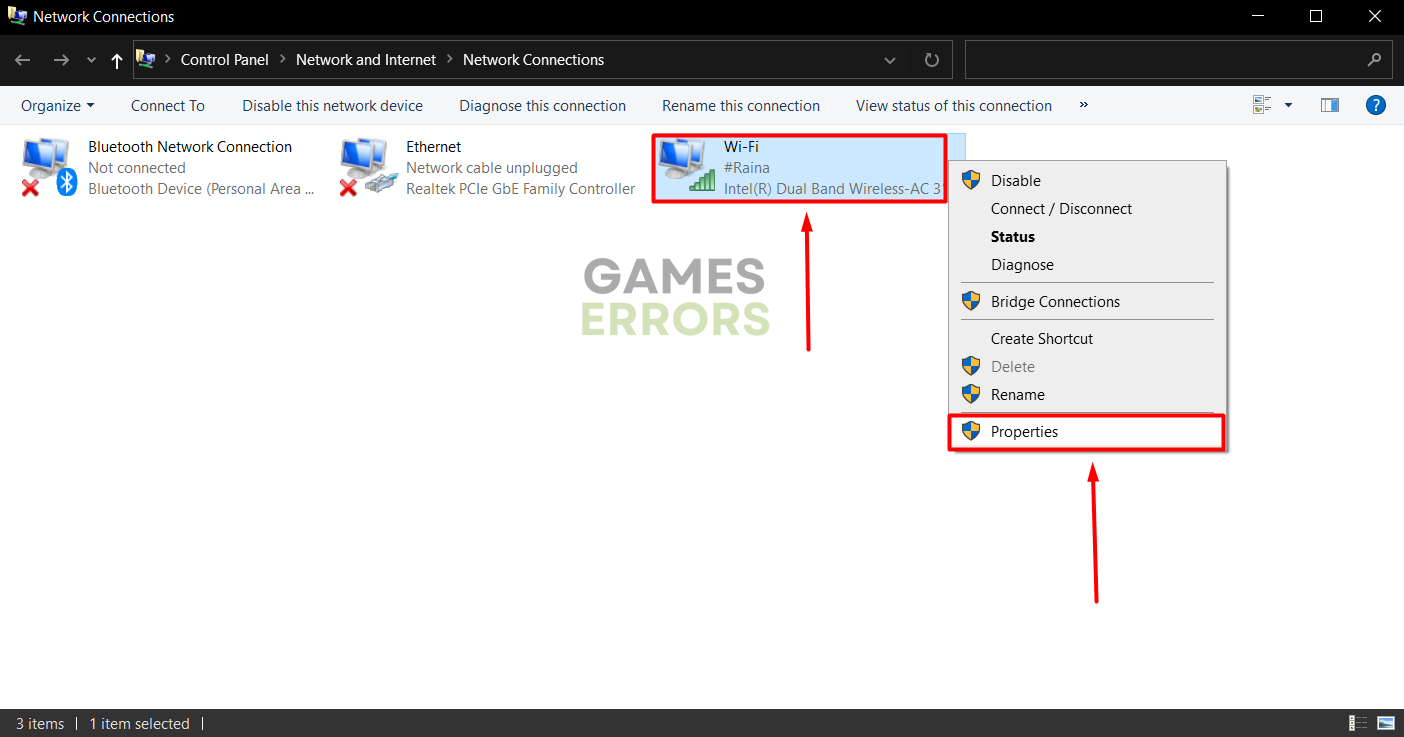
- Right-click the internet network you use and select Properties.

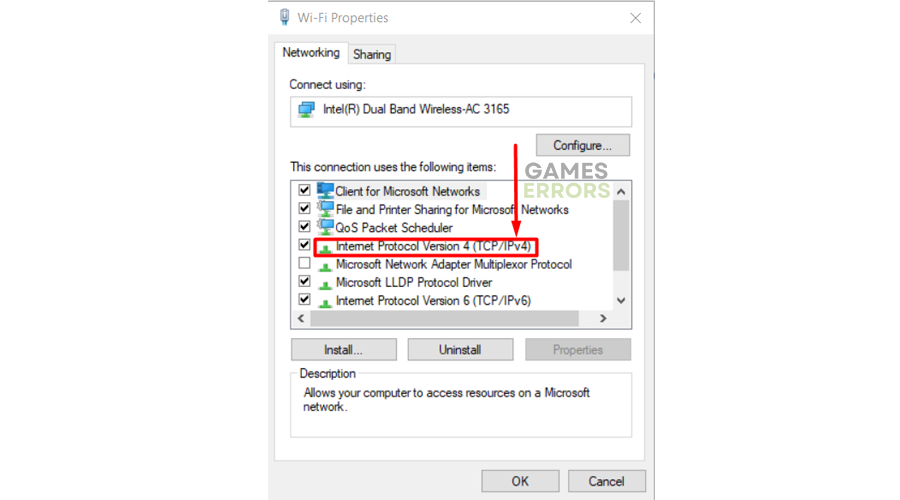
- Double-click Internet Protocol Version 4 (TCP/IPv4).
- Enable Use the following DNS server addresses and add:
➡ 8.8.8.8 for the Preferred DNS server
➡ 8.8.4.4 for the Alternate DNS server - Click OK and restart your PC.
3. Use a VPN
By using a VPN, some gamers managed to connect to other Ubisoft servers, which didn’t send them the error 10-0x00000000. This method will work only if you use a reliable VPN provider to ensure fast speeds and low latency. Otherwise, the game won’t perform well.
Take a look at ExpressVPN, our favorite VPN provider, offering a fast and reliable connection to 90+ countries around the globe. They are one of the best gaming VPNs and include support for consoles and other devices.
Extra steps
If you are still struggling with R6 error 10-0x00000000, try to:
- 📶 Use an alternative network: Connet your PC to another network ad check if the error 10-0x00000000 re-occurs. Additionally, try switching between wired and wireless connections.
- 🌐Enable port forwarding: Open your router’s configuration page using a browser, usually 192.168.X.X or 10.0.X.X. Find the port forwarding options under Advanced Settings and enable it.
- 📞 Contact your ISP: Find your ISPs contact information on the monthly bill, contact their support center and ask them to assist you in troubleshooting potential networking problems.
Related articles:
- Rainbow Six Siege Error Code 0-0x00100608 [Quick Fix]
- Rainbow Six Siege Voice Chat Not Working [Quick Fix]
- Rainbow Six Siege Mouse Stuck On Screen [Fixed]
- Rainbow Six Siege Not Launching: How To Fix It Easily
- Rainbow Six Siege Error Code 3-0x00050001: How To Fix
Conclusion
The Rainbow Six Siege error code 10-0x00000000 can be annoying, as the cause cannot be pinpointed easily. Remember to check server status, and only then troubleshoot your ‘hosts’ file and manually switch to Google DNS. As mentioned, you can connect to another game server using a reliable VPN, like ExpressVPN.
Don’t forget to enable port forwarding and test the game with another network. Doing all this will remove potential issues on your device and network preventing you from connecting to Ubisoft Rainbow Six servers.

Improve this guide
User forum
0 messages