
Internal Exception java.net.SocketException Connection Reset [Fixed]
Connection Lost - these are one of the worst words for any gamer! Luckily, you are in the perfect place to find fixes for this problem in Minecraft. 😎
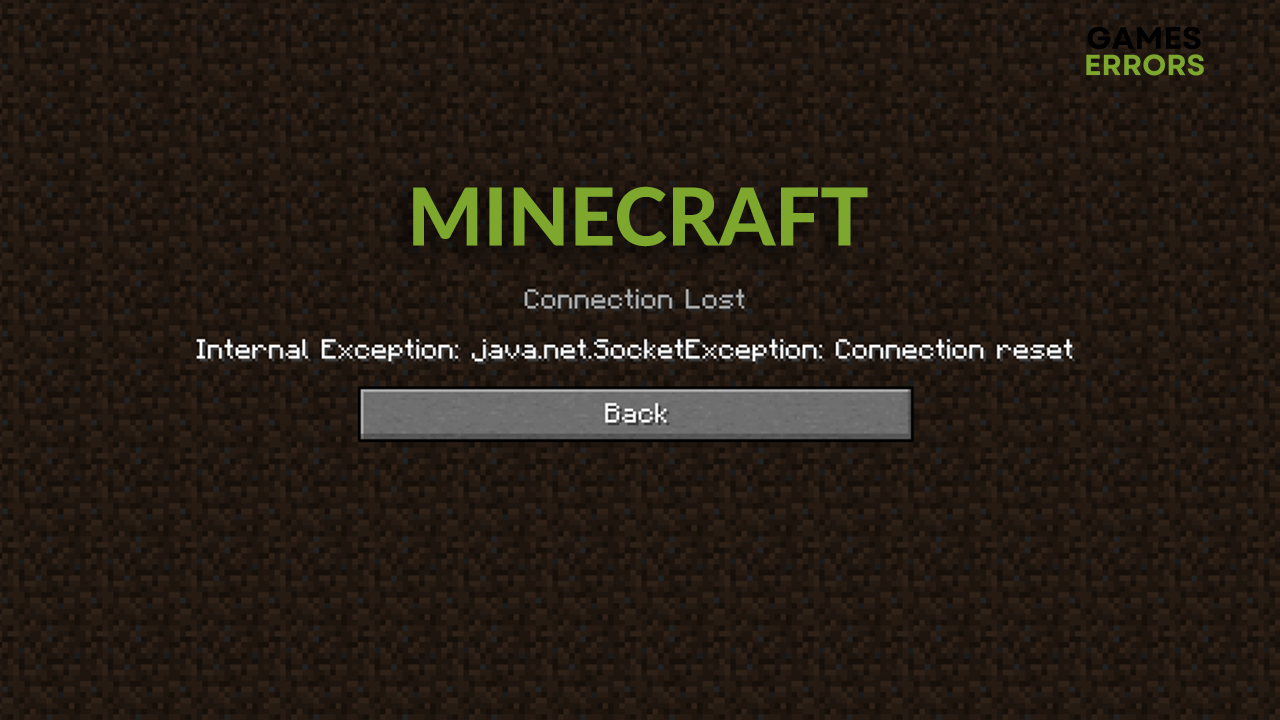
The Minecraft Internal Exception java.net.SocketException Connection Reset occurs when a player plays on a game server or Minecraft realm. It occurs randomly and can happen multiple times. If this is ruining your experience of the most popular sandbox game, follow our solutions and fix it for good!
If you cannot play Minecraft due to constant crashes, read our guide on preventing Minecraft from crashing.
Why do I get an Internal Exception java.net.SocketException Connection Reset?
You get the Minecraft Internal Exception java.net.socketexception Connection Reset error due to problems in the communication between your Minecraft client and the server, which is caused by a bad internet connection, faulty network configuration, outdated network drivers, unreliable DNS, and faulty DNS settings.
How to resolve Java net SocketException Connection reset?
To resolve the Minecraft Internal Exception java.net.socketexception Connection Reset start by checking the internet connection of the device you are playing MC on, then proceed with the following simple pre-checks:
- Check if the server you are connected to is working.
- Use a wired internet connection if possible. If not, ensure you have a good Wi-Fi signal.
- Restart your internet device (modem and/or router).
- Try using a different internet connection (like a mobile hotspot).
If the Internal Exception java.net.SocketException Connection Reset continues occurring, follow the solutions below.
1. Modify network configuration
Many players report that two specific network settings were causing the Internal Exception java.net.SocketException Connection Reset error for them. Without getting into technical details, the two settings will change how packets are communicated over the network and processed on your PC.
- Click on the Windows icon, type Command Prompt, and click on it to open it.
- Type netsh interface tcp show global and hit Enter. You should get a list of TCP global parameters.

- If Receive-Side Scaling State is on any other value than enabled, apply the following command:
netsh interface tcp set global rss=enabled - If Receive Window Auto-Tuning Level is on any other value than normal, apply the following command:
netsh interface tcp set global autotuninglevel=normal - Launch Minecraft and check if the problem has disappeared.

2. Update your network driver
You should have the latest network driver to ensure your PC’s reliable and stable internet connection. This will prevent your Minecraft client from losing connection with the server or realm you are playing at.
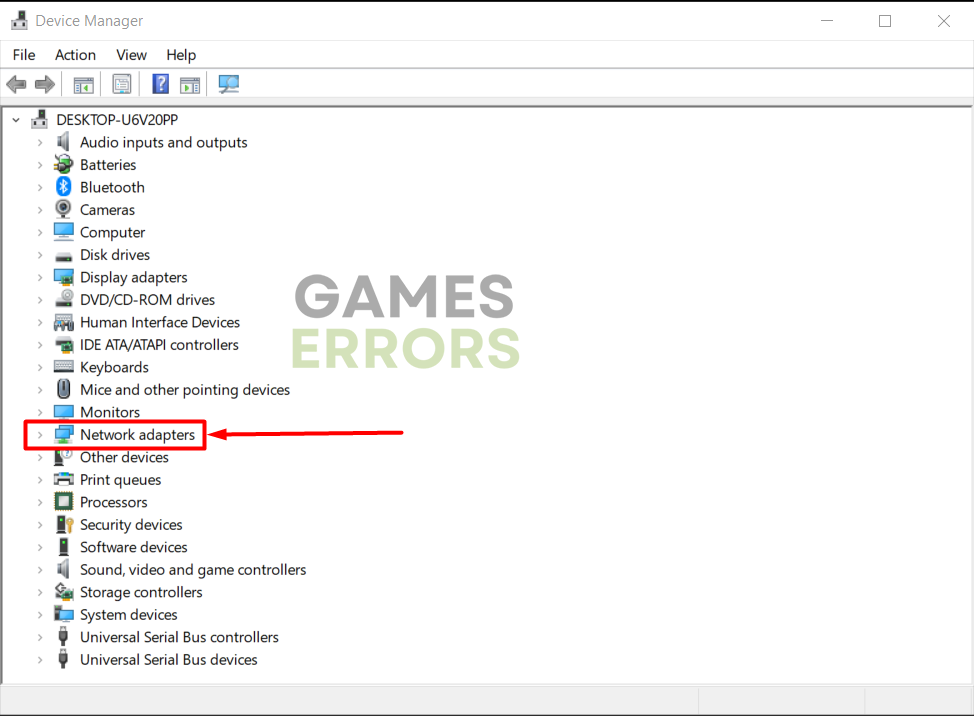
- Click the Windows icon, type Device Manager, and open this tool when it appears under Best match.

- Double-click on the Network adapters.

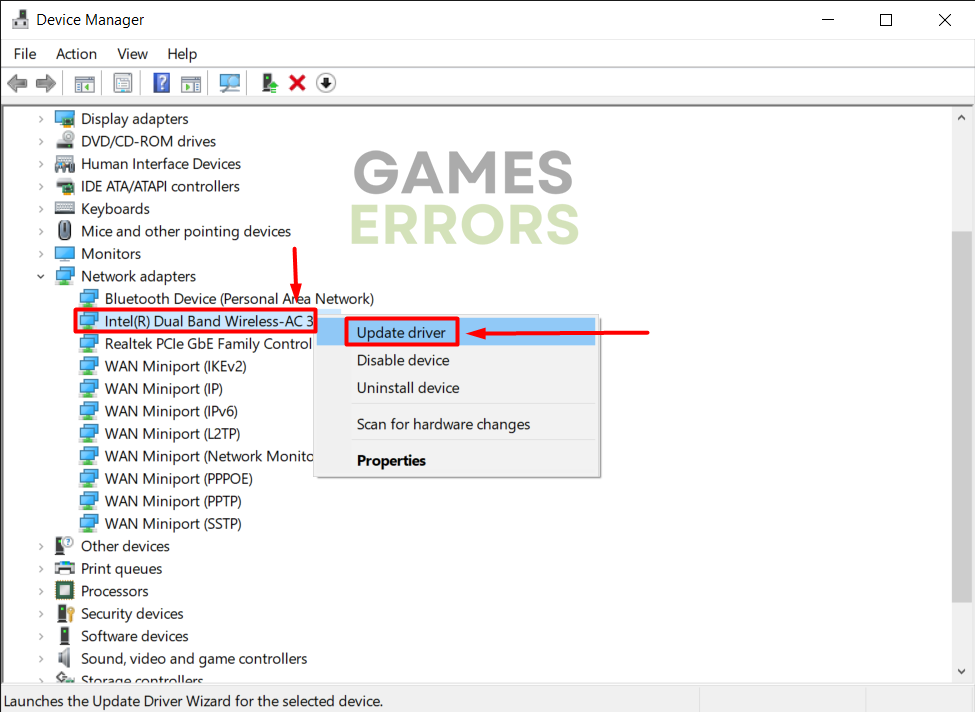
- Right-click on the network device you use and choose the Update driver option.

- Click on the Search automatically for drivers option in the new window.
- Driver Update Wizard will check if a newer driver is available for your network device. Follow the installation steps to install the driver.
- Restart your PC.
If this tool doesn’t find a network driver update, we recommend double-checking if a driver is available using PC HelpSoft. This driver updater tool will ensure you always have the latest network driver.
3. Use Google DNS
Time needed: 3 minutes
DNS servers serve as internet maps and help your device to navigate the internet. By default, Windows will automatically connect you to a DNS server, but if you get disconnected from the Minecraft server or realm, we recommend using Google DNS.
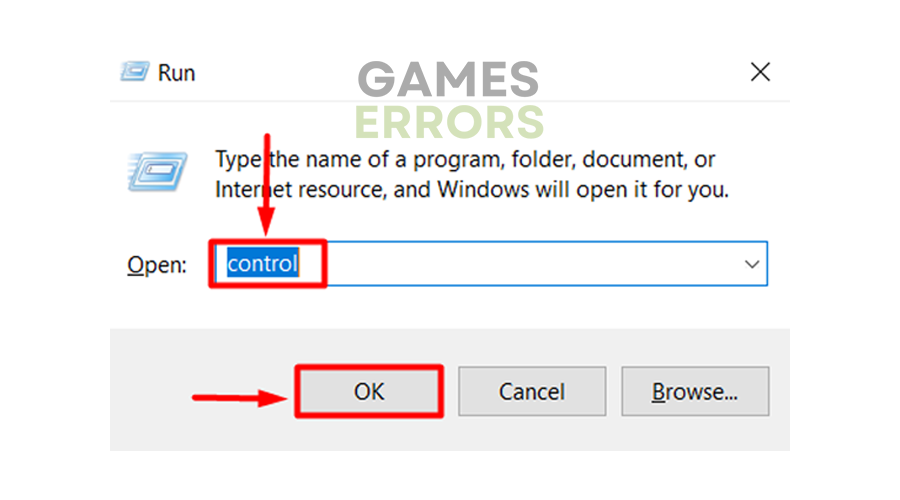
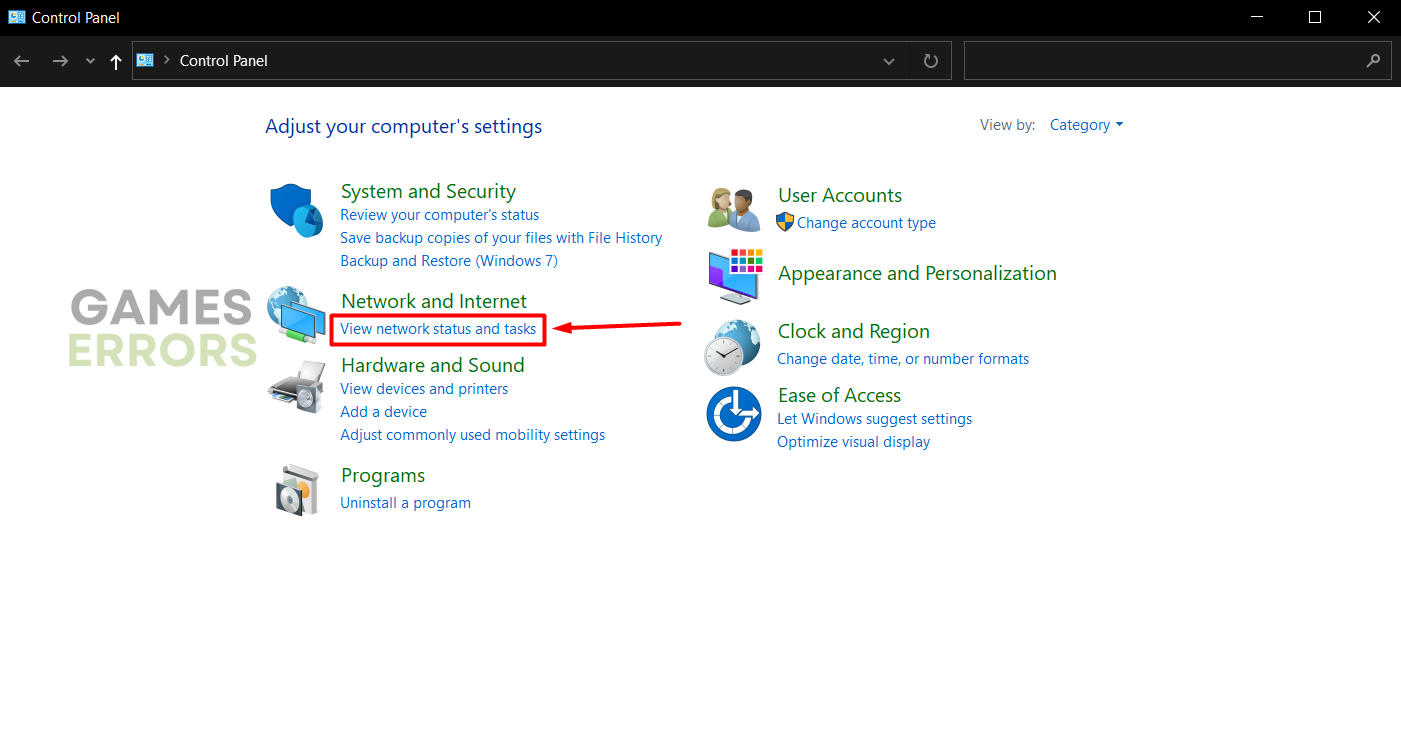
- Use Windows Key + R shortcut to open the Run dialog, type control, and hit OK.

- Click on the View network status and tasks under the Network and internet section.

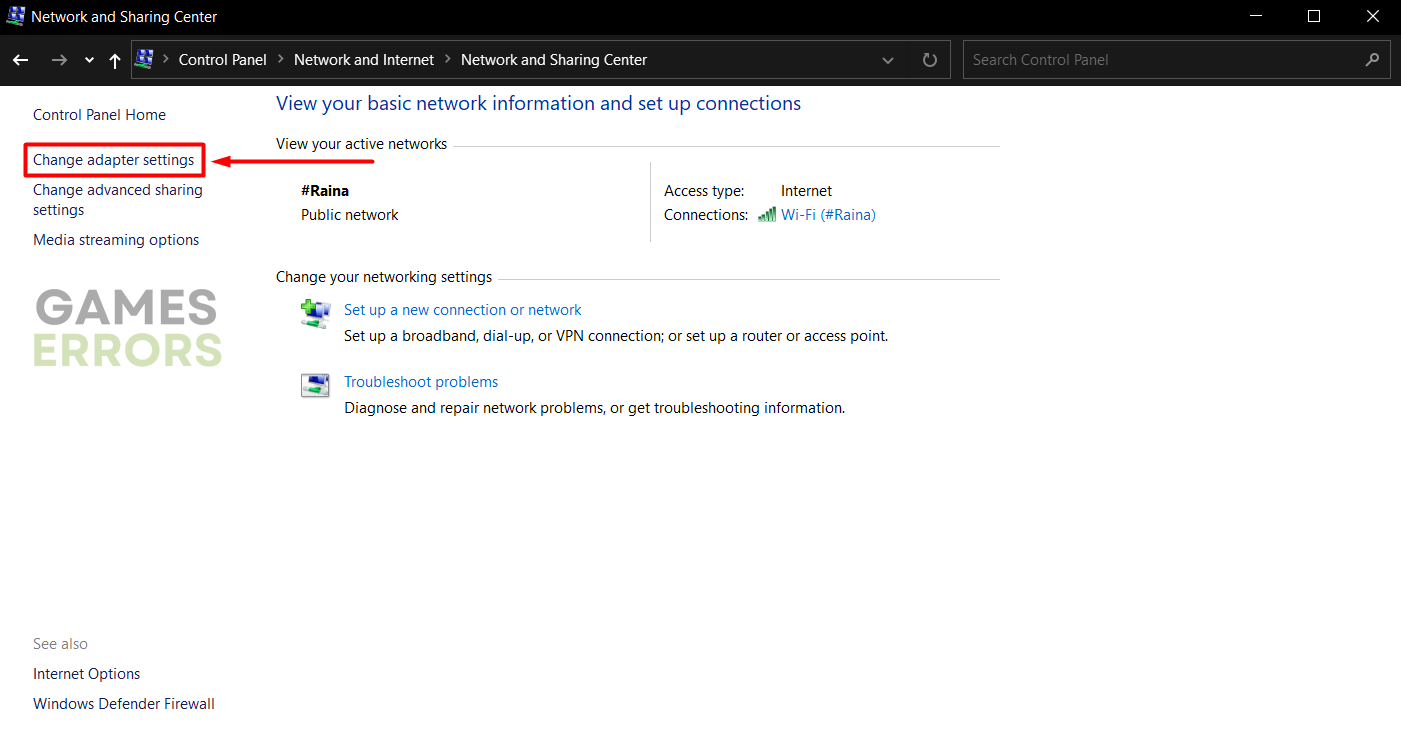
- Click on the Change adapter settings.

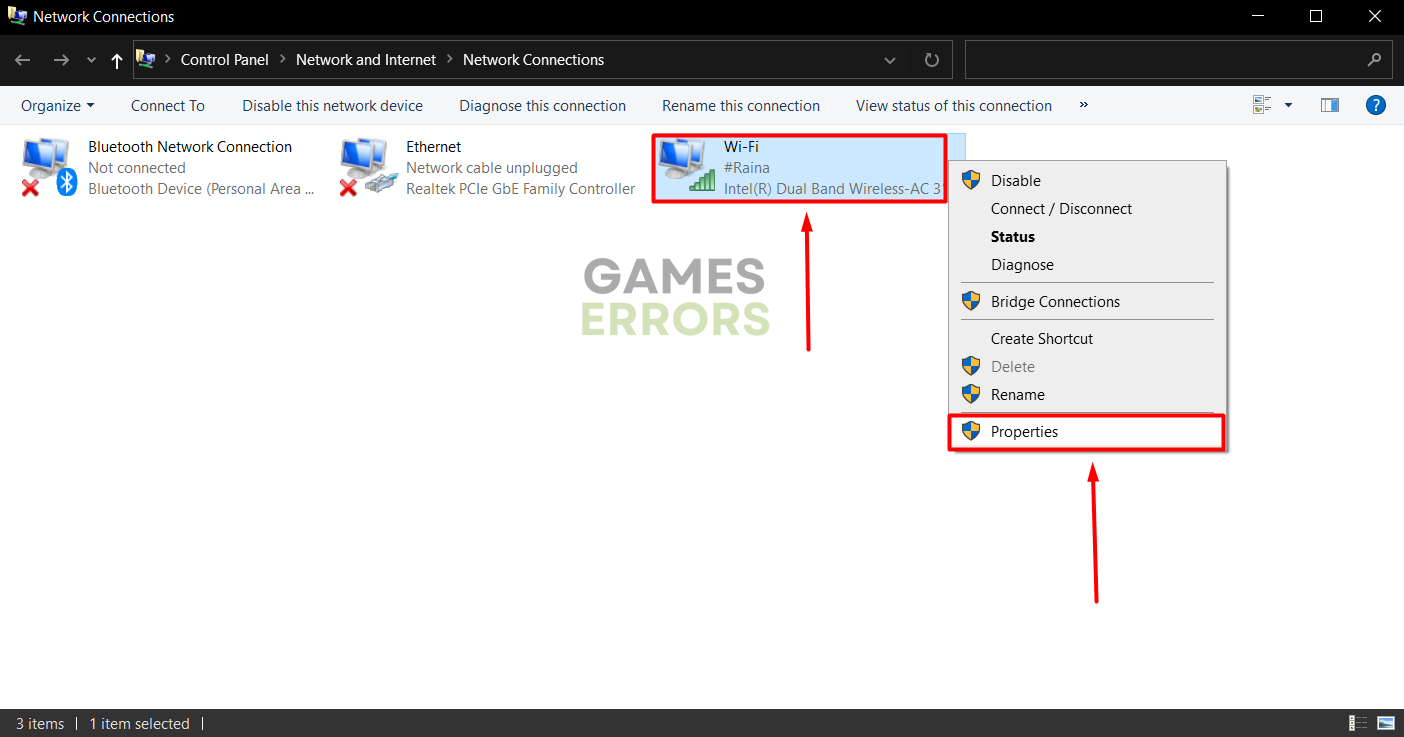
- Right-click your internet network and select Properties.
➡ Green signal icon is for wireless connection.
➡ Cable icon is for a wired connection.
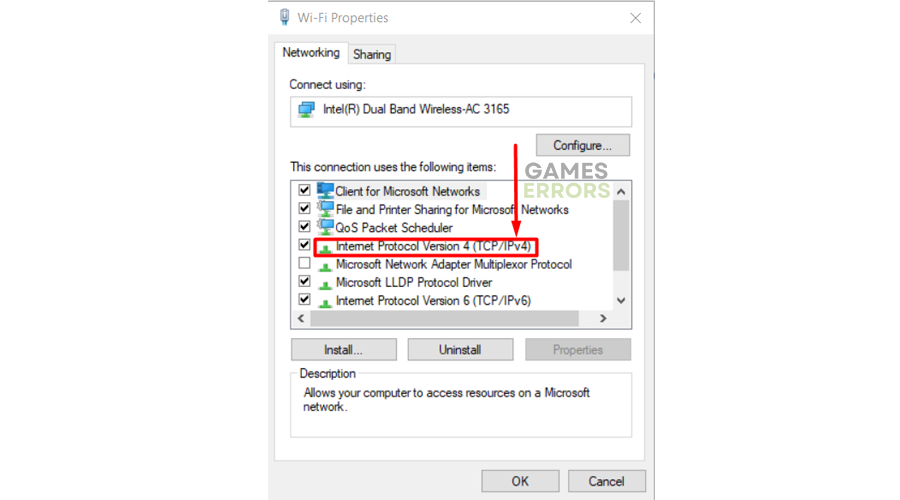
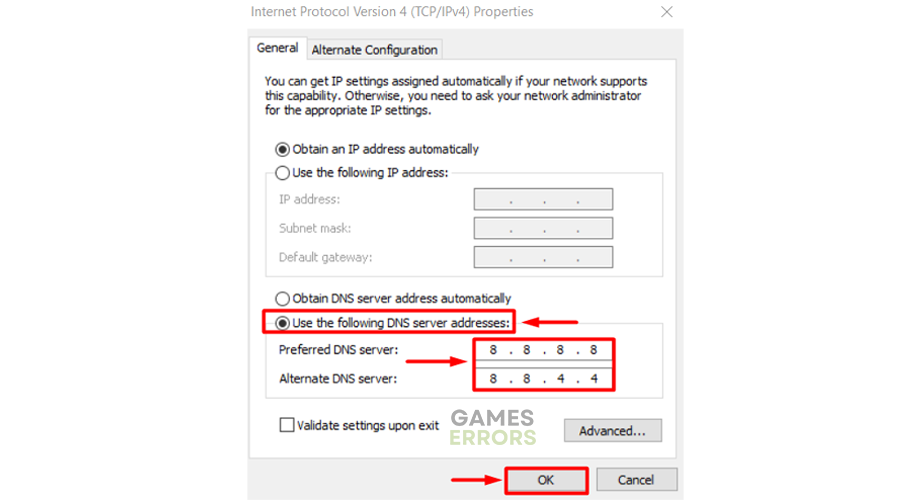
- Double-click Internet Protocol Version 4(TCP/IPv4).
- Select Use the following DNS server addresses, then type 8.8.8.8 for the Preferred DNS server and 8.8.4.4 for the Alternate DNS server.
These are Google Public DNS IP addresses.
- Press the OK button.
- Restart your PC and try to play on the Minecraft server or realm to check if the error persists.
4. Flush the DNS
Regardless if you applied any of the previous solutions, consider flushing your DNS settings. This will ensure your device can properly communicate with the internet through your home network and it will reduce the chances of getting a Minecraft connection reset.
- Click on the Windows icon, type Command Prompt, and click on it to open it.
- Type the commands below, one by one, and hit Enter after each command.
ipconfig /flushdns
ipconfig /registerdns
ipconfig /release
ipconfig /renew
netsh winsock reset
- After the last command is executed successfully, restart your PC.

Extra steps to fix the Minecraft internal exception: java.net.socketexception: connection reset:
If nothing up until now was helpful, and you are still wondering how to fix internal exception java.net.socketexception connection reset, try the fixes below:
- Uninstall or Update Hamachi: Sometimes the Minecraft java.net.socketexception Connection Reset can occur due to an outdated Hamachi. If you are using the application with your friends and their MC doesn’t have this problem, you might need to get the latest Hamachi version.
- Update Java on your PC: First, uninstall Java, and then proceed to update it. For some reason, simply updating it over the old version never worked for me. Also, a clean install could be better.
- Some players claim that lowering the render distance to 12 or less fixed their internal exception java.net.socketexception connection reset in Minecraft.
- Create and use a new profile in the Minecraft launcher: A freshly created profile could be a great option to improve your Minecraft performance overall while also getting rid of the Minecraft connection reset problems.
- Verify the integrity of game files.
- Close unnecessary background applications.
- Use the best VPN for Minecraft.
Related articles:
- Minecraft Error 442: Here’s The Simplest Fix
- Minecraft Error Code Drowned: How To Fix It Easily
- File System Error (-2143322101): Causes And Easy Solutions
- Minecraft Won’t Update: How To Force It To Update Properly
- Minecraft Exit Code -805306369: What Is & How To Fix It
Conclusion
If, after everything, problems persist, we advise you to get in touch with your ISP and check if your network is working properly. Remember to keep your network drivers and other drivers updated as well as Hamachi for as long as you are using it, and to flush the DNS cache once in a while even after you dealt with this error. Let us know how troubleshooting the Internal Exception java.net.SocketException Connection Reset went and what solved the problem for you.

Improve this guide
User forum
2 messages